

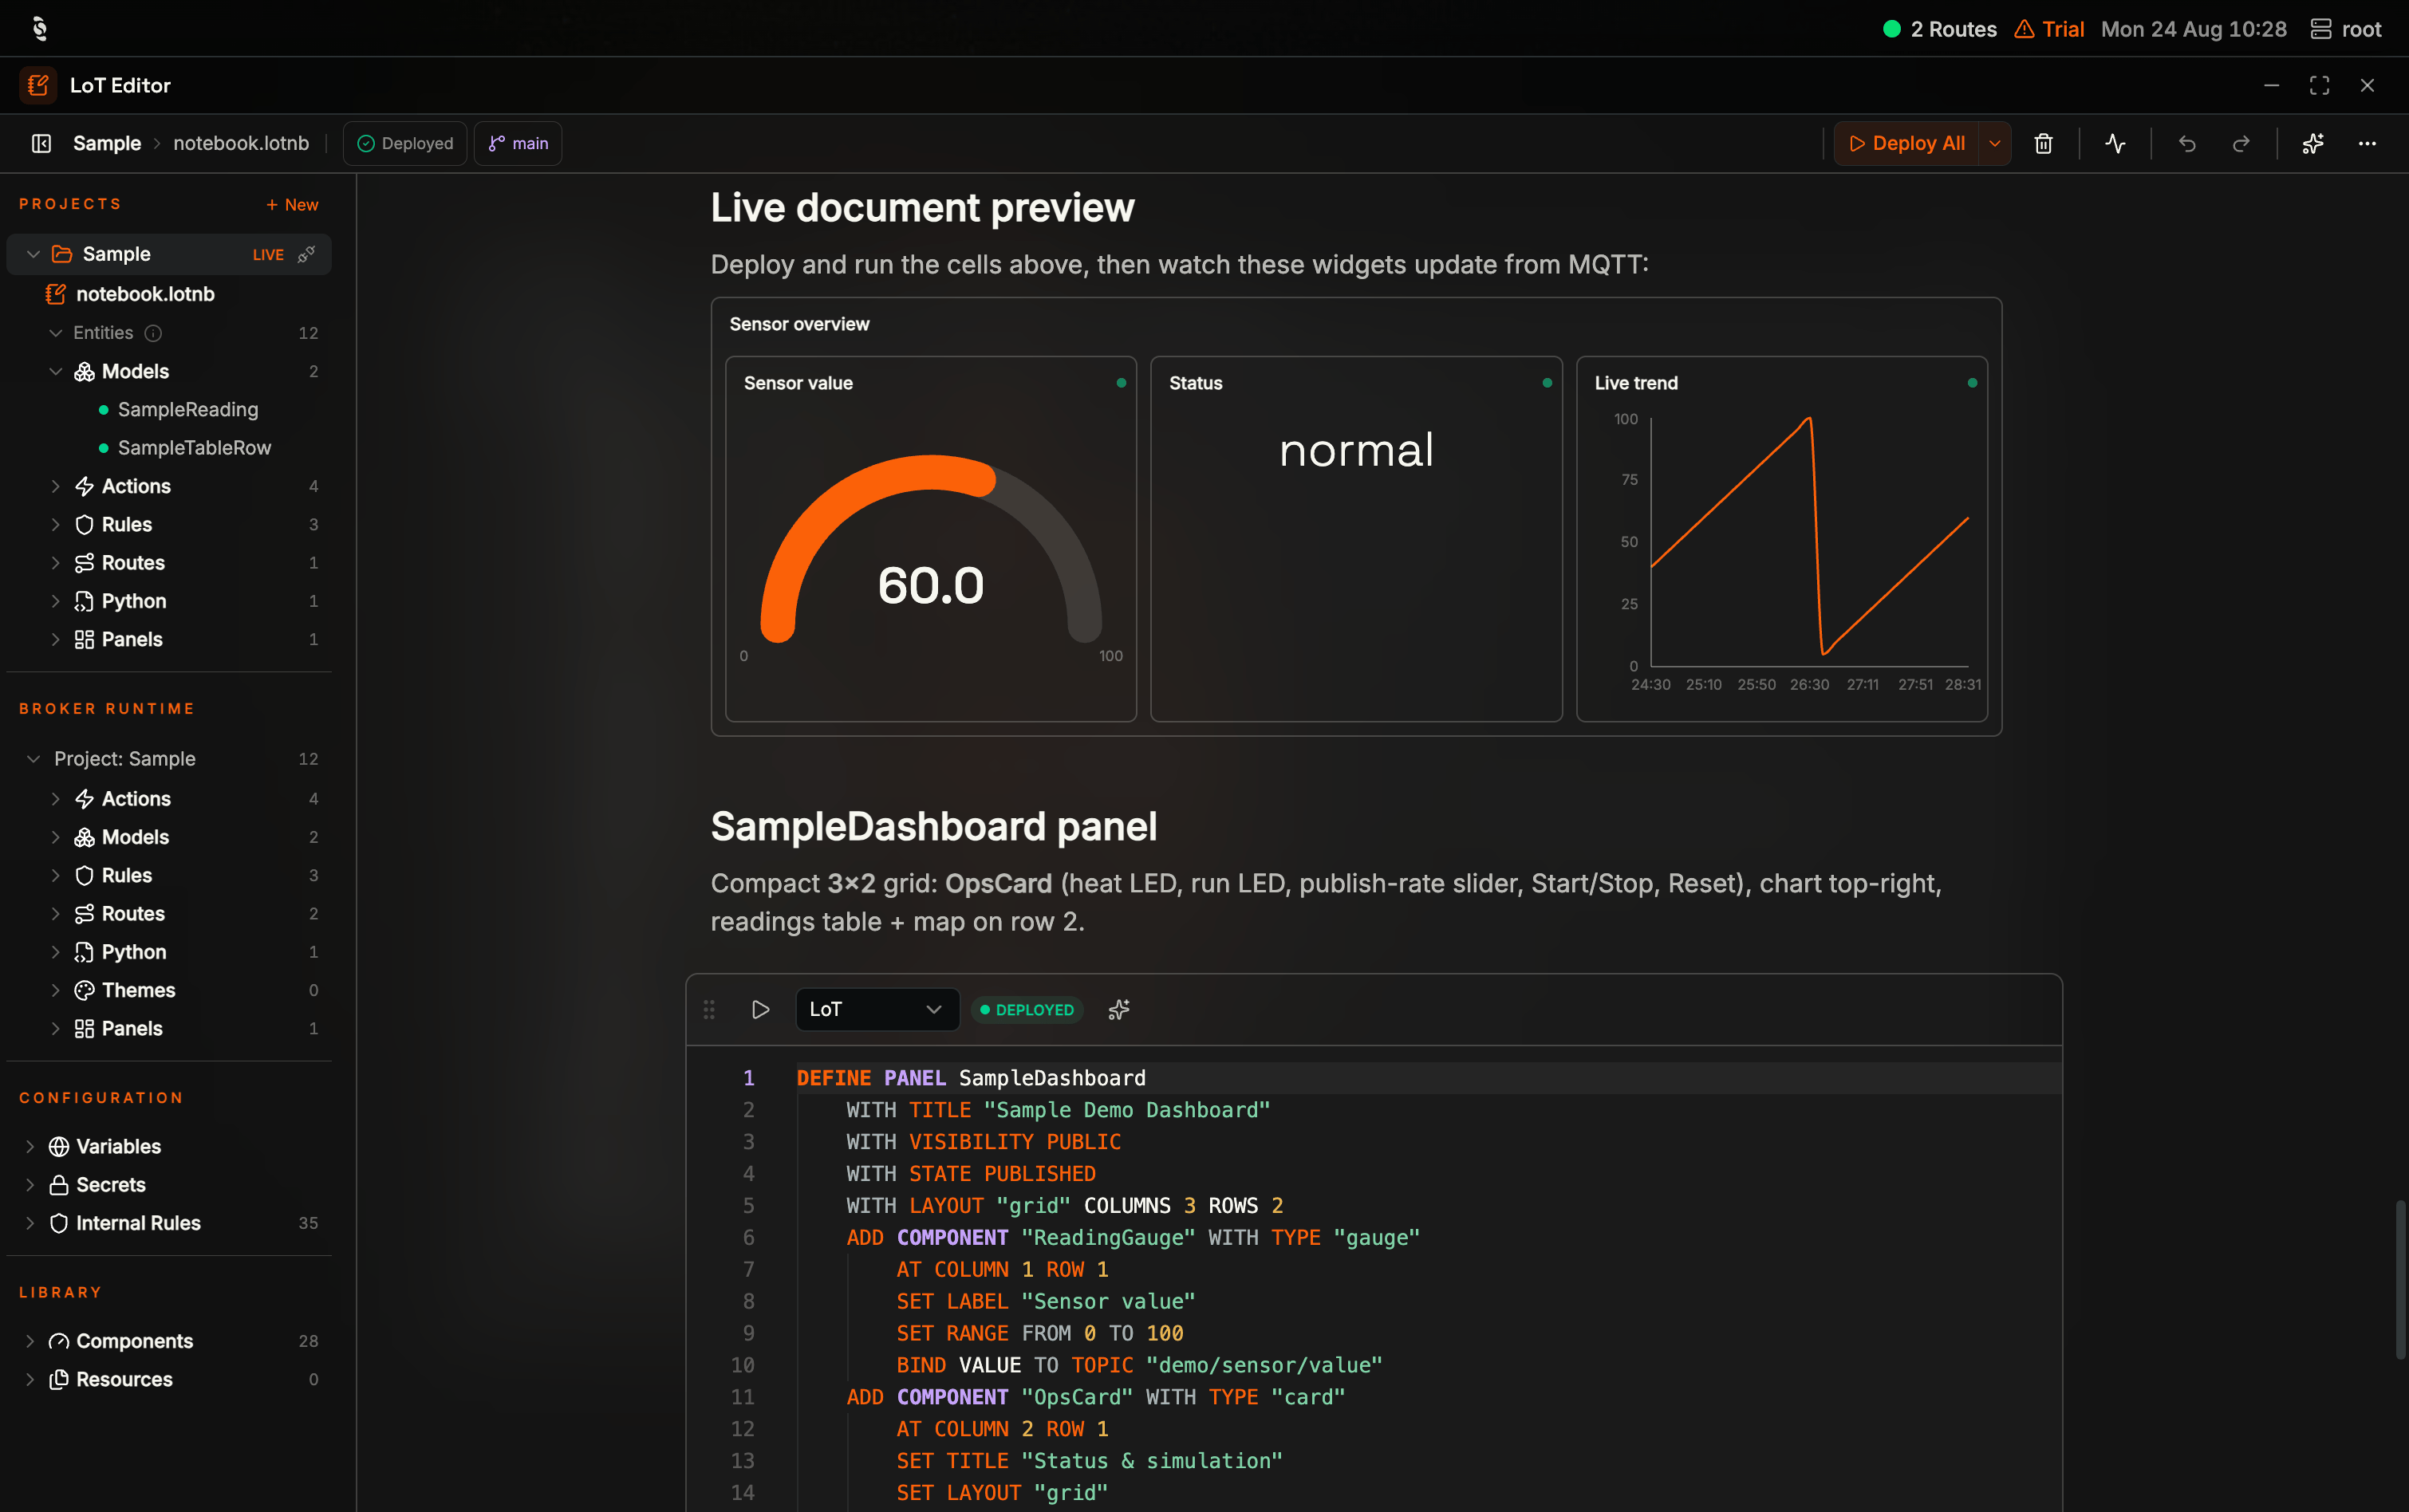
The LoT Editor with the Sample notebook open: a live document preview (sensor gauge, status, trend) sits above the SampleDashboard panel cell, Projects lists Sample badged LIVE, Broker runtime shows Project: Sample, and the header shows Deployed plus Deploy All
Why Use the LoT Editor?
The LoT Editor brings the LoT Notebooks experience from VS Code into the Coreflux HUB. You author LoT and Python in notebook cells, deploy any cell on its own, and see per-cell whether your copy matches what the broker is running — with the broker’s live entity list right beside your code, without leaving the browser. This makes the HUB a single place to develop, manage, and operate your Coreflux solutions.Import .lotnb, Push to broker, and Pull from broker are what keep the two workflows one.When to Use It
- Deploying LoT without another tool installed — Any HUB install, Docker or desktop app, can author and deploy
- Checking what is really on the broker — Broker runtime is the authoritative list, next to your code
- Iterating on one definition — Run a single cell instead of redeploying a whole project
- Auditing drift — Per-cell badges and a broker diff show exactly which definitions have moved out of sync
- Documenting a solution where it lives — Markdown cells render inline, so the topic conventions and device maps sit beside the code that implements them
- Putting live visuals next to the LoT that drives them — Drag Library components into a markdown cell and watch topics such as
demo/sensor/valueupdate in the notebook - Picking up someone else’s project — Open it from the broker and read the notebook top to bottom
- Publishing or recovering a project — Push a local draft, Pull or Inspect one already on the broker, or restore an earlier commit
- Removing without surprises — A local delete, an entity remove, and a project remove from the broker are three different operations
Opening the Editor
Select LoT Editor in the HUB dock — the notebook-and-pen icon, after Data Viewer and Connections. An orange dot under the icon marks the editor as the active app.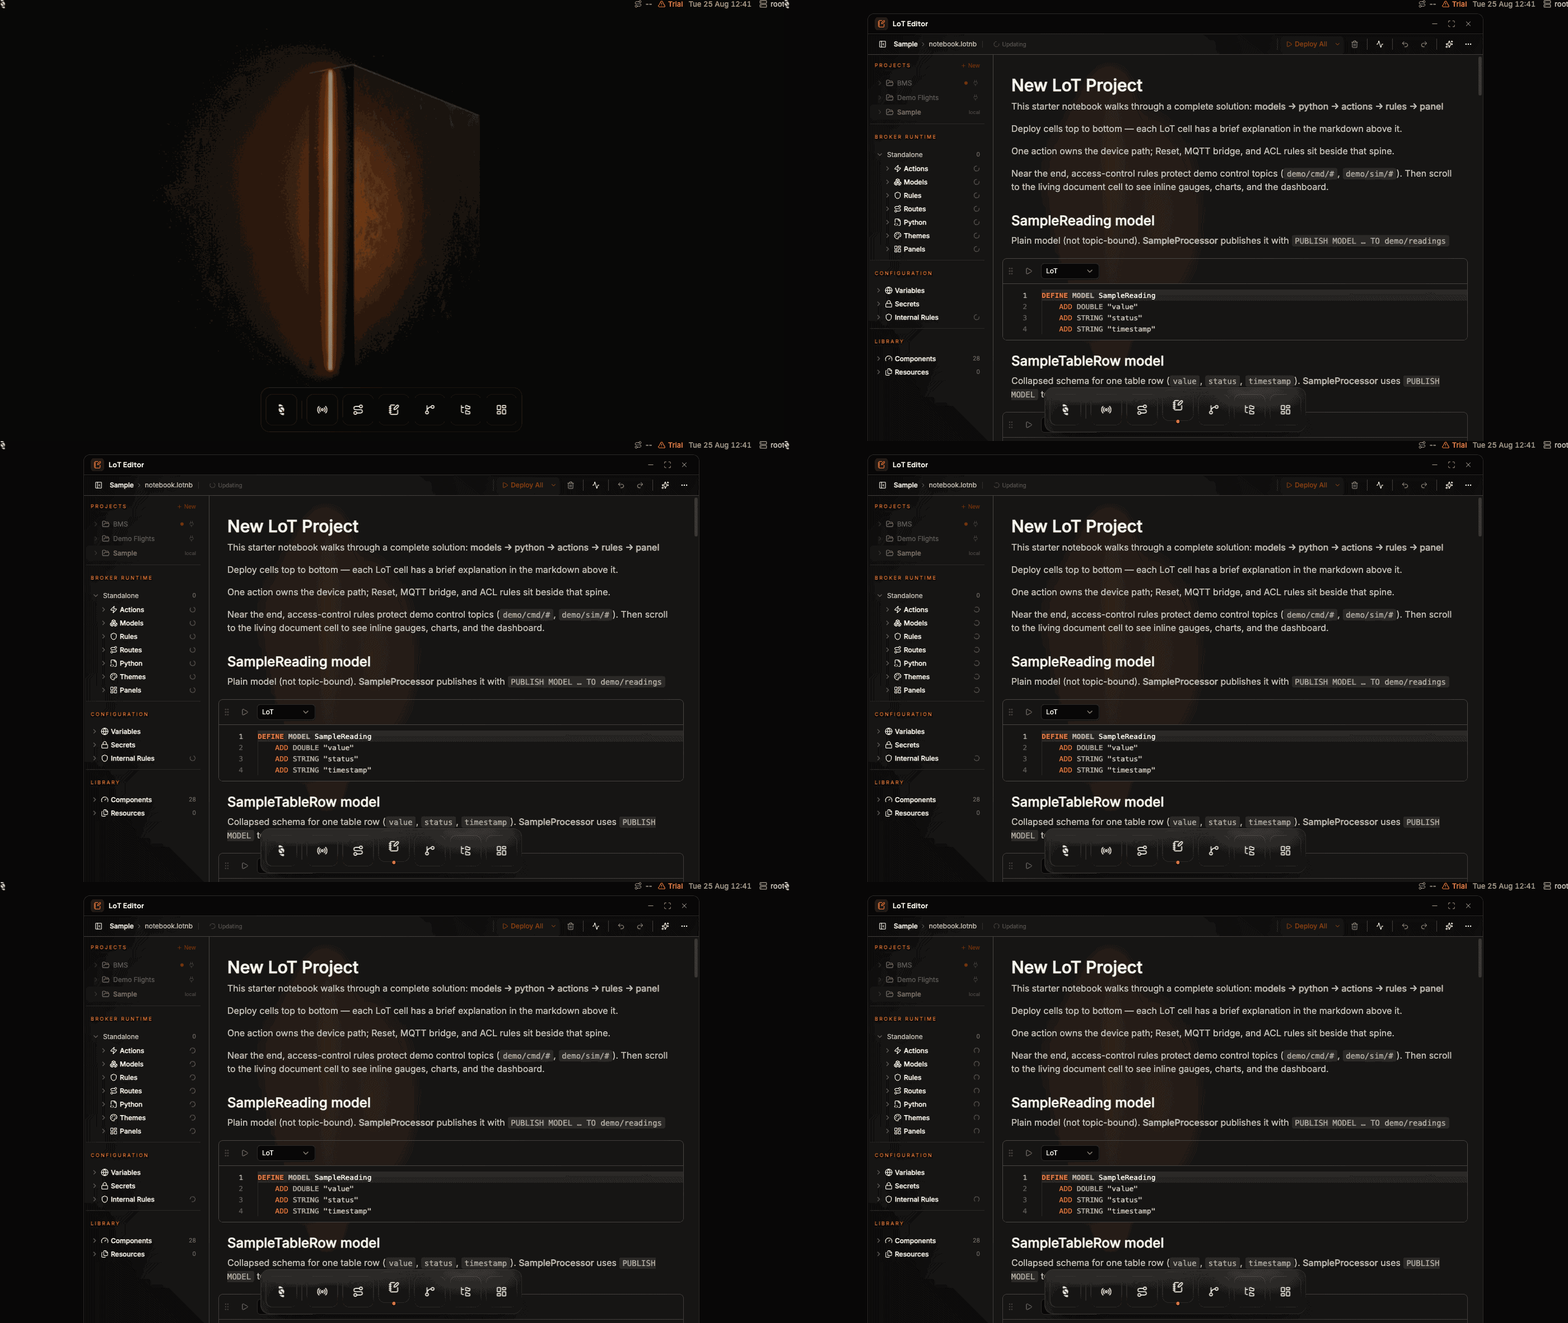
Opening LoT Editor from the HUB dock: the notebook-and-pen icon is fourth from the left, and the Sample notebook opens above the dock
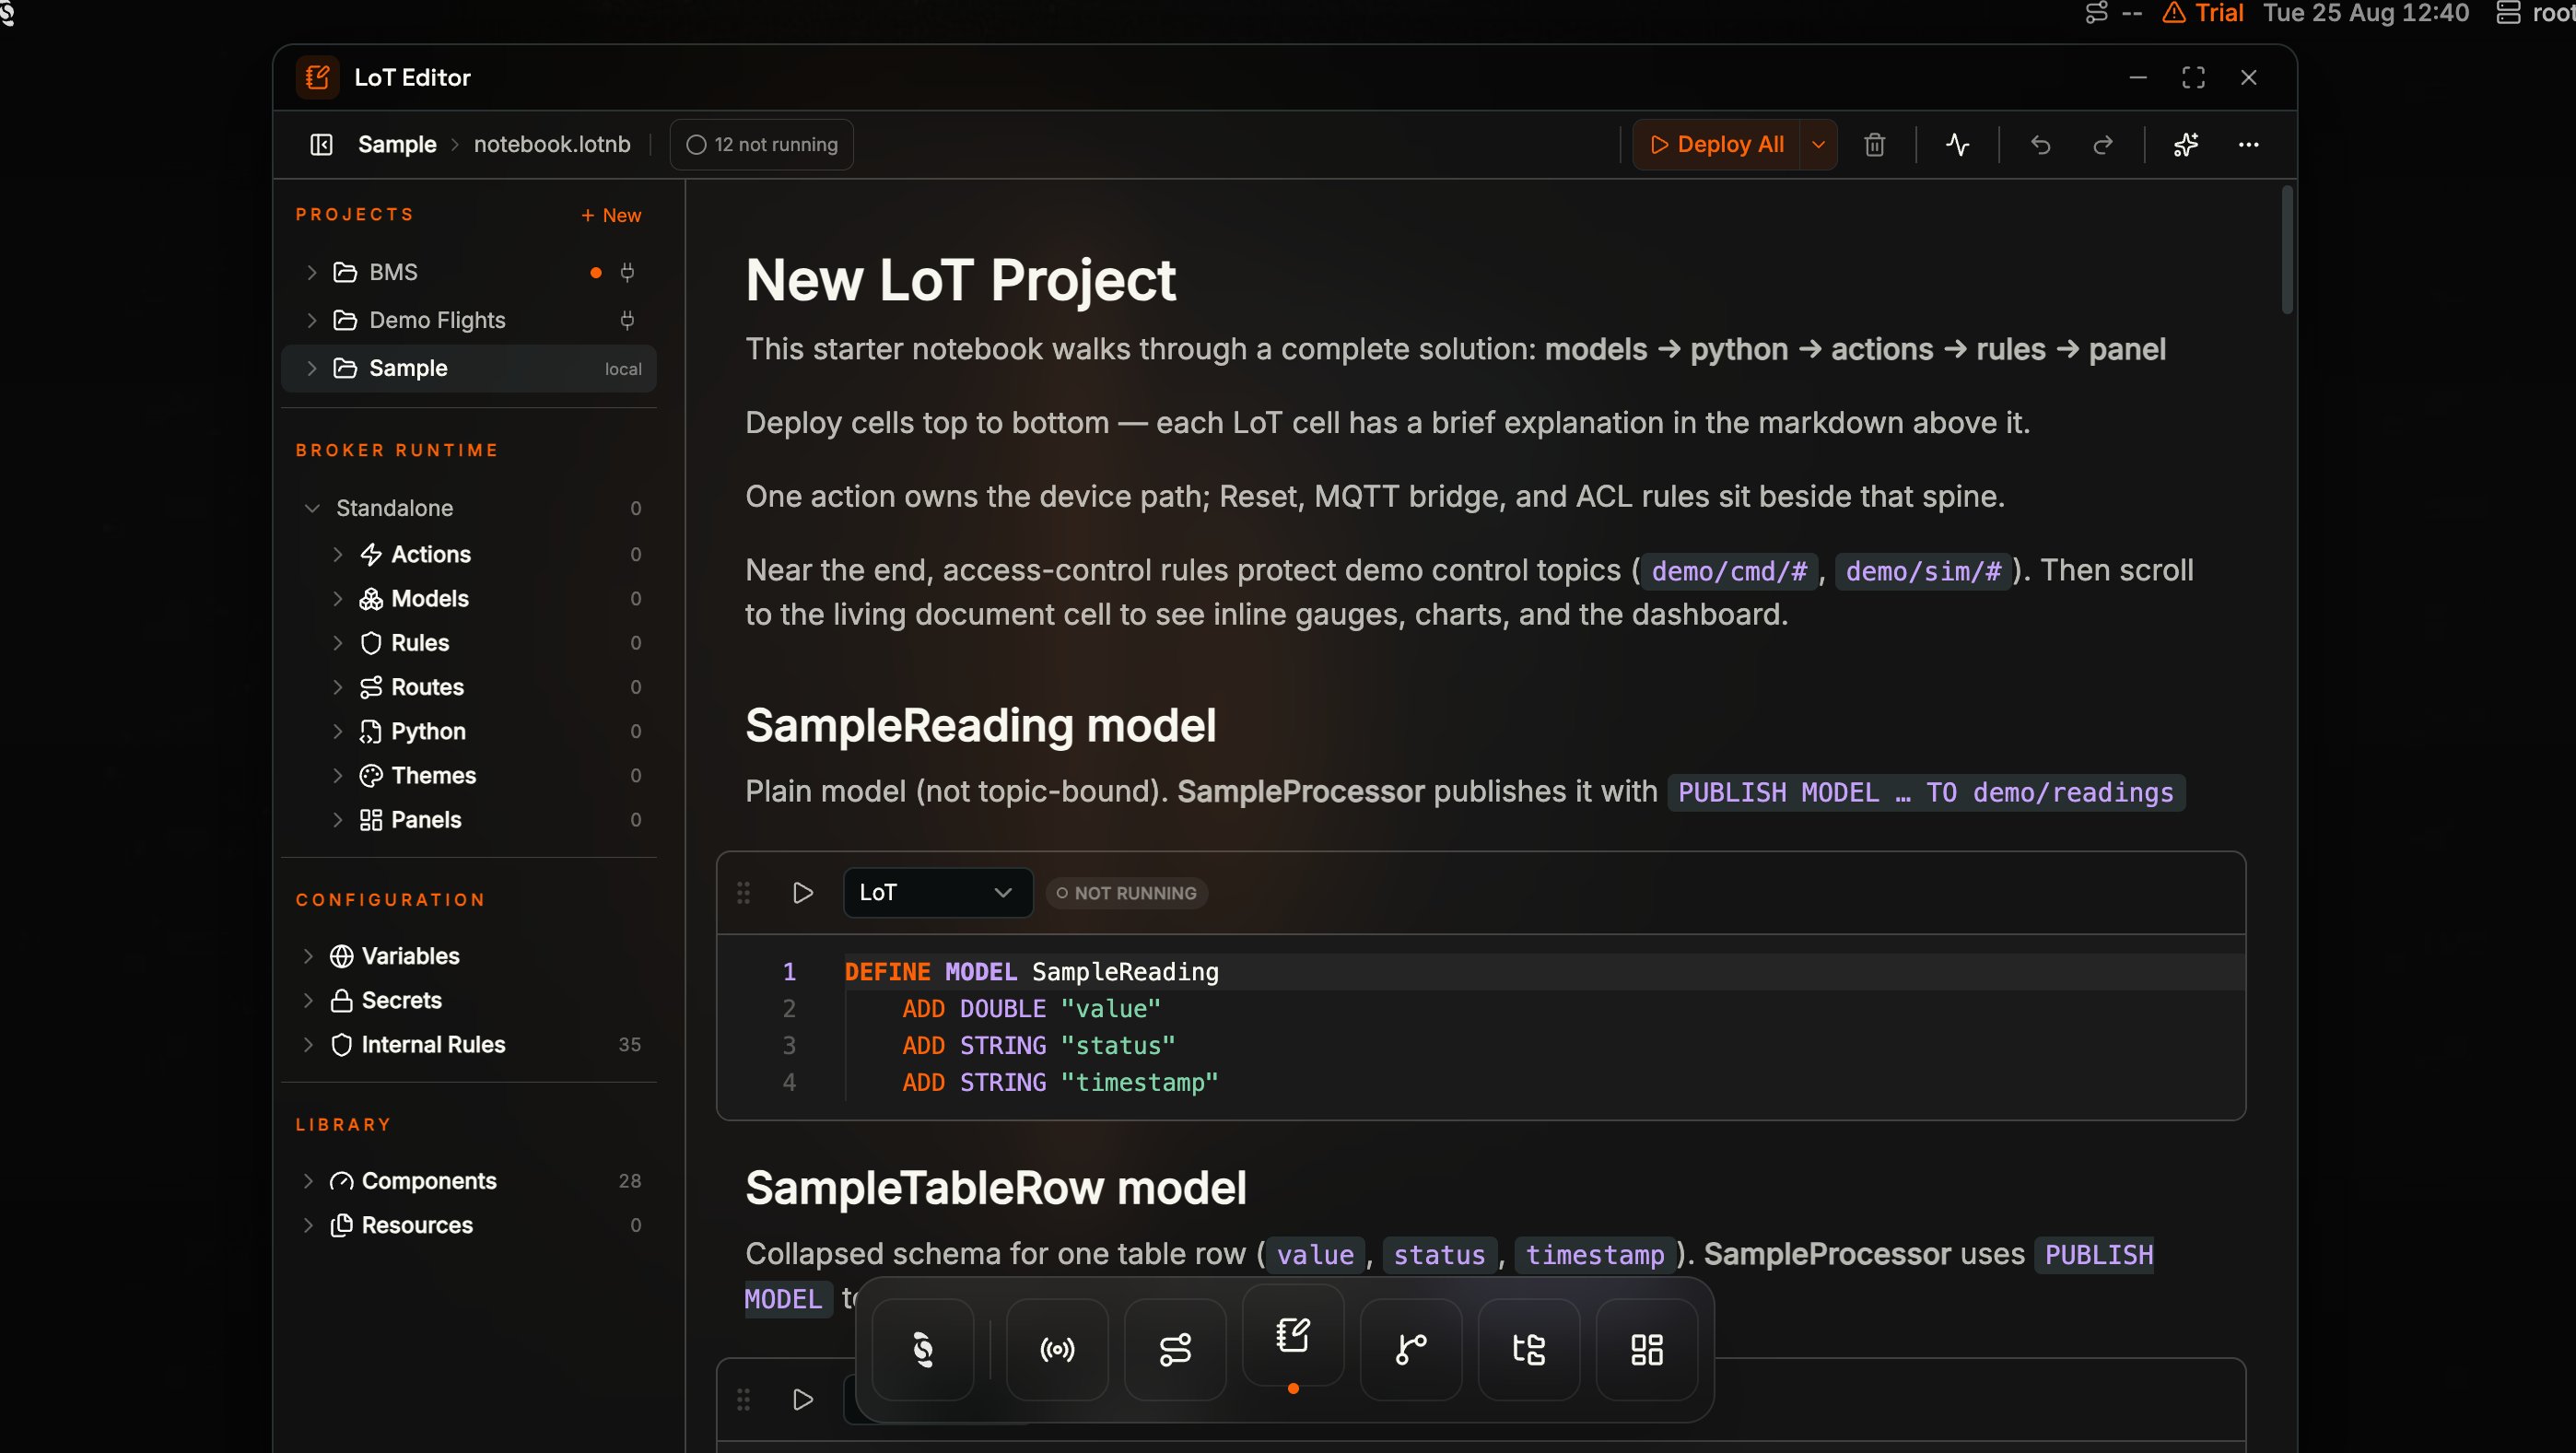
LoT Editor open on Sample with the dock still visible: breadcrumb Sample › notebook.lotnb, 12 not running, Deploy All, and the notebook-and-pen dock icon lit with an orange dot
A Notebook Is Both Document and Deployment
A notebook is an ordered list of cells, and the cell type dropdown decides what each one is:demo/sensor/value sit in the notebook itself, so you deploy the cells above and watch the gauge, status, and trend update without leaving the editor.
+ Code and + Markdown buttons that appear in the gutter between cells — so a new cell always lands exactly where you point at it.
Working With Cells
Every cell has its own toolbar, left to right. Hover the cell to reveal the right-hand controls — Move up / Move down, Duplicate, and Delete stay hidden until then.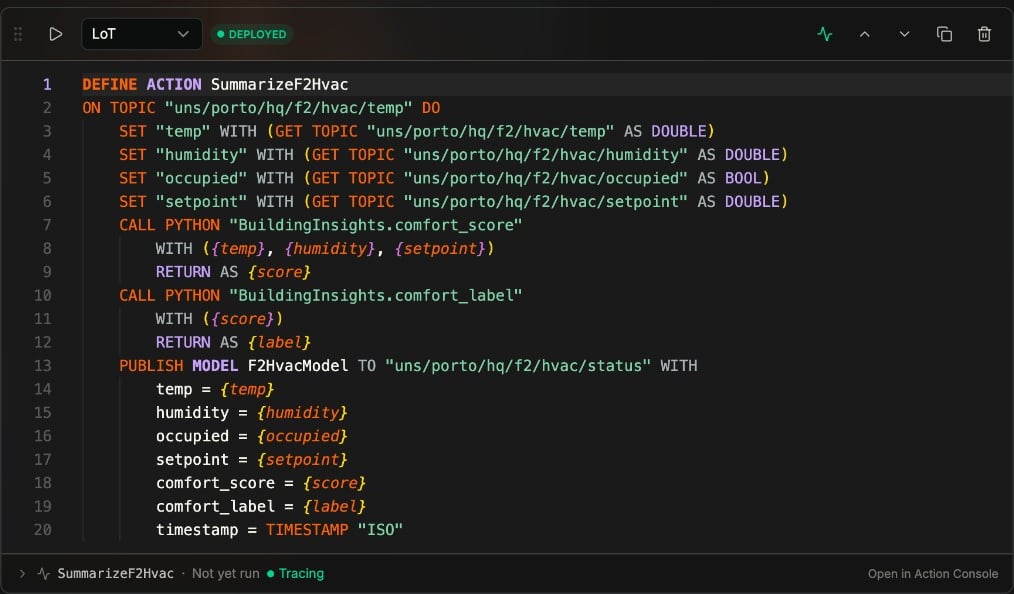
SummarizeF2Hvac hovered, deployed, and tracing: drag handle, Run cell, LoT, DEPLOYED, then Run or trace, Move up, Move down, Duplicate, and Delete, with Tracing on the strip below
SummarizeF2Hvac · Not yet run · Tracing — expand it for Traces and Run, or choose Open in Action Console to pin the same panel in the right-hand rail. Tracing (green) means a five-minute capture is already armed for that Action.
Deleting a cell asks “Delete this cell?” and warns that the cell and its contents are removed from the notebook and that it cannot be undone. It changes the notebook only — the entity that cell deployed stays on the broker until you remove it there. See Removal.
Action Console: Traces and Run Once
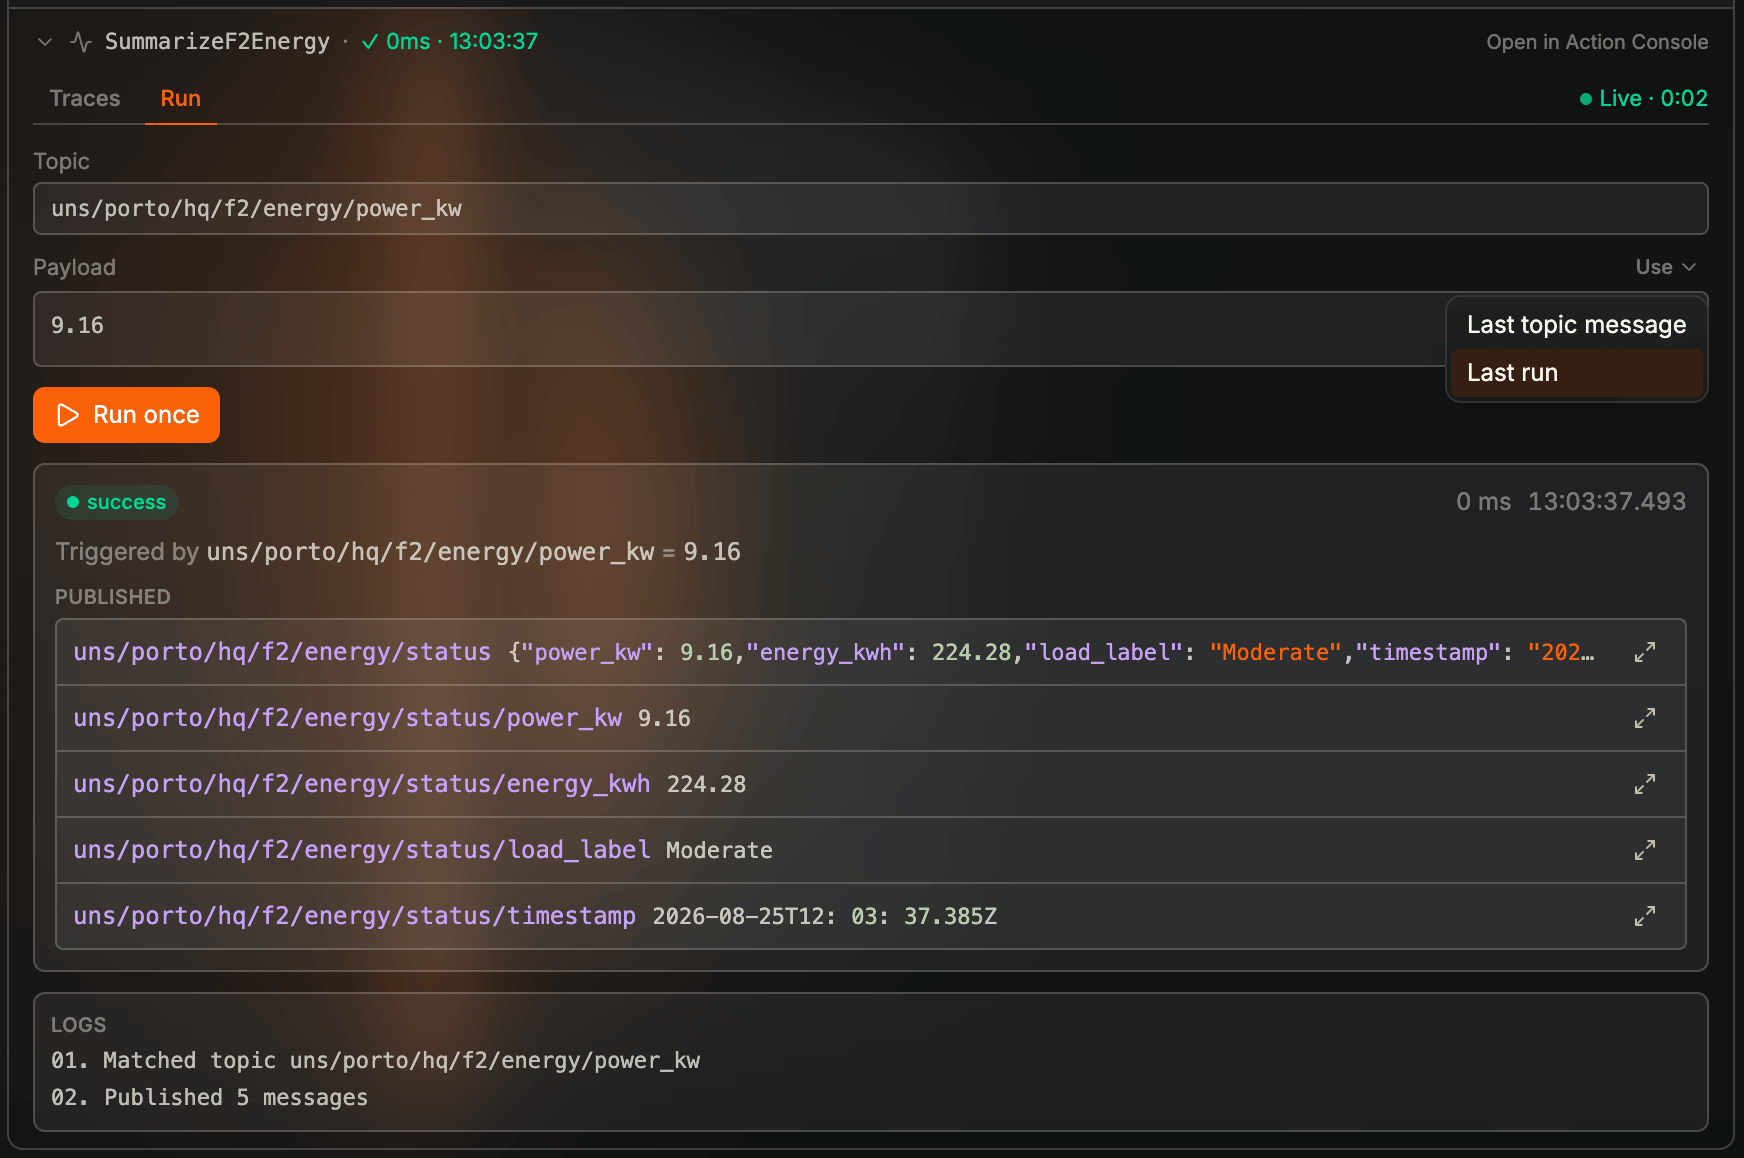
Run cell deploys the definition. The console underneath — or pinned from the header pulse — is where you watch and trigger execution: Traces records every run for five minutes, and Run once fires the Action with a topic and payload you choose. Every Action cell has the same console in two places — expanded under the cell, or pinned in the header pulse rail. Both have Traces and Run.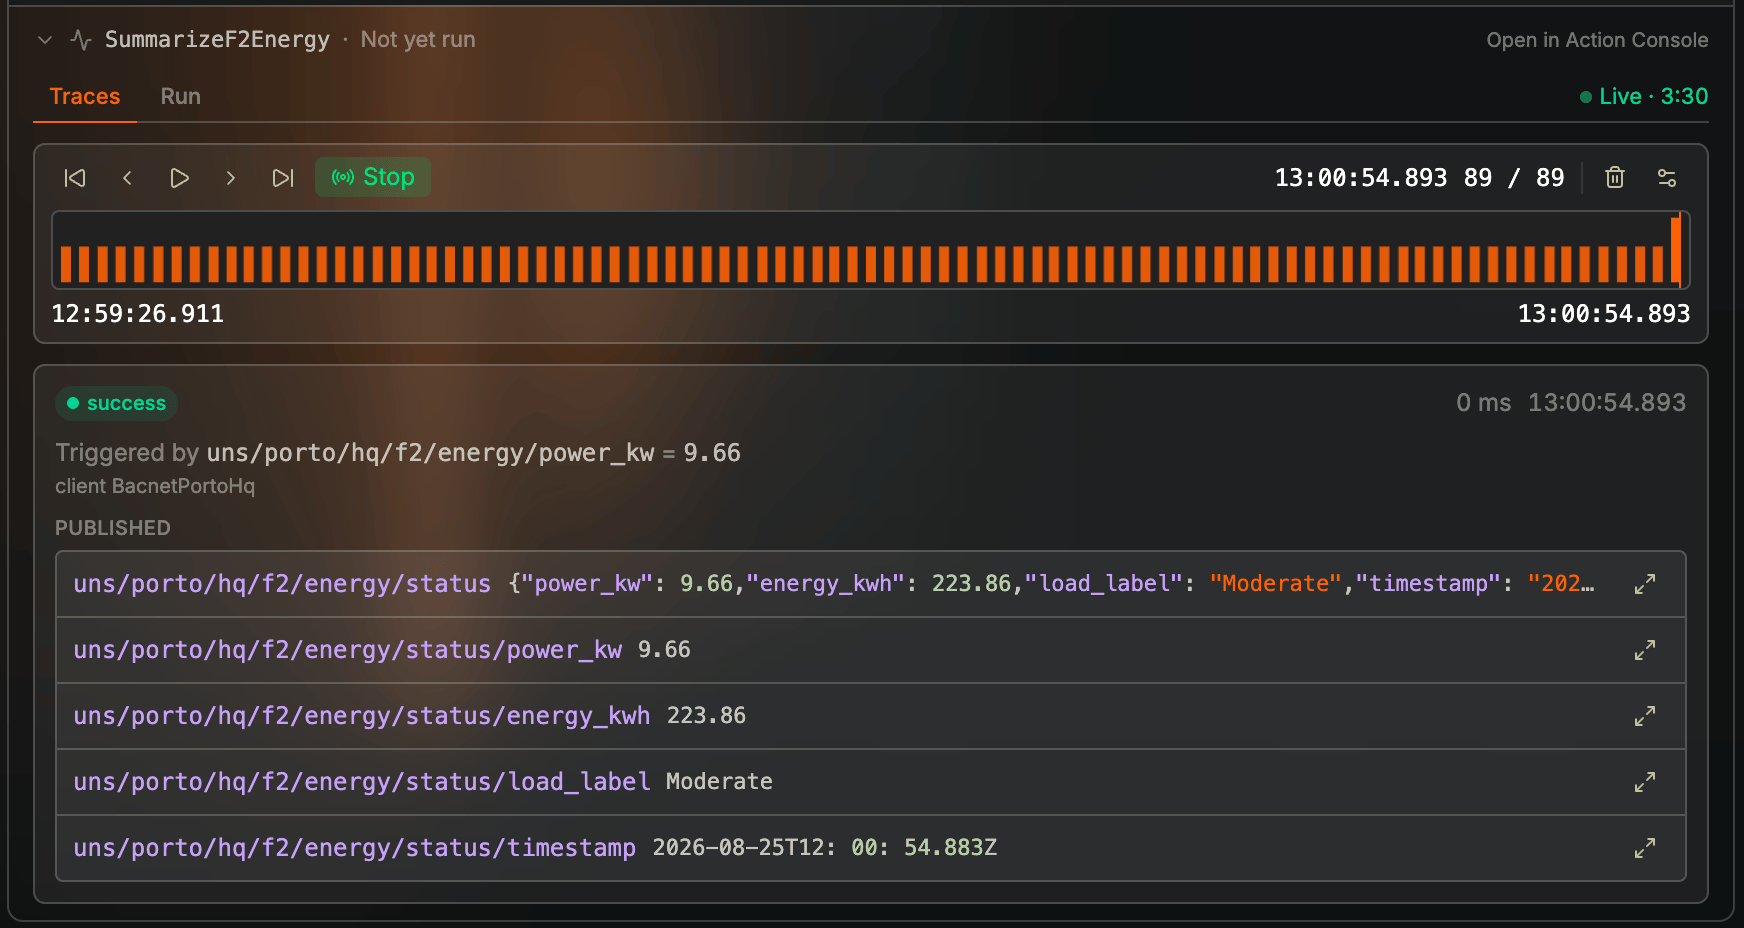
SampleProcessor Traces tab before a capture: timeline chrome and the note that traces last five minutes while a single run lives on the Run tab
SampleProcessor Run tab: topic demo/sensor/value, payload 60, Use menu, and the orange Run once control
Is This Cell Running on the Broker?
Each LoT and Python cell reports its own state against the broker, which is the fastest way to tell whether the code you are reading is the code that is running: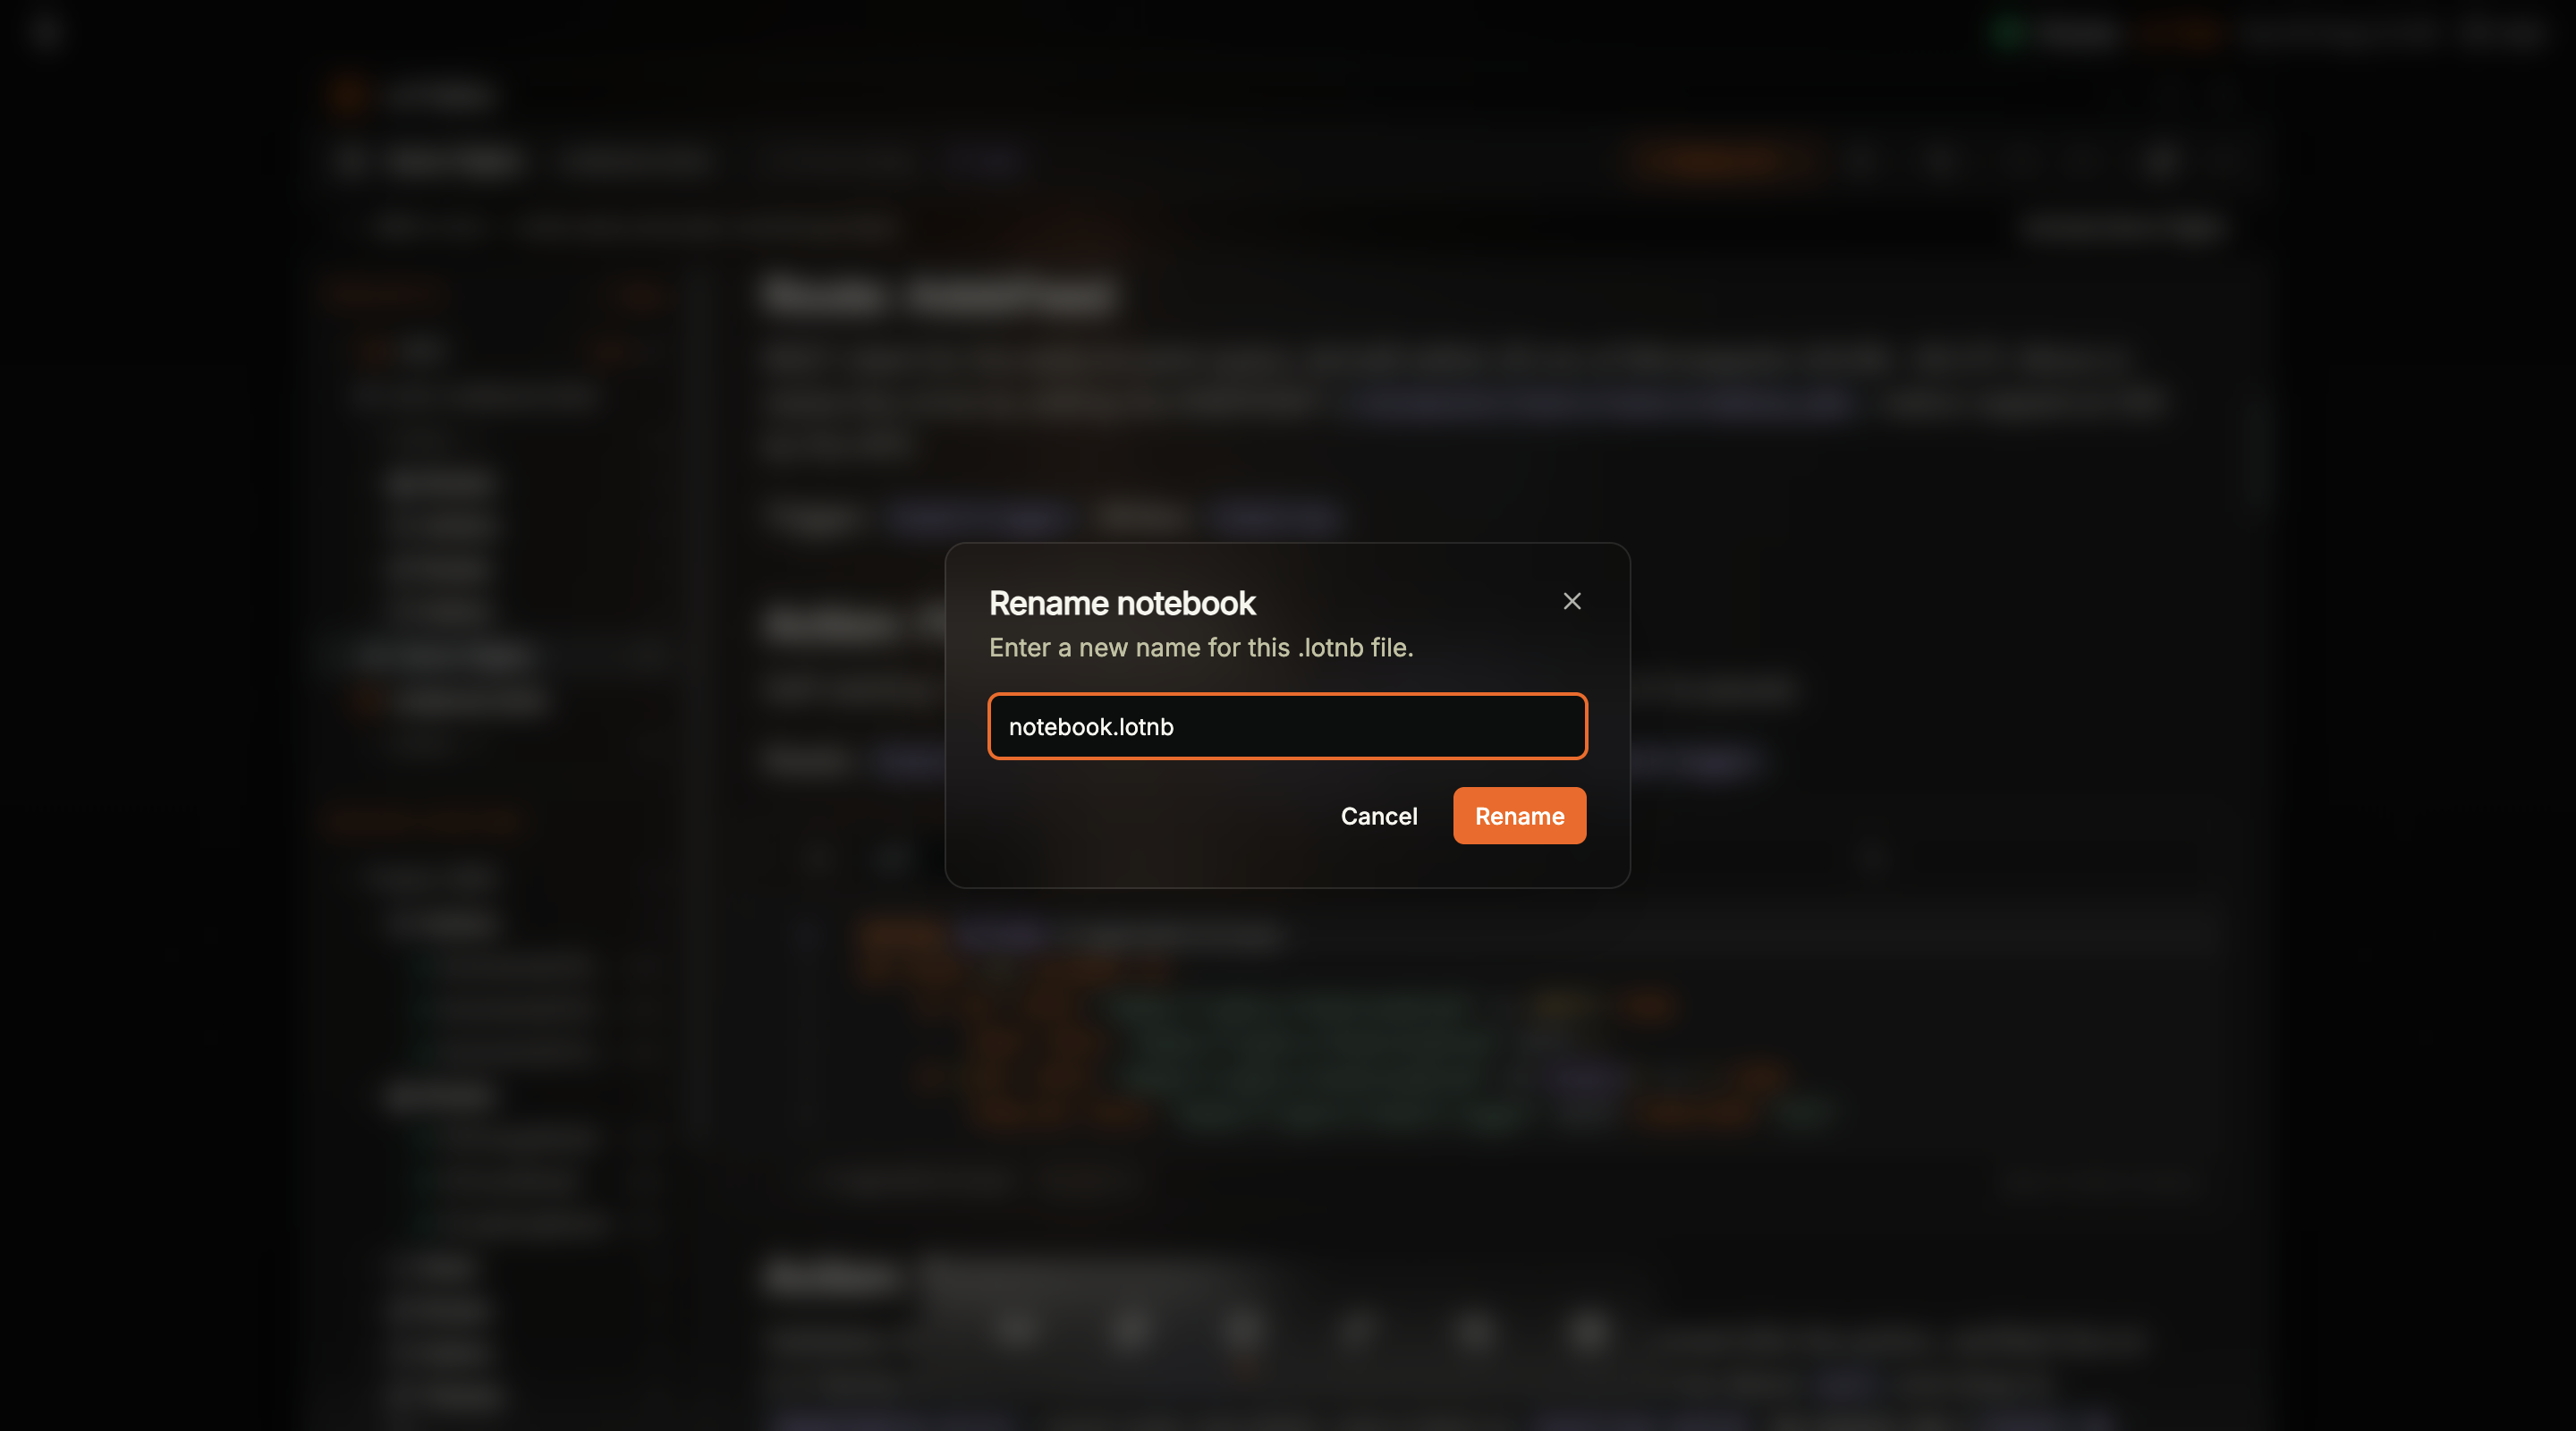
Cells that are not on the live project are badged NOT RUNNING — the header chip counts them, and Compare with broker is available on each toolbar
NOT RUNNING and DIFFERS are how the editor answers “why is my Action missing from LoT Flow?” — the graph is drawn from Broker runtime, so a cell that has never been deployed has nothing to draw.Comparing a cell with the broker
Whenever a cell is notDEPLOYED, a Compare with broker (Diff) control appears on its toolbar. It replaces the editor with a line-by-line comparison of the running definition against your local copy, headed BROKER · <entity> ⟷ LOCAL with an added/removed line count:
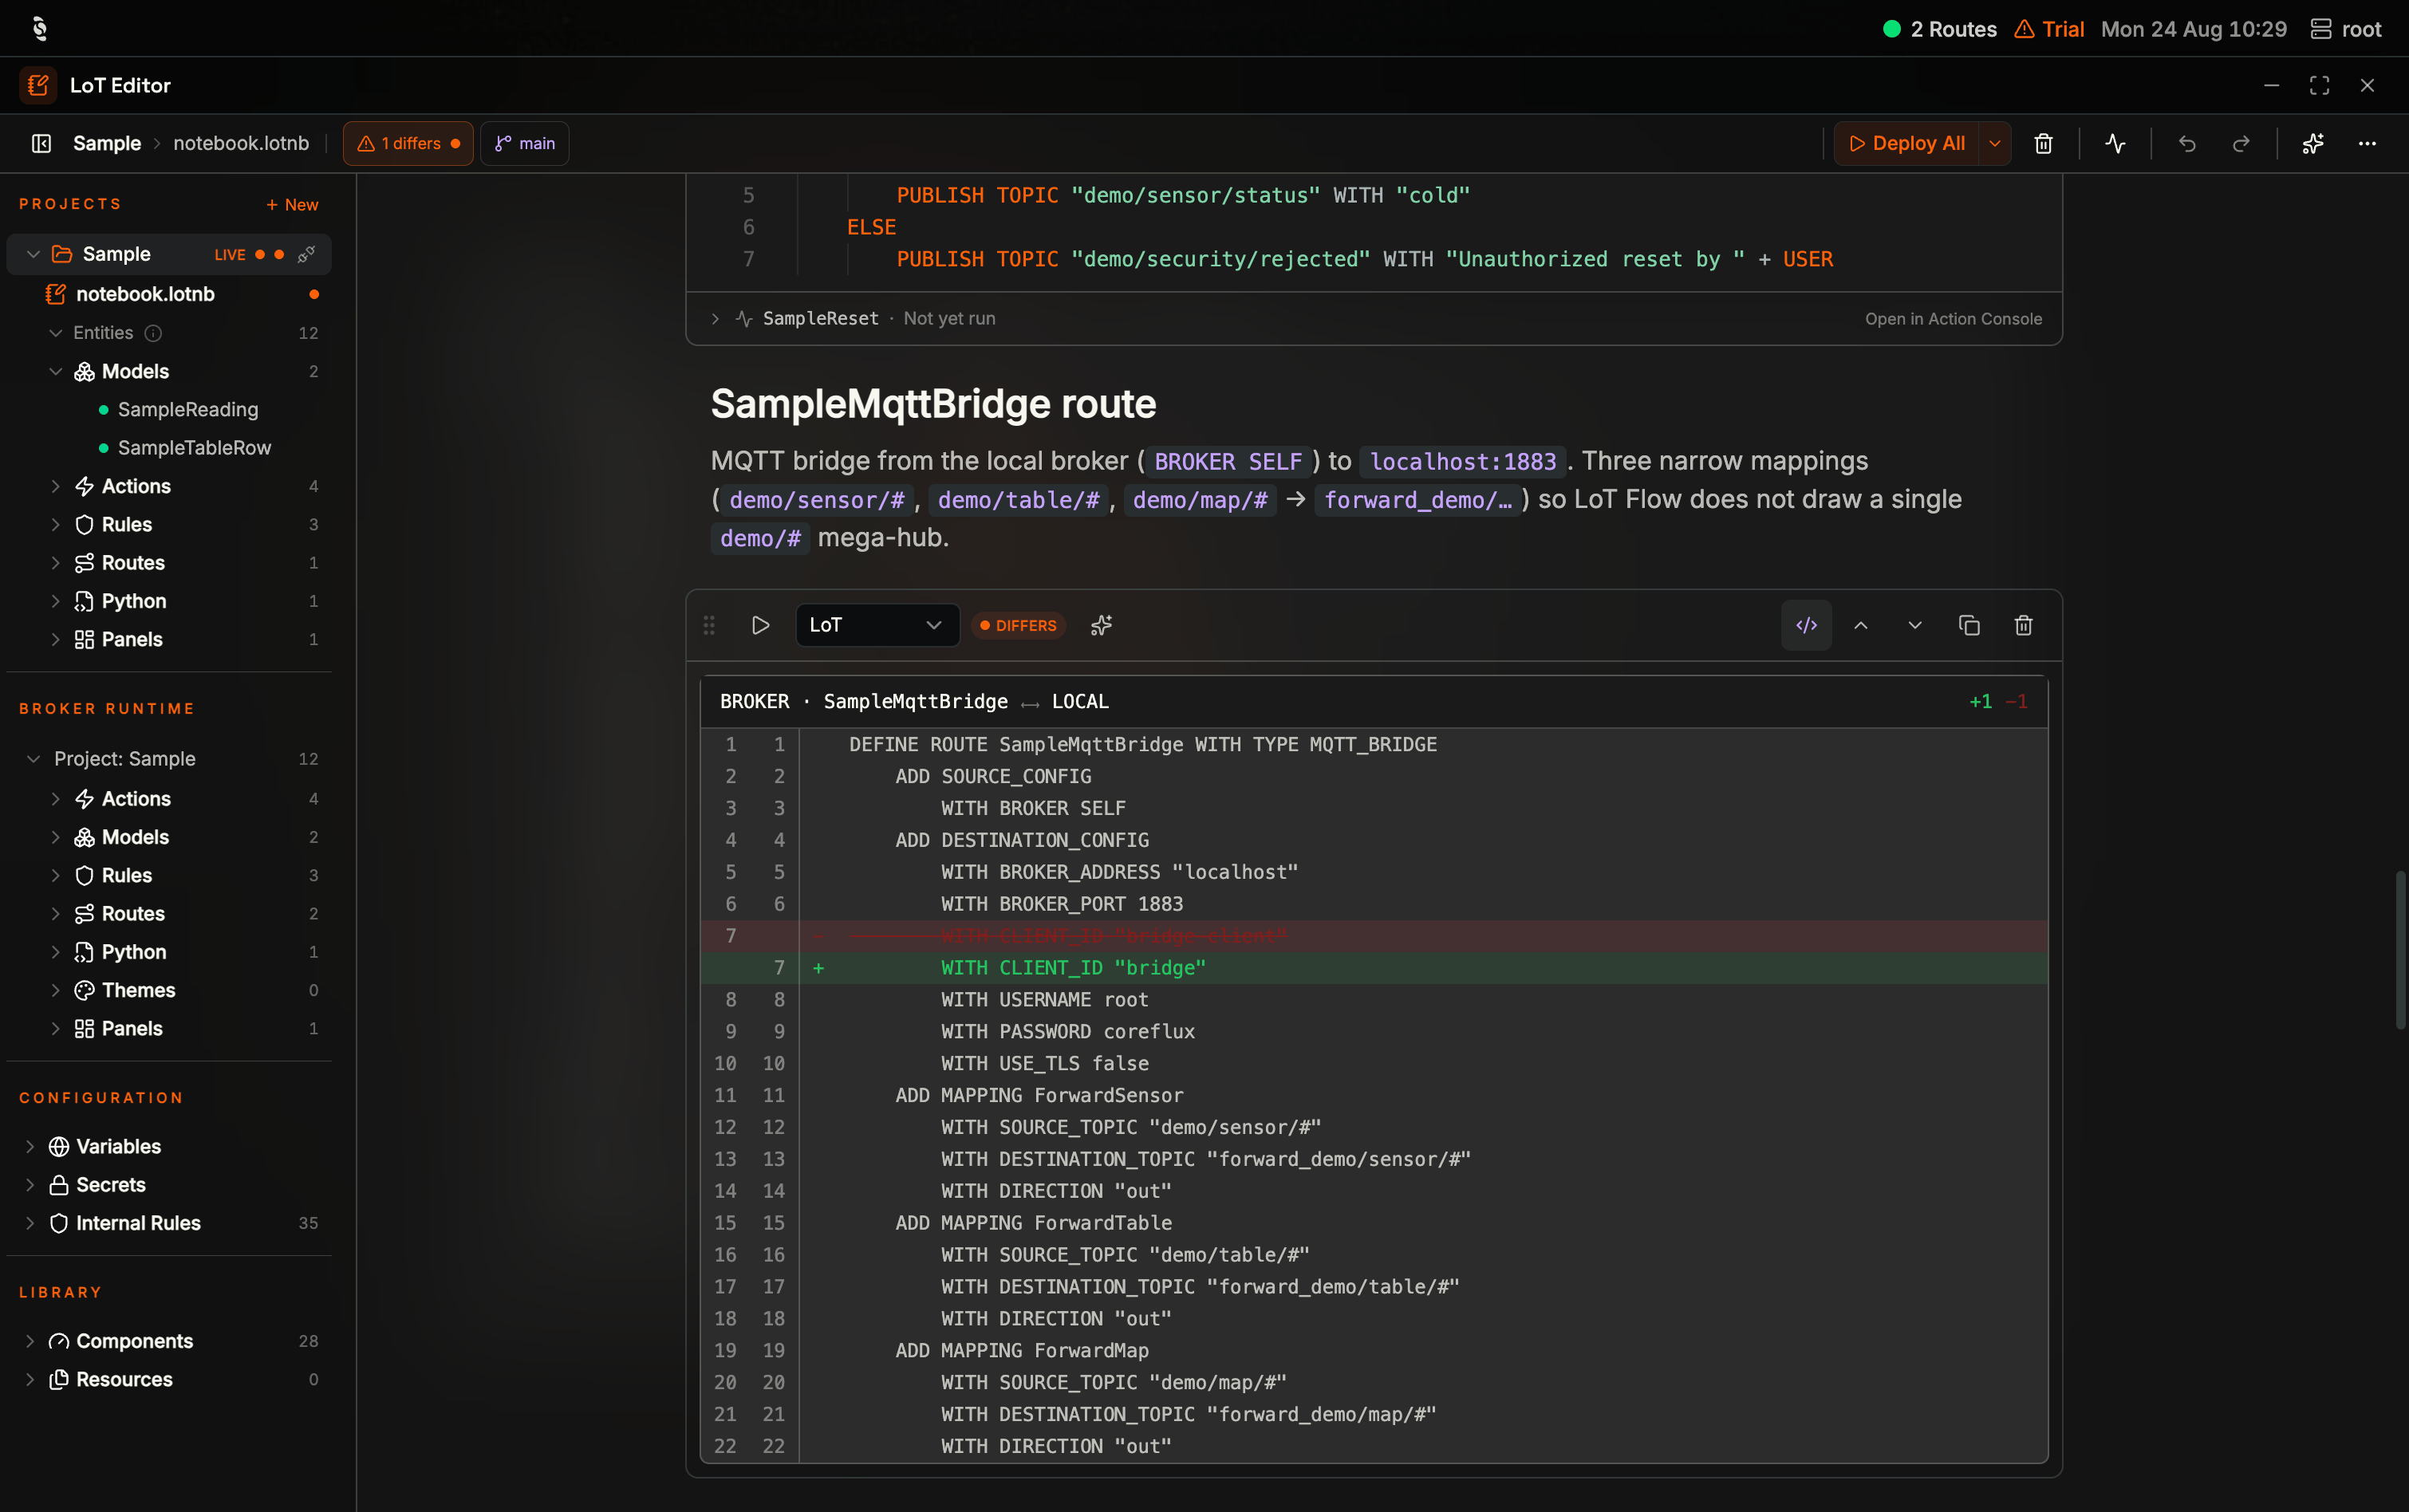
A cell in diff mode with the header 1 differs: BROKER · SampleMqttBridge ⟷ LOCAL, the removed CLIENT_ID bridge-client in red and the local CLIENT_ID bridge in green
NOT RUNNING cell the comparison is against nothing — every line shows as an addition, which is a quick way to review a whole definition before it goes live.
Deploying
Two granularities, and the difference matters when a project is large:- Run cell deploys that one definition. Use it while iterating — you get the broker’s response for that entity alone.
- Deploy All deploys every LoT and Python cell in the open notebook. Use it while iterating.
- Deploy project (the other half of the split button) stores the whole project and loads it, replacing the broker’s entity set. It always confirms first.
DEPLOYED once the broker confirms it, and the entity appears under Broker runtime.
Here is a complete Model as it appears in a cell — the fields the Action fills in are the ones worth reading first:
The Sidebar: Projects and Broker Runtime
There is one Projects list, and Broker runtime sits under it as its own section — always present, even when nothing is running.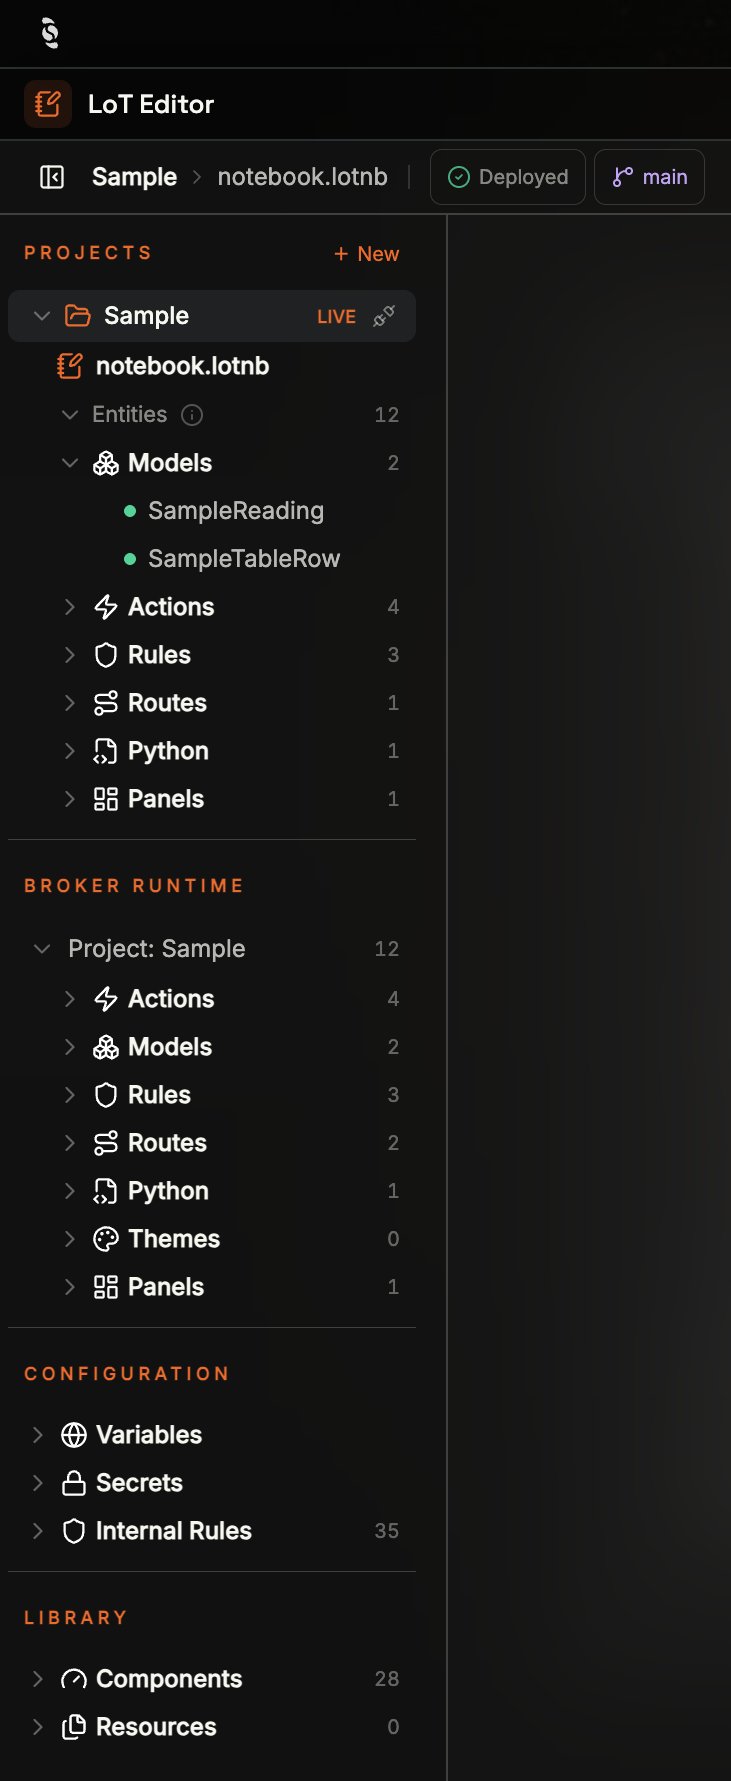
The LoT Editor sidebar: PROJECTS lists Sample badged LIVE with notebook.lotnb and Entities 12, BROKER RUNTIME shows Project: Sample (12) with Actions, Models, Rules, Routes, Python, Themes, and Panels, then CONFIGURATION and LIBRARY
Broker runtime
Expanding Broker runtime groups everything running by type —Actions, Models, Rules, Routes, Python, Themes, Panels — each with a count and names beneath. Click Project: {name} or Standalone to open the inspector:
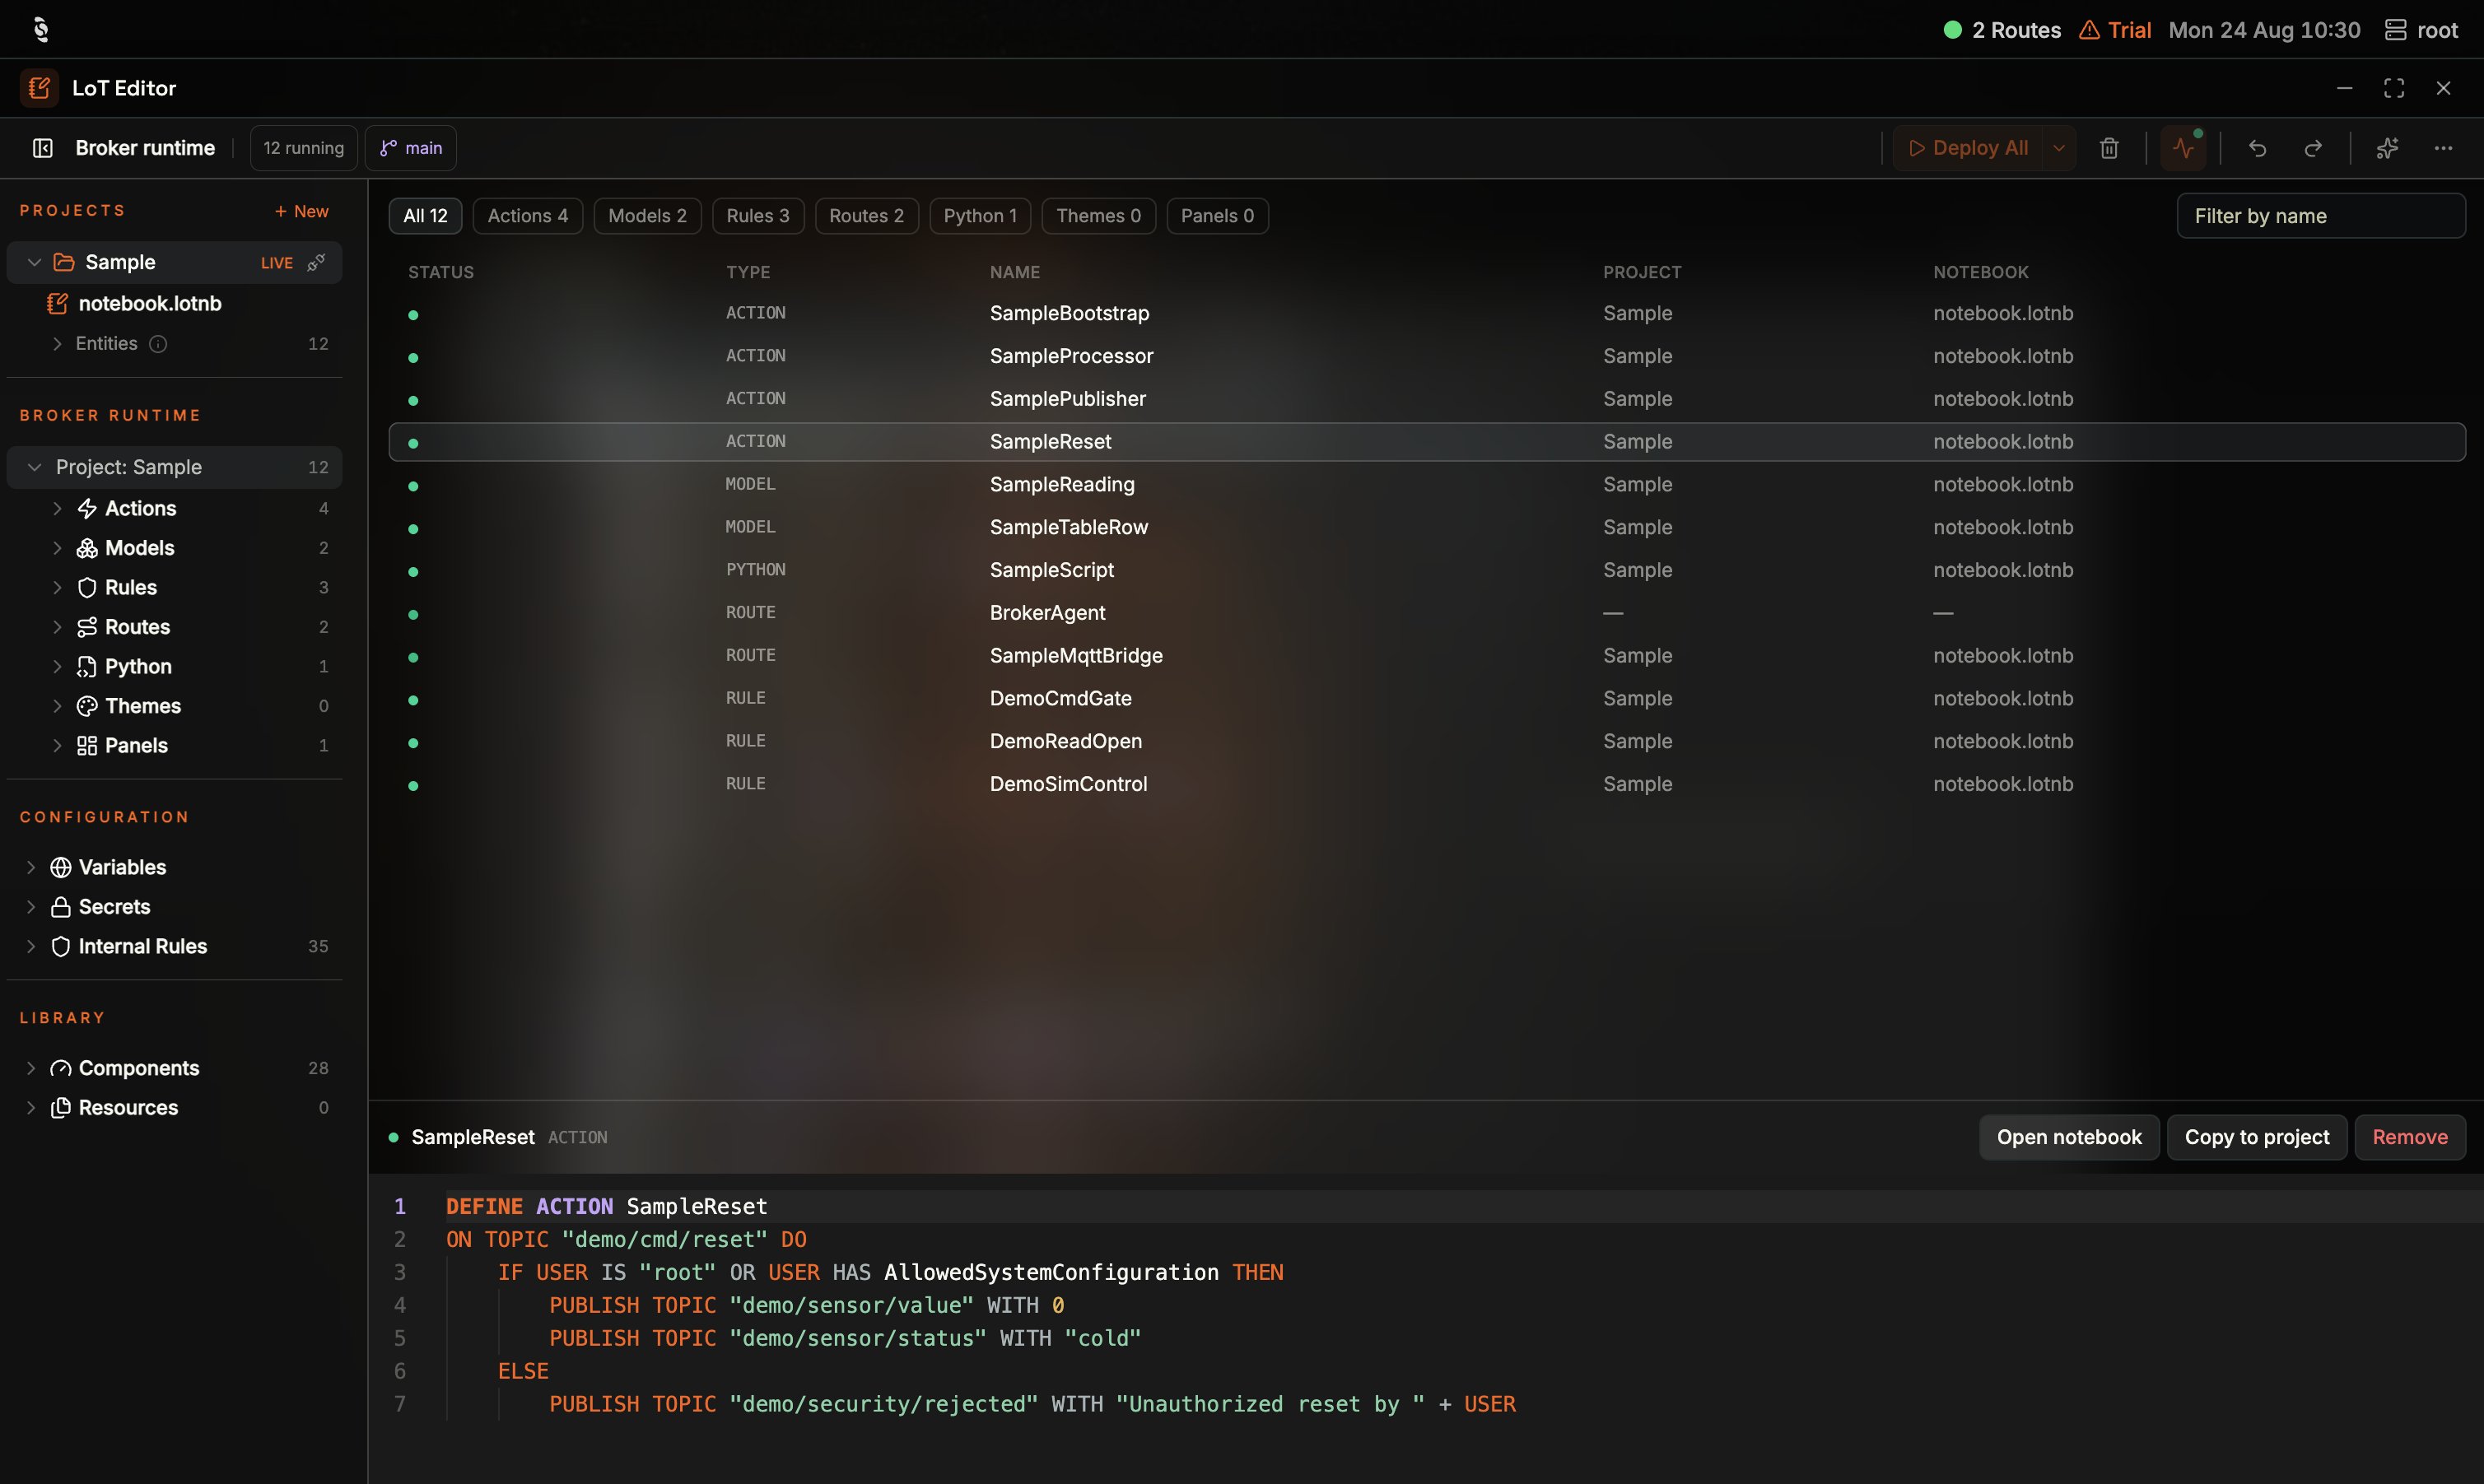
Broker runtime inspector: type filters, a table of STATUS, TYPE, NAME, PROJECT, and NOTEBOOK, and the selected entity's running source with Open notebook, Copy to project, and Remove. BrokerAgent is a ROUTE with empty Project and Notebook — a standalone leftover next to Sample-owned entities
notebook.lotnb; a standalone route such as BrokerAgent leaves Project and Notebook blank. Select a row to read the running source and use Open notebook, Copy to project, or Remove.
A project’s own Entities folder (under the project in Projects) is what that project’s notebooks declare. Broker runtime is what is running. In the Sample notebook those counts can disagree — Routes (1) under the project versus Routes (2) on the broker — because a leftover such as BrokerAgent is running but not declared in the notebook.
An idle project’s declarations can match the running set and still read NOT RUNNING on cells — Activate that project before treating those badges as a deploy to-do.
Rulesunder a project counts rules that project owns. Locked built-ins live under Configuration → Internal Rules, not here.Pythoncounts scripts. LoT Flow’s Python group counts the individual functions those scripts expose.
Library: Visual Components and Documents
Library is the bottom of the LoT Editor sidebar. It is how you put views and files into a project — not a second editor.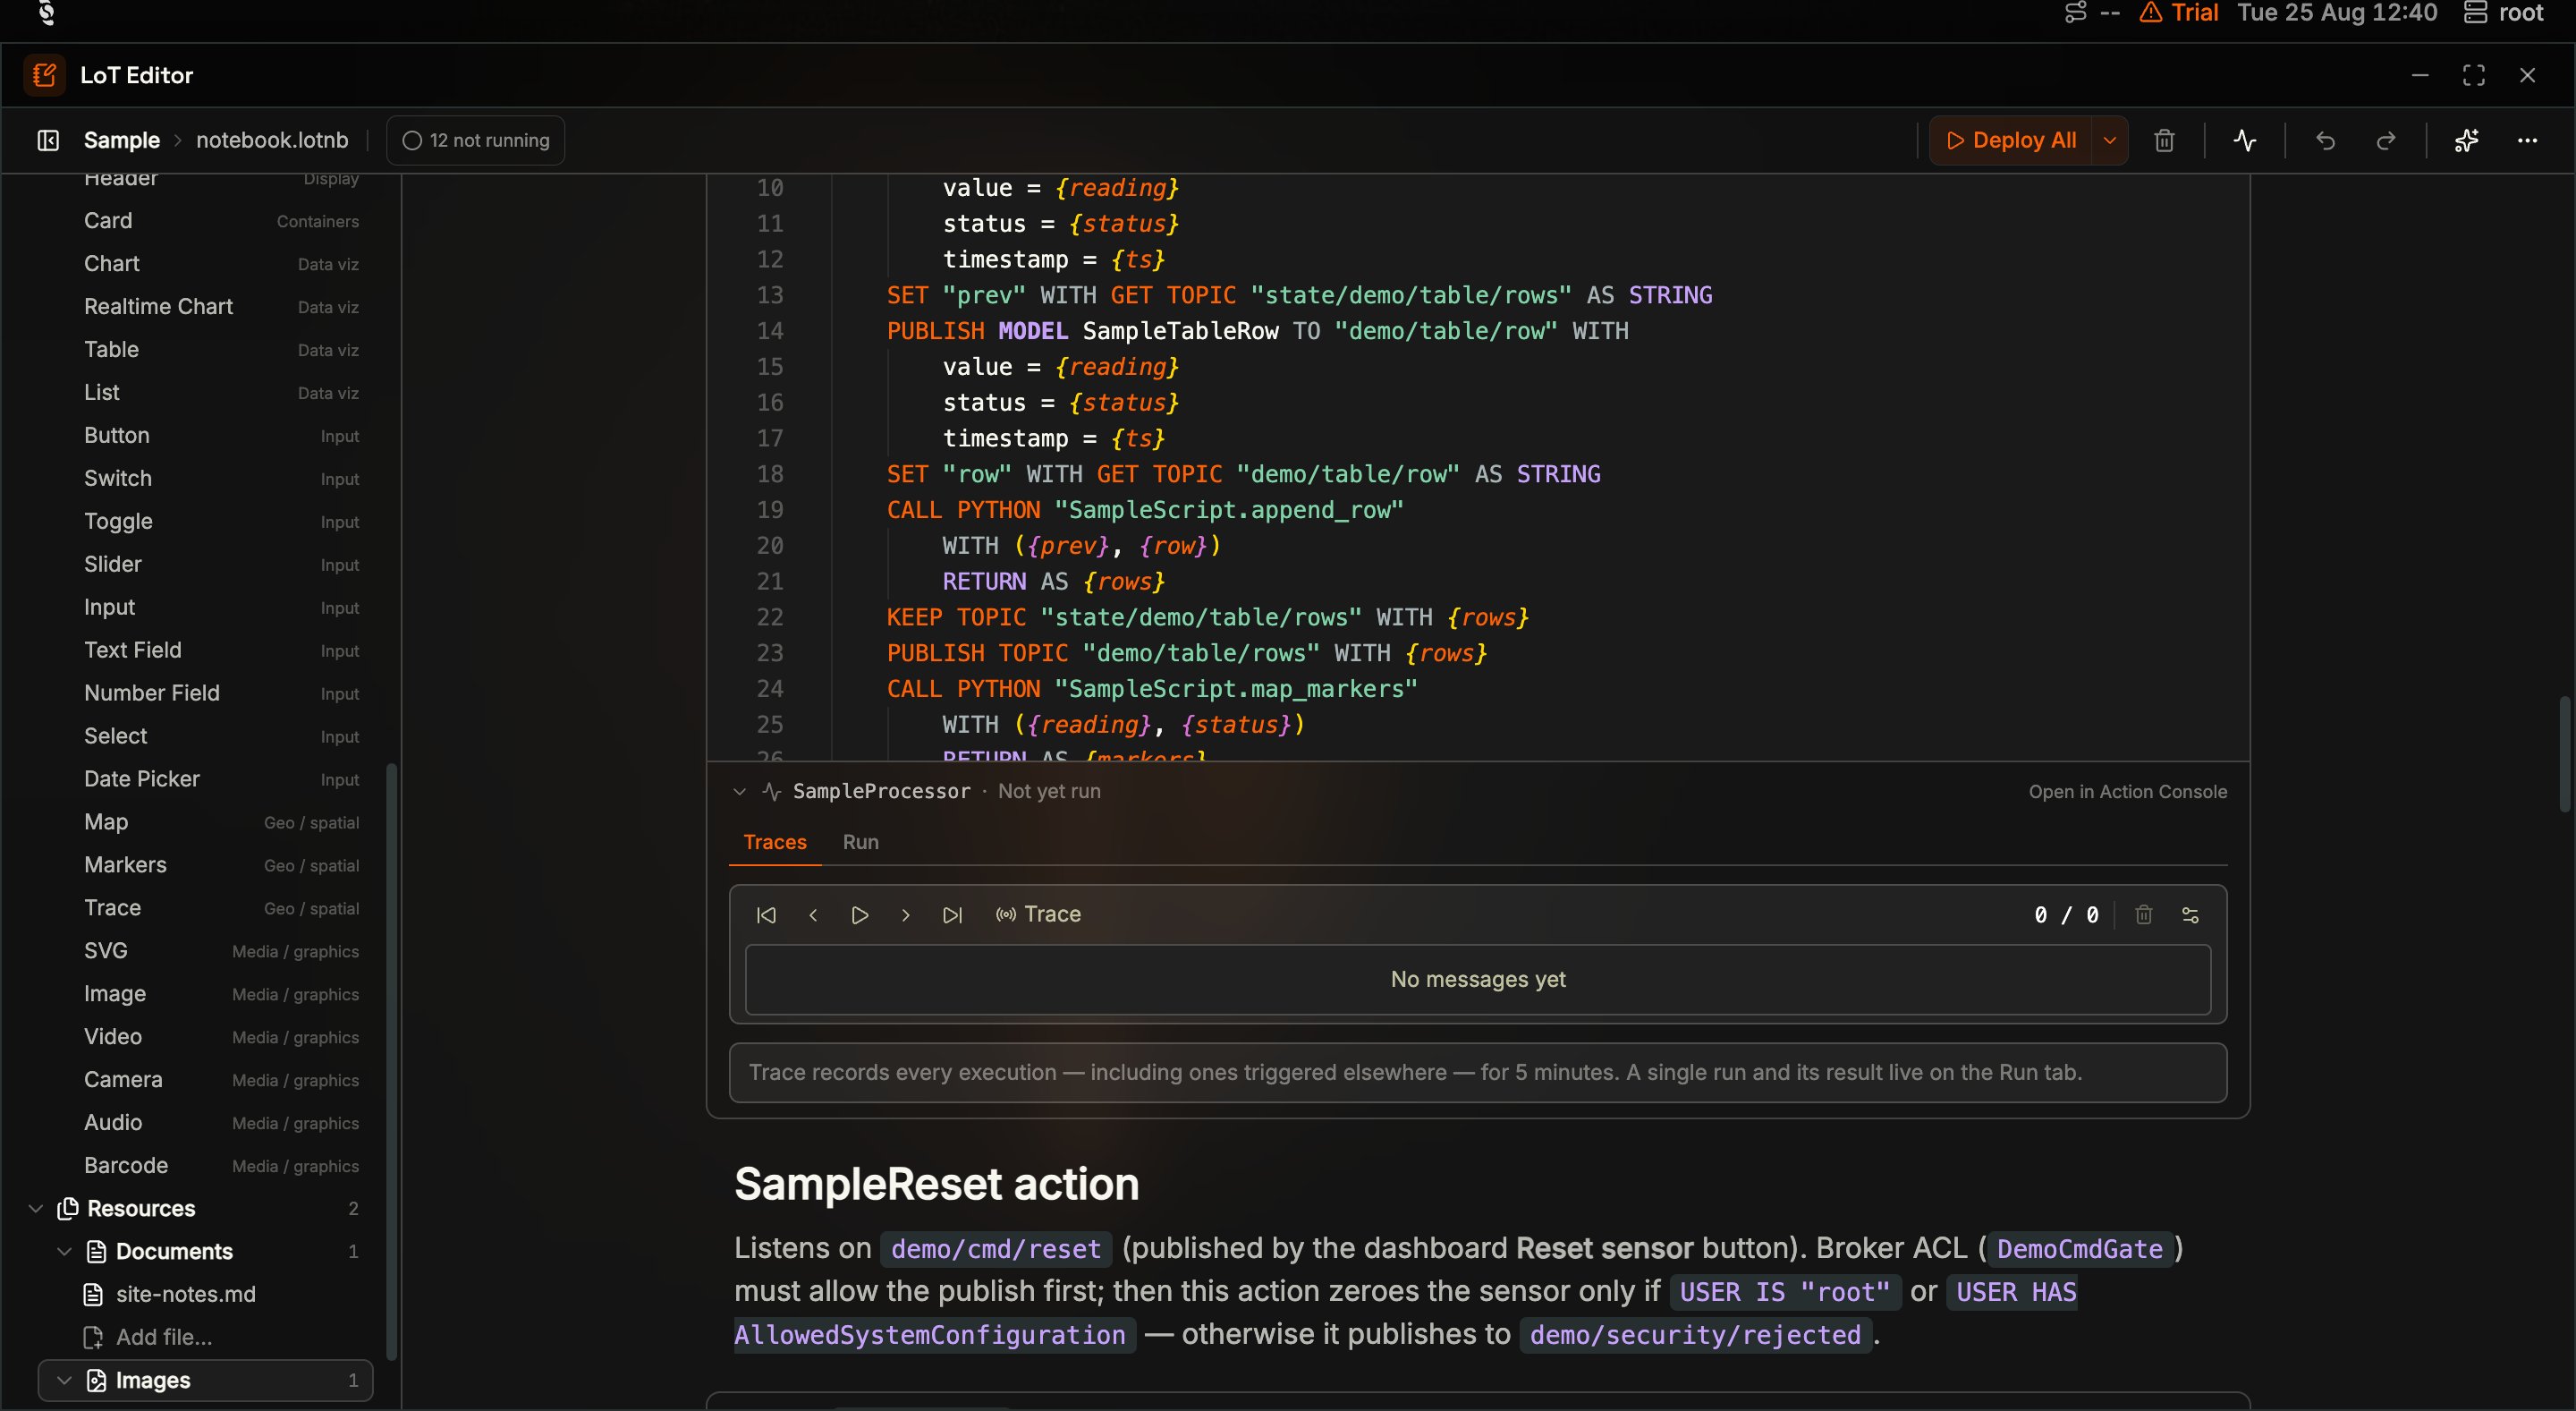
Library open in Sample: Components listed by group (Header, Card, Chart, inputs, map, media), Resources with Documents (site-notes.md, Add file…) and Images (1)
Components
Components is the palette of live widgets you can drop onto a markdown cell. Each row is a type (Gauge, Chart, Button, Map, …) with its group on the right. Drag a row onto a markdown cell to embed a viewer bound to an MQTT topic. The Sample notebook’s live preview is this capability in use: a card of gauge, status, and trend sitting in the document.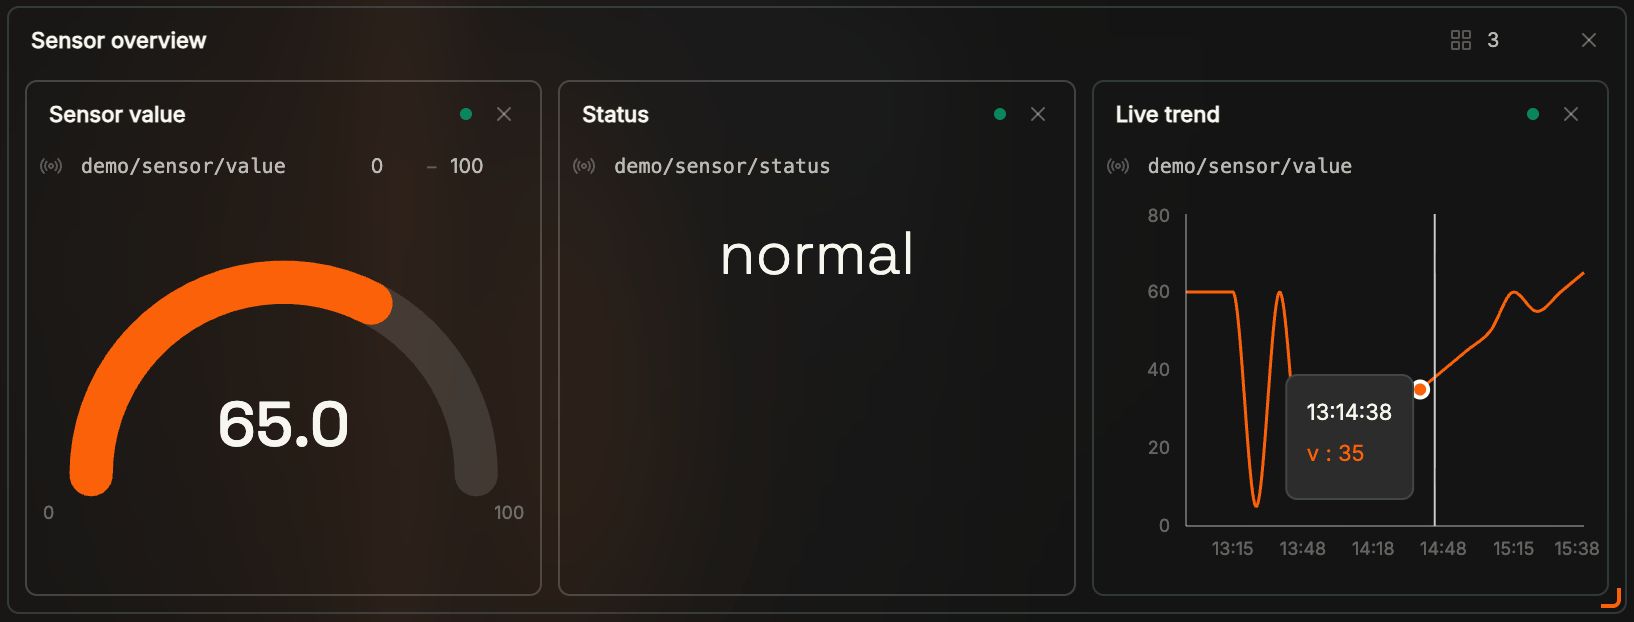
Live document preview in Sample: Sensor overview card with a gauge at 65.0, status normal, and a live trend on demo/sensor/value
Resources: documents and images
Resources nests Documents and Images. These are files in the project, not a separate scrapbook you have to remember to Push.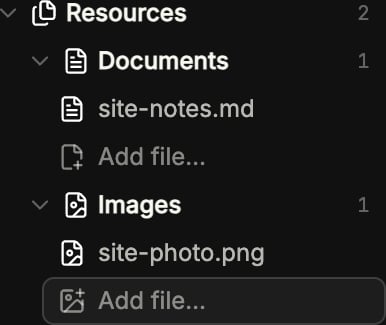
Library Resources: Documents lists site-notes.md with Add file…, Images shows a count of 1
Standalone Deployments vs Projects
The broker can run LoT with a live project, or without one. Broker runtime tells you which:- Run cell / Deploy All with nothing LIVE writes straight into standalone runtime. The toolbar stays a direct action.
- Deploy All from an idle project on the broker asks you to Activate first — it does not silently load that project.
- Deploy All from a local-only draft while another project is LIVE is refused (the toast points you at Push). Deploying those cells would write into the other live project.
- Activate loads a stored project’s declarations. If the broker publishes entity ownership, only that project’s entities stop; standalone leftovers stay. Without ownership, the confirm says the current project’s entities are replaced.
- Deactivate unloads the live project and removes its entities from running. Auto-commit stops until you Activate again. Broker runtime then reads Standalone (plus anything that was never owned by that project). The confirm is explicit: Deactivating BMS unloads it from the broker and removes its entities from running.
- Adopt into project (Broker runtime context menu) writes selected running entities into a notebook and Pushes — that is how you turn a standalone set into a project.
Moving Work Between Projects and the Broker
Right-click a project under Projects for operations on that row. A LIVE project and an idle on-broker project do not offer the same items (idle has Inspect and Activate; live has Deactivate and the full create/import set).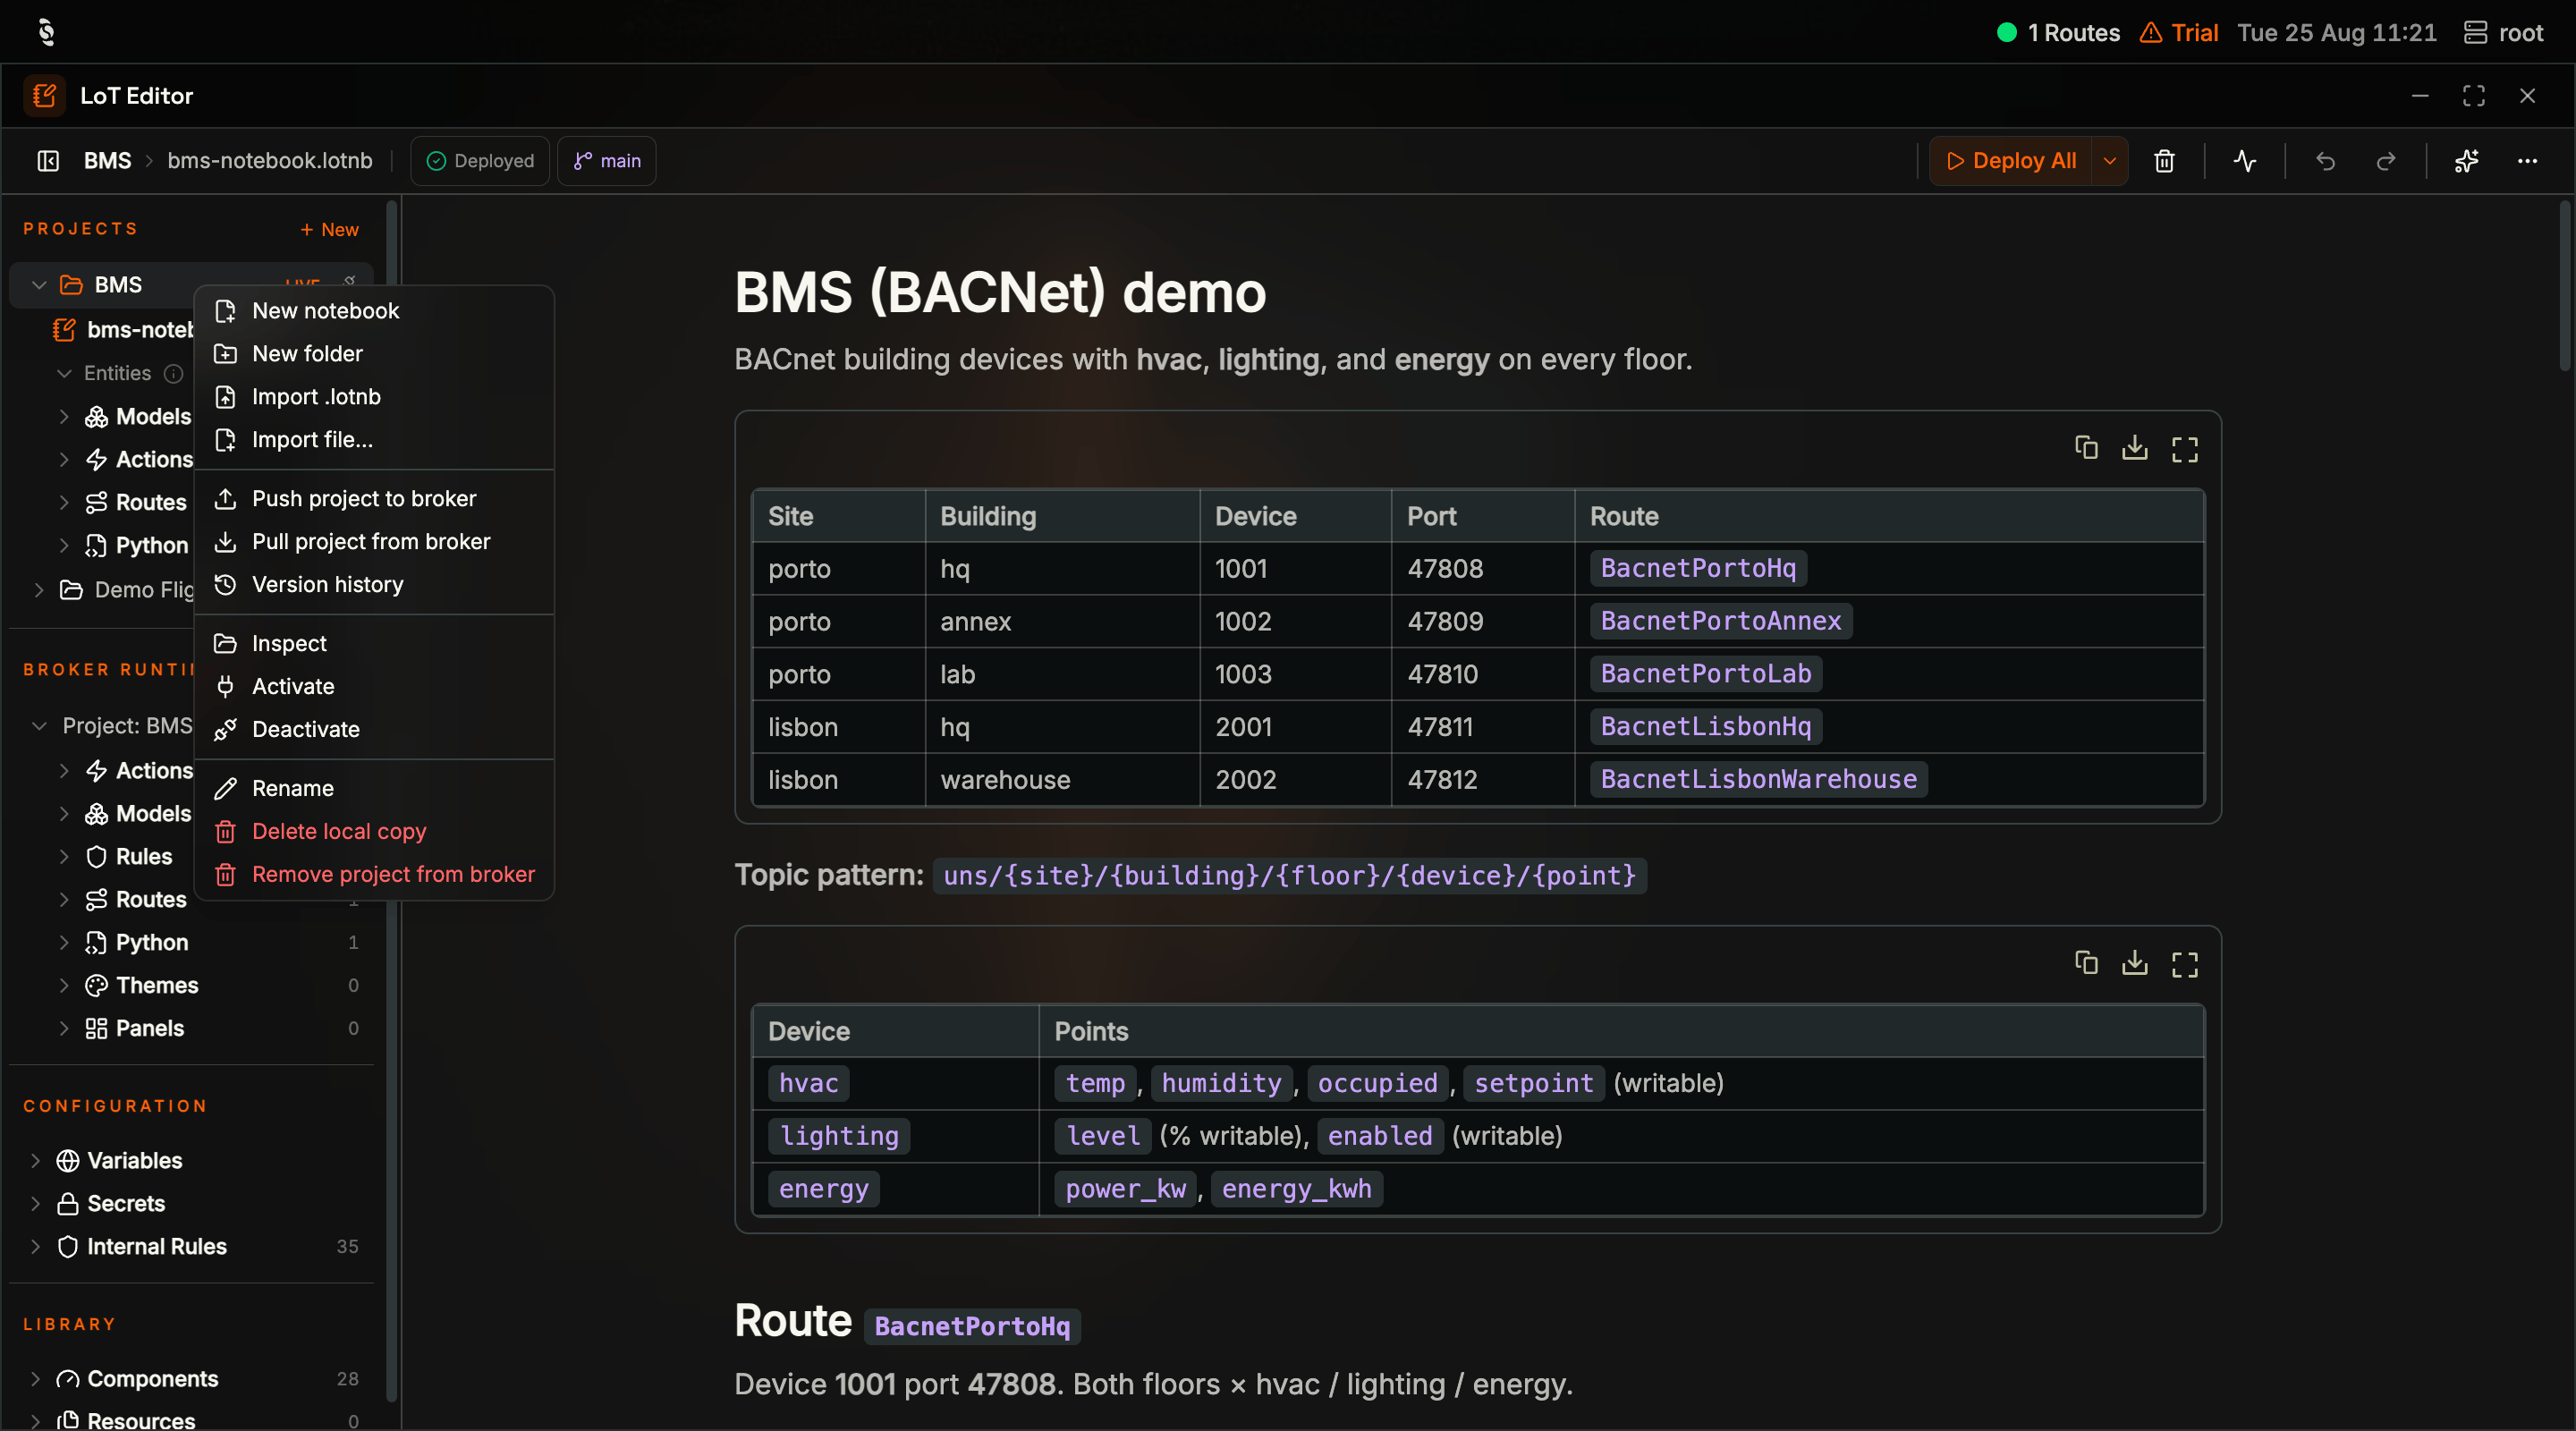
The project context menu: notebooks and import, Push and Pull, Version history, Inspect, Activate and Deactivate, then Rename, Delete local copy, and Remove project from broker
Project: {name} to open the inspector table (status, type, name, owning project, notebook). A row with empty Project / Notebook is a standalone leftover — see Standalone vs projects. Right-click Broker runtime for operations on the running set:
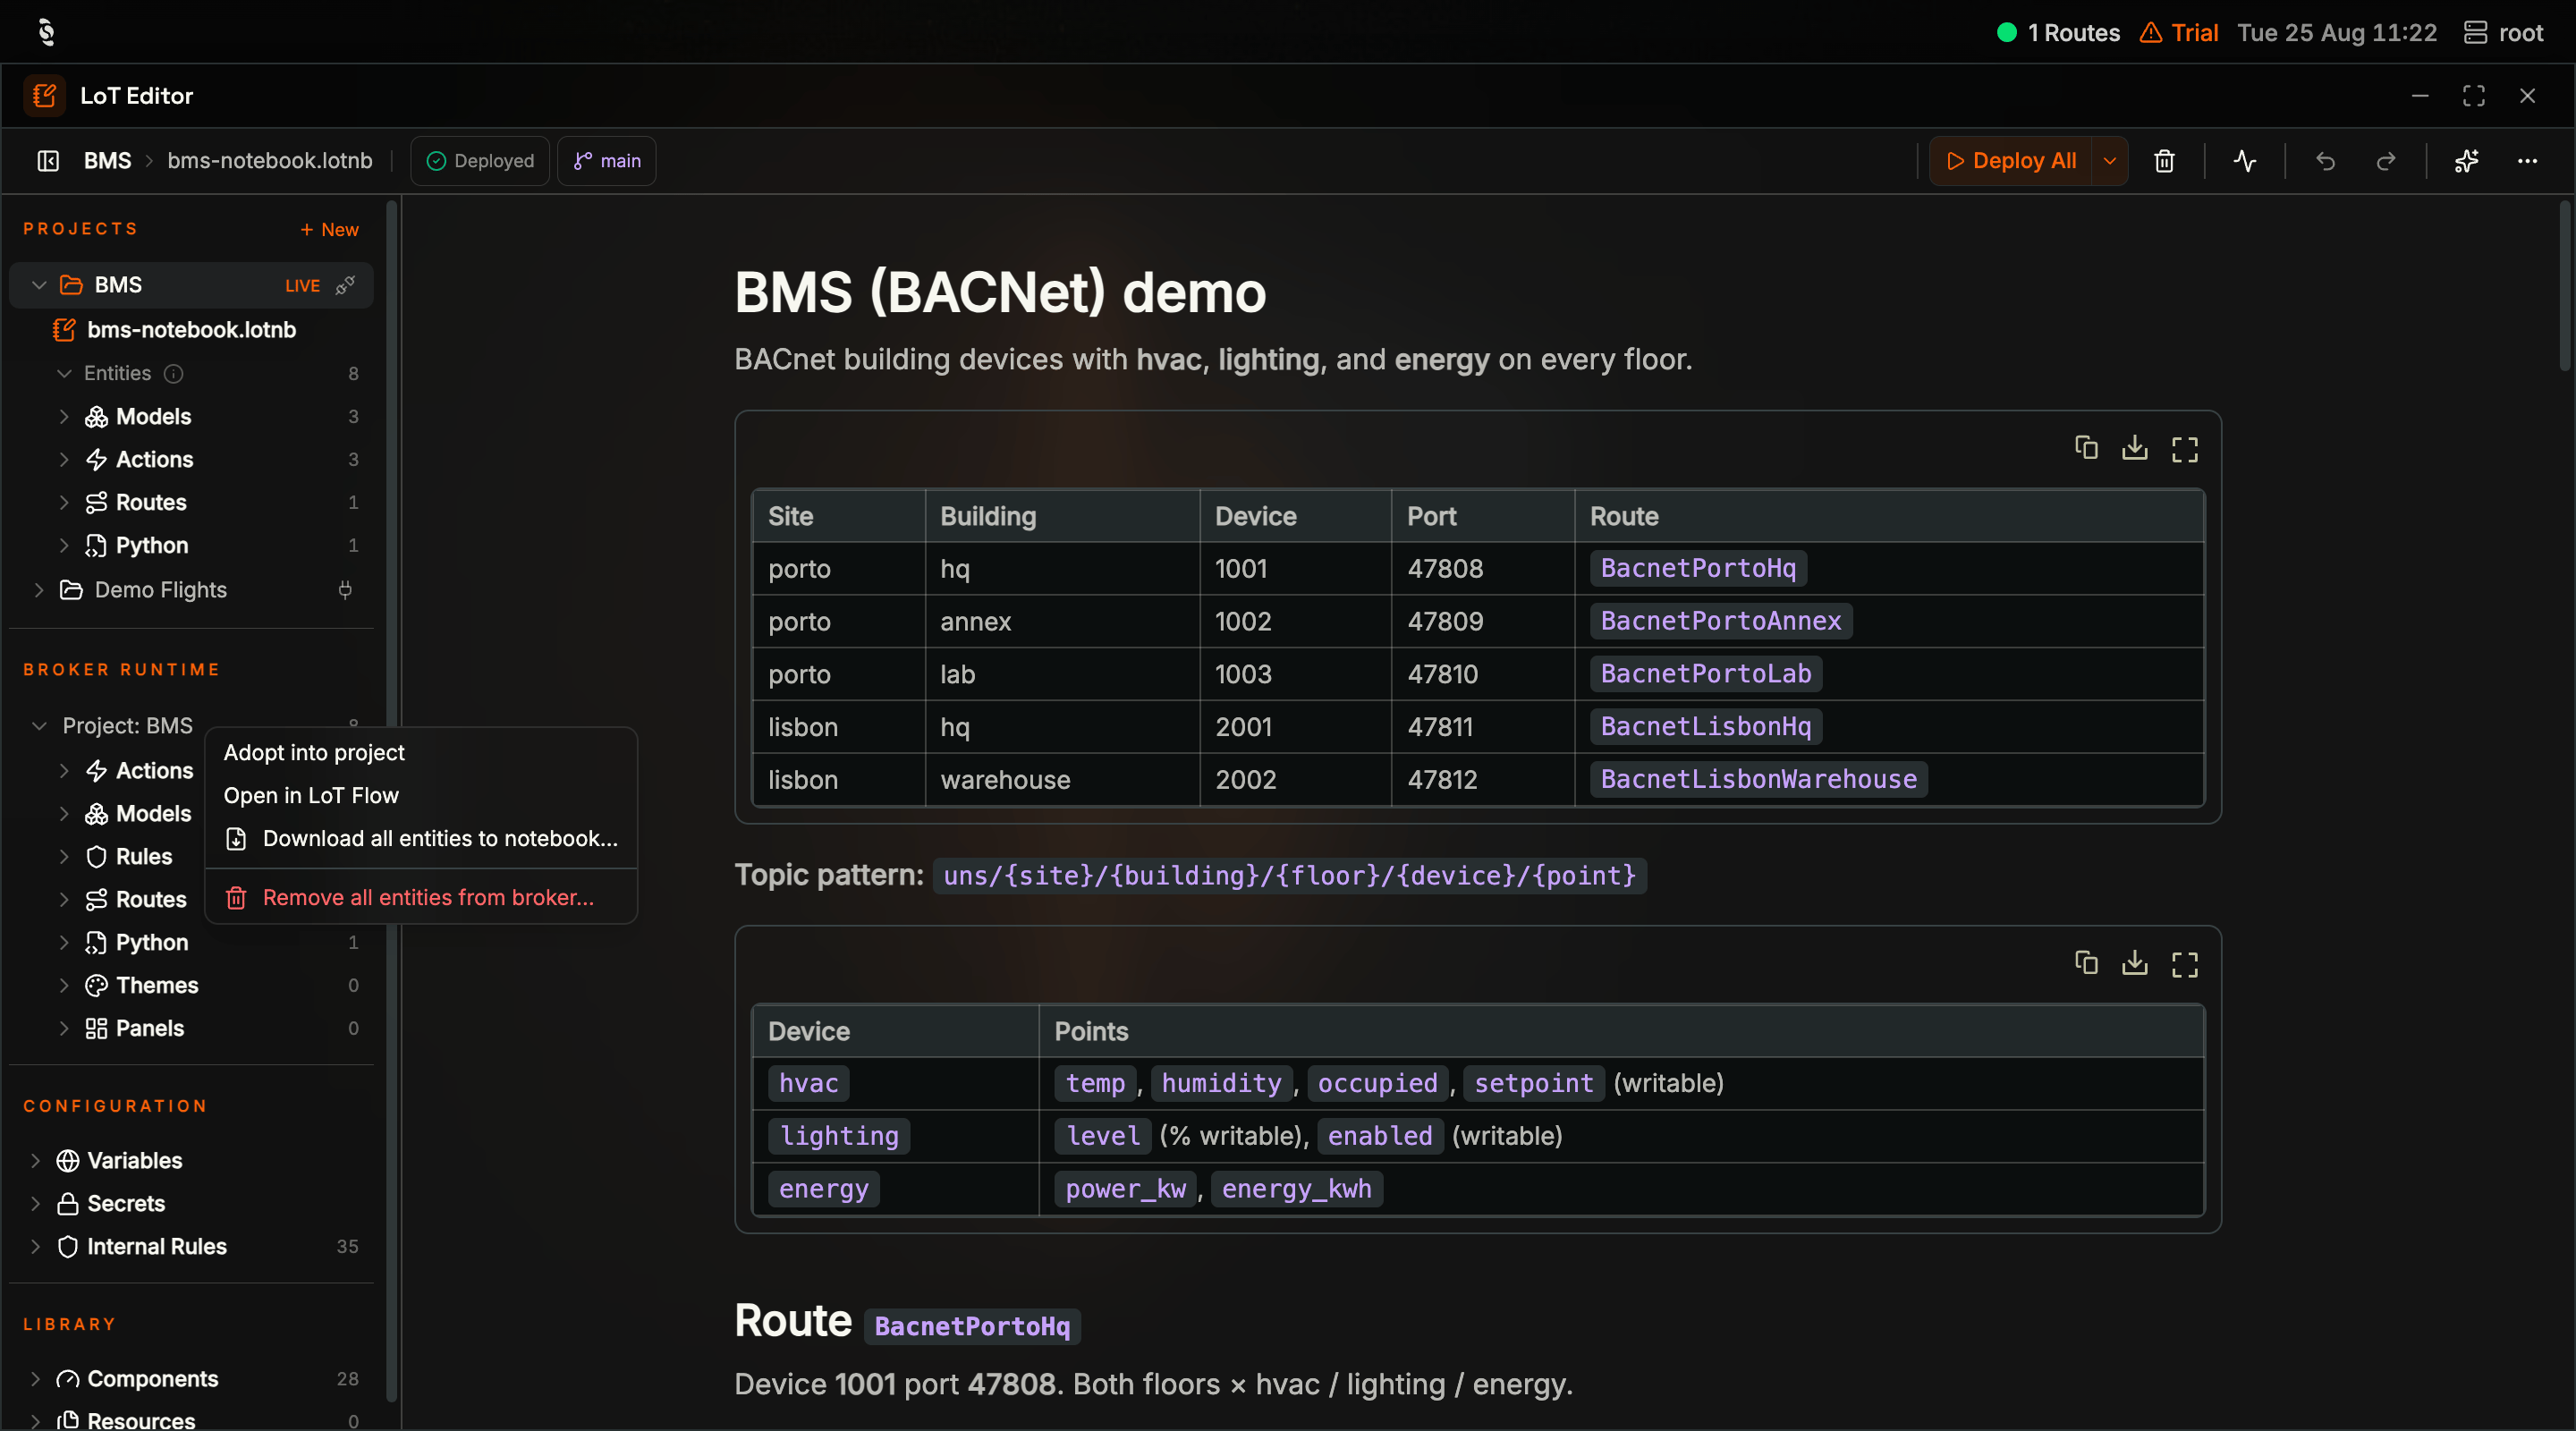
The Broker runtime context menu: Adopt into project, Open in LoT Flow, Download all entities to notebook, and Remove all entities from broker
Version History
Broker projects are git repositories, and the editor exposes enough of that to recover from mistakes without a terminal: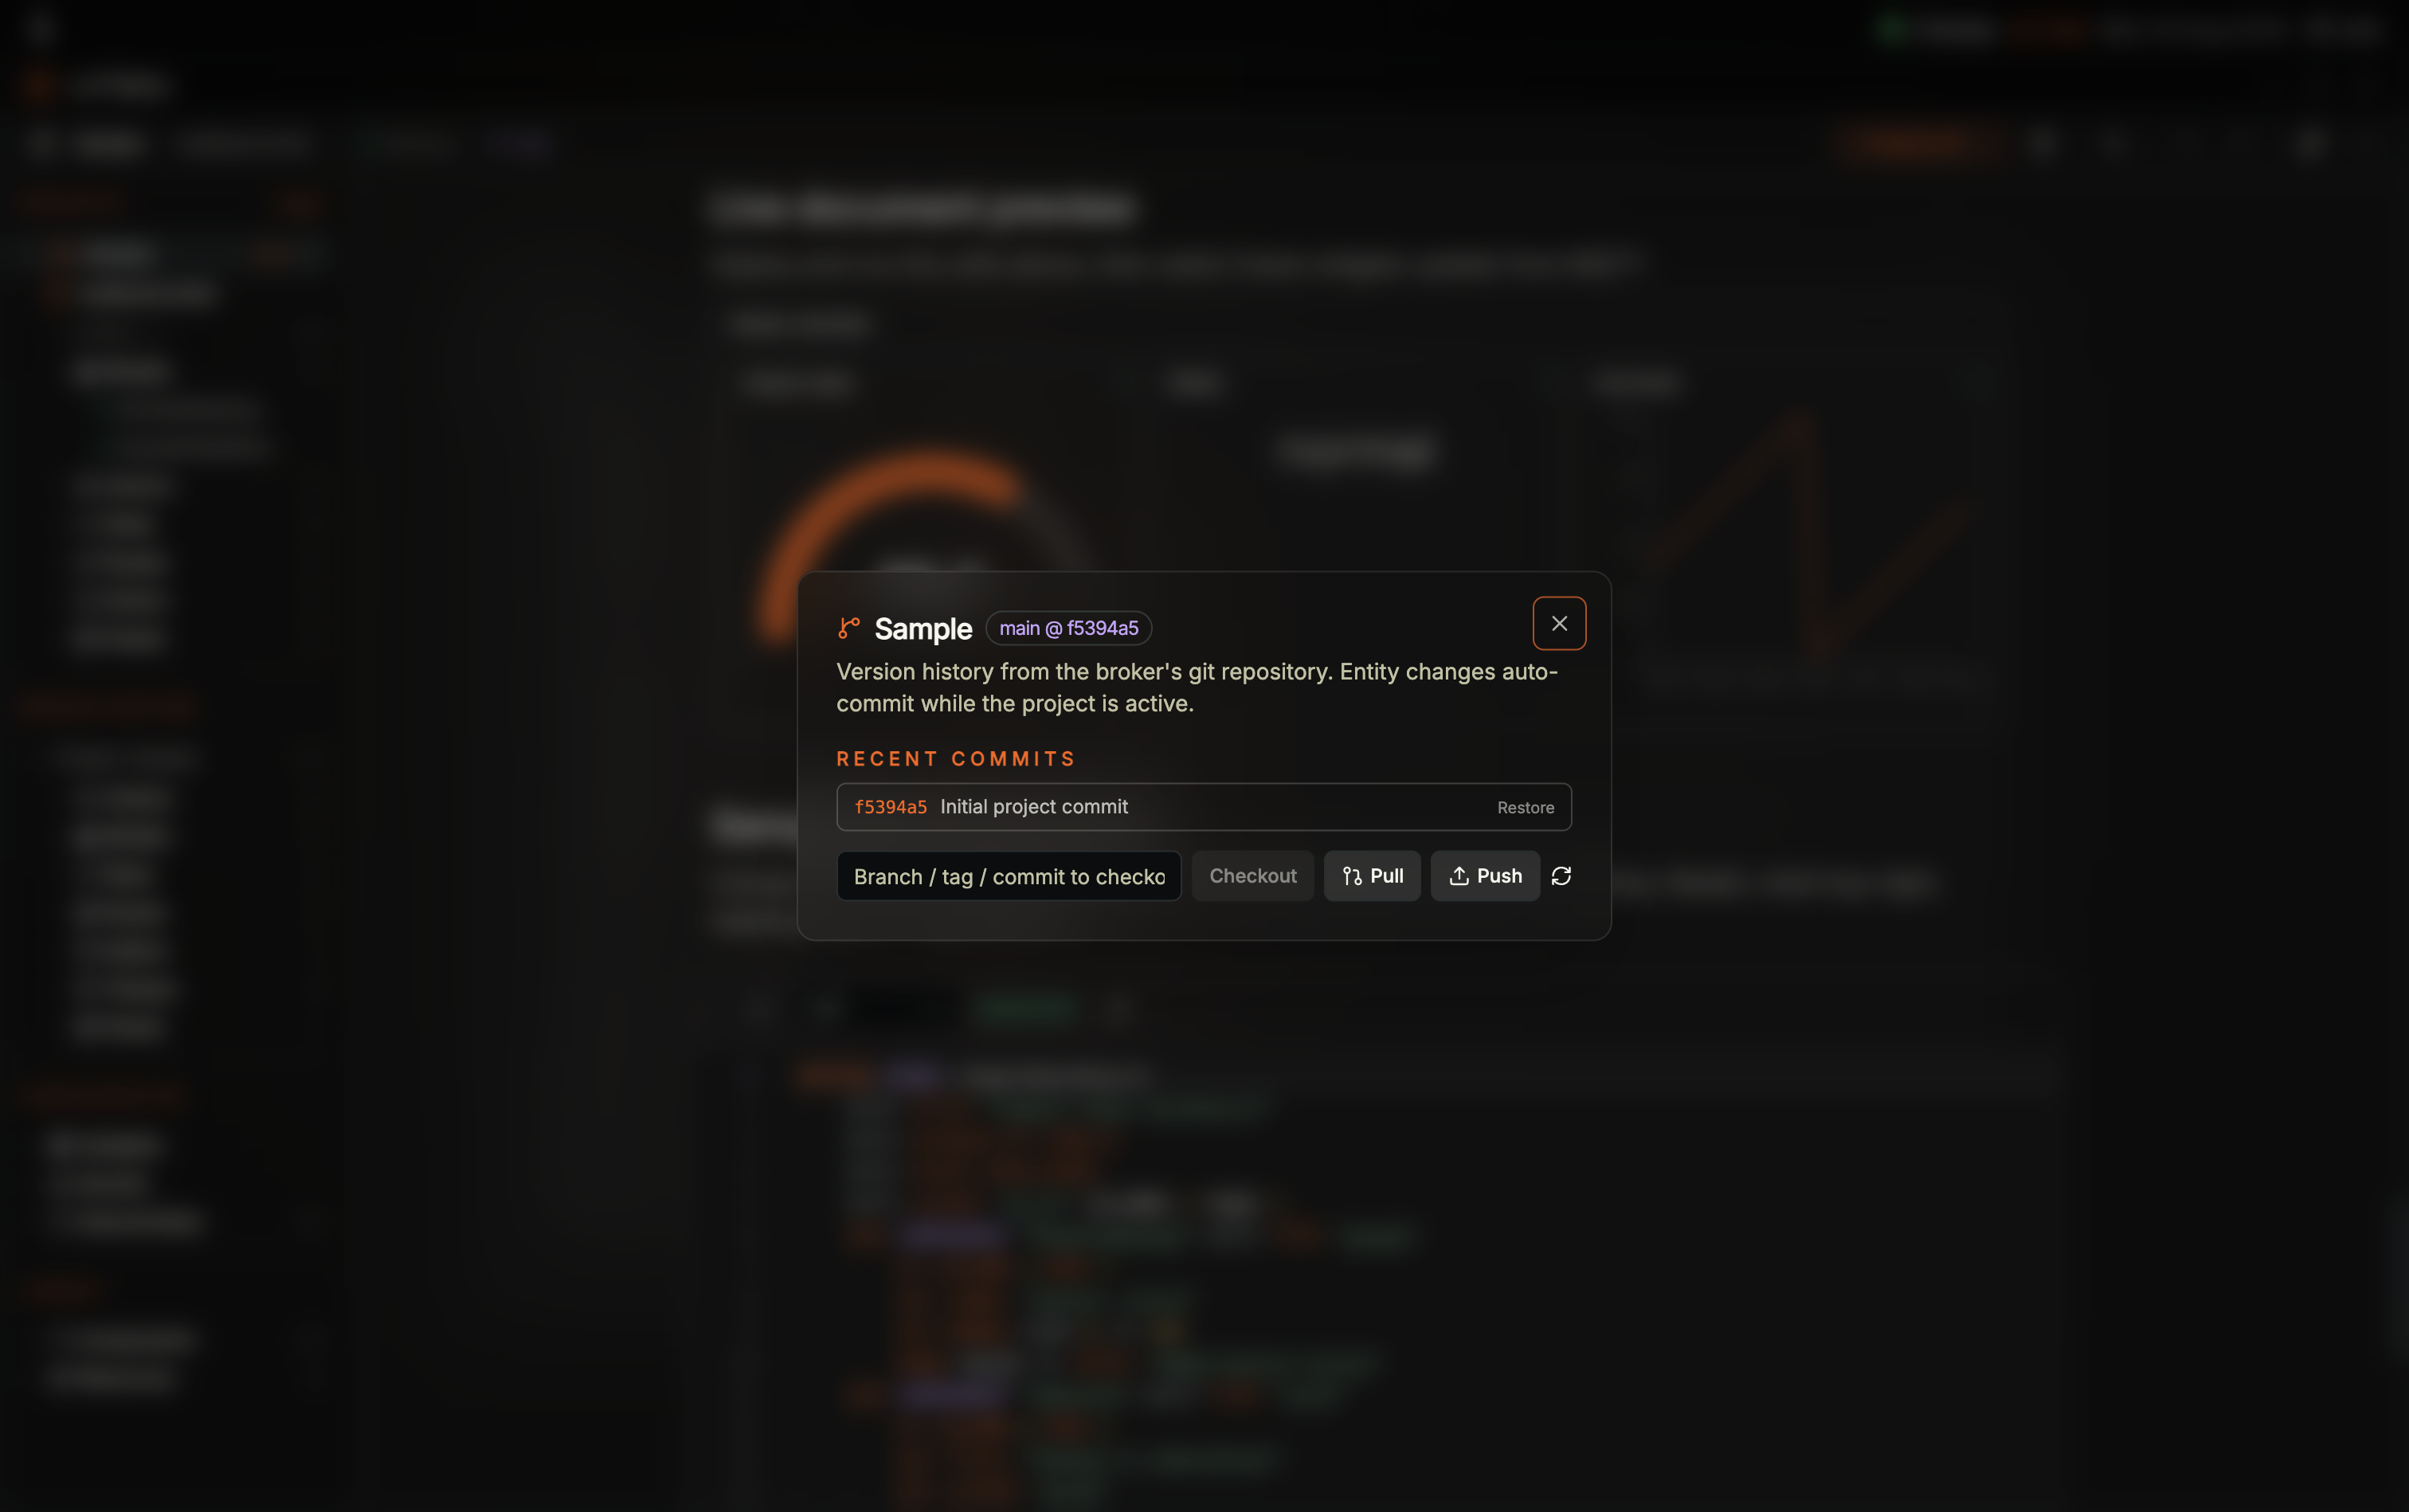
Version history for Sample on branch main at commit f5394a5: the note that history comes from the broker's git repository and that entity changes auto-commit while the project is active, one recent commit Initial project commit with Restore, and Checkout, Pull, Push, and refresh controls
- Restore a commit — checks that commit out on the broker and reloads the workspace if the project is active
- Checkout a branch, tag, or commit — type a ref and check it out
- Pull and Push — synchronise with the broker’s configured git remote
Update route: BacnetPortoHq, which is why the history reads as a log of deployments.Pulling Entities Back Into a Notebook
Deployment is not one-way. Anything running on the broker can be brought back into a notebook, which is how you adopt LoT that was deployed by other means. Right-click an entity type group under Broker runtime: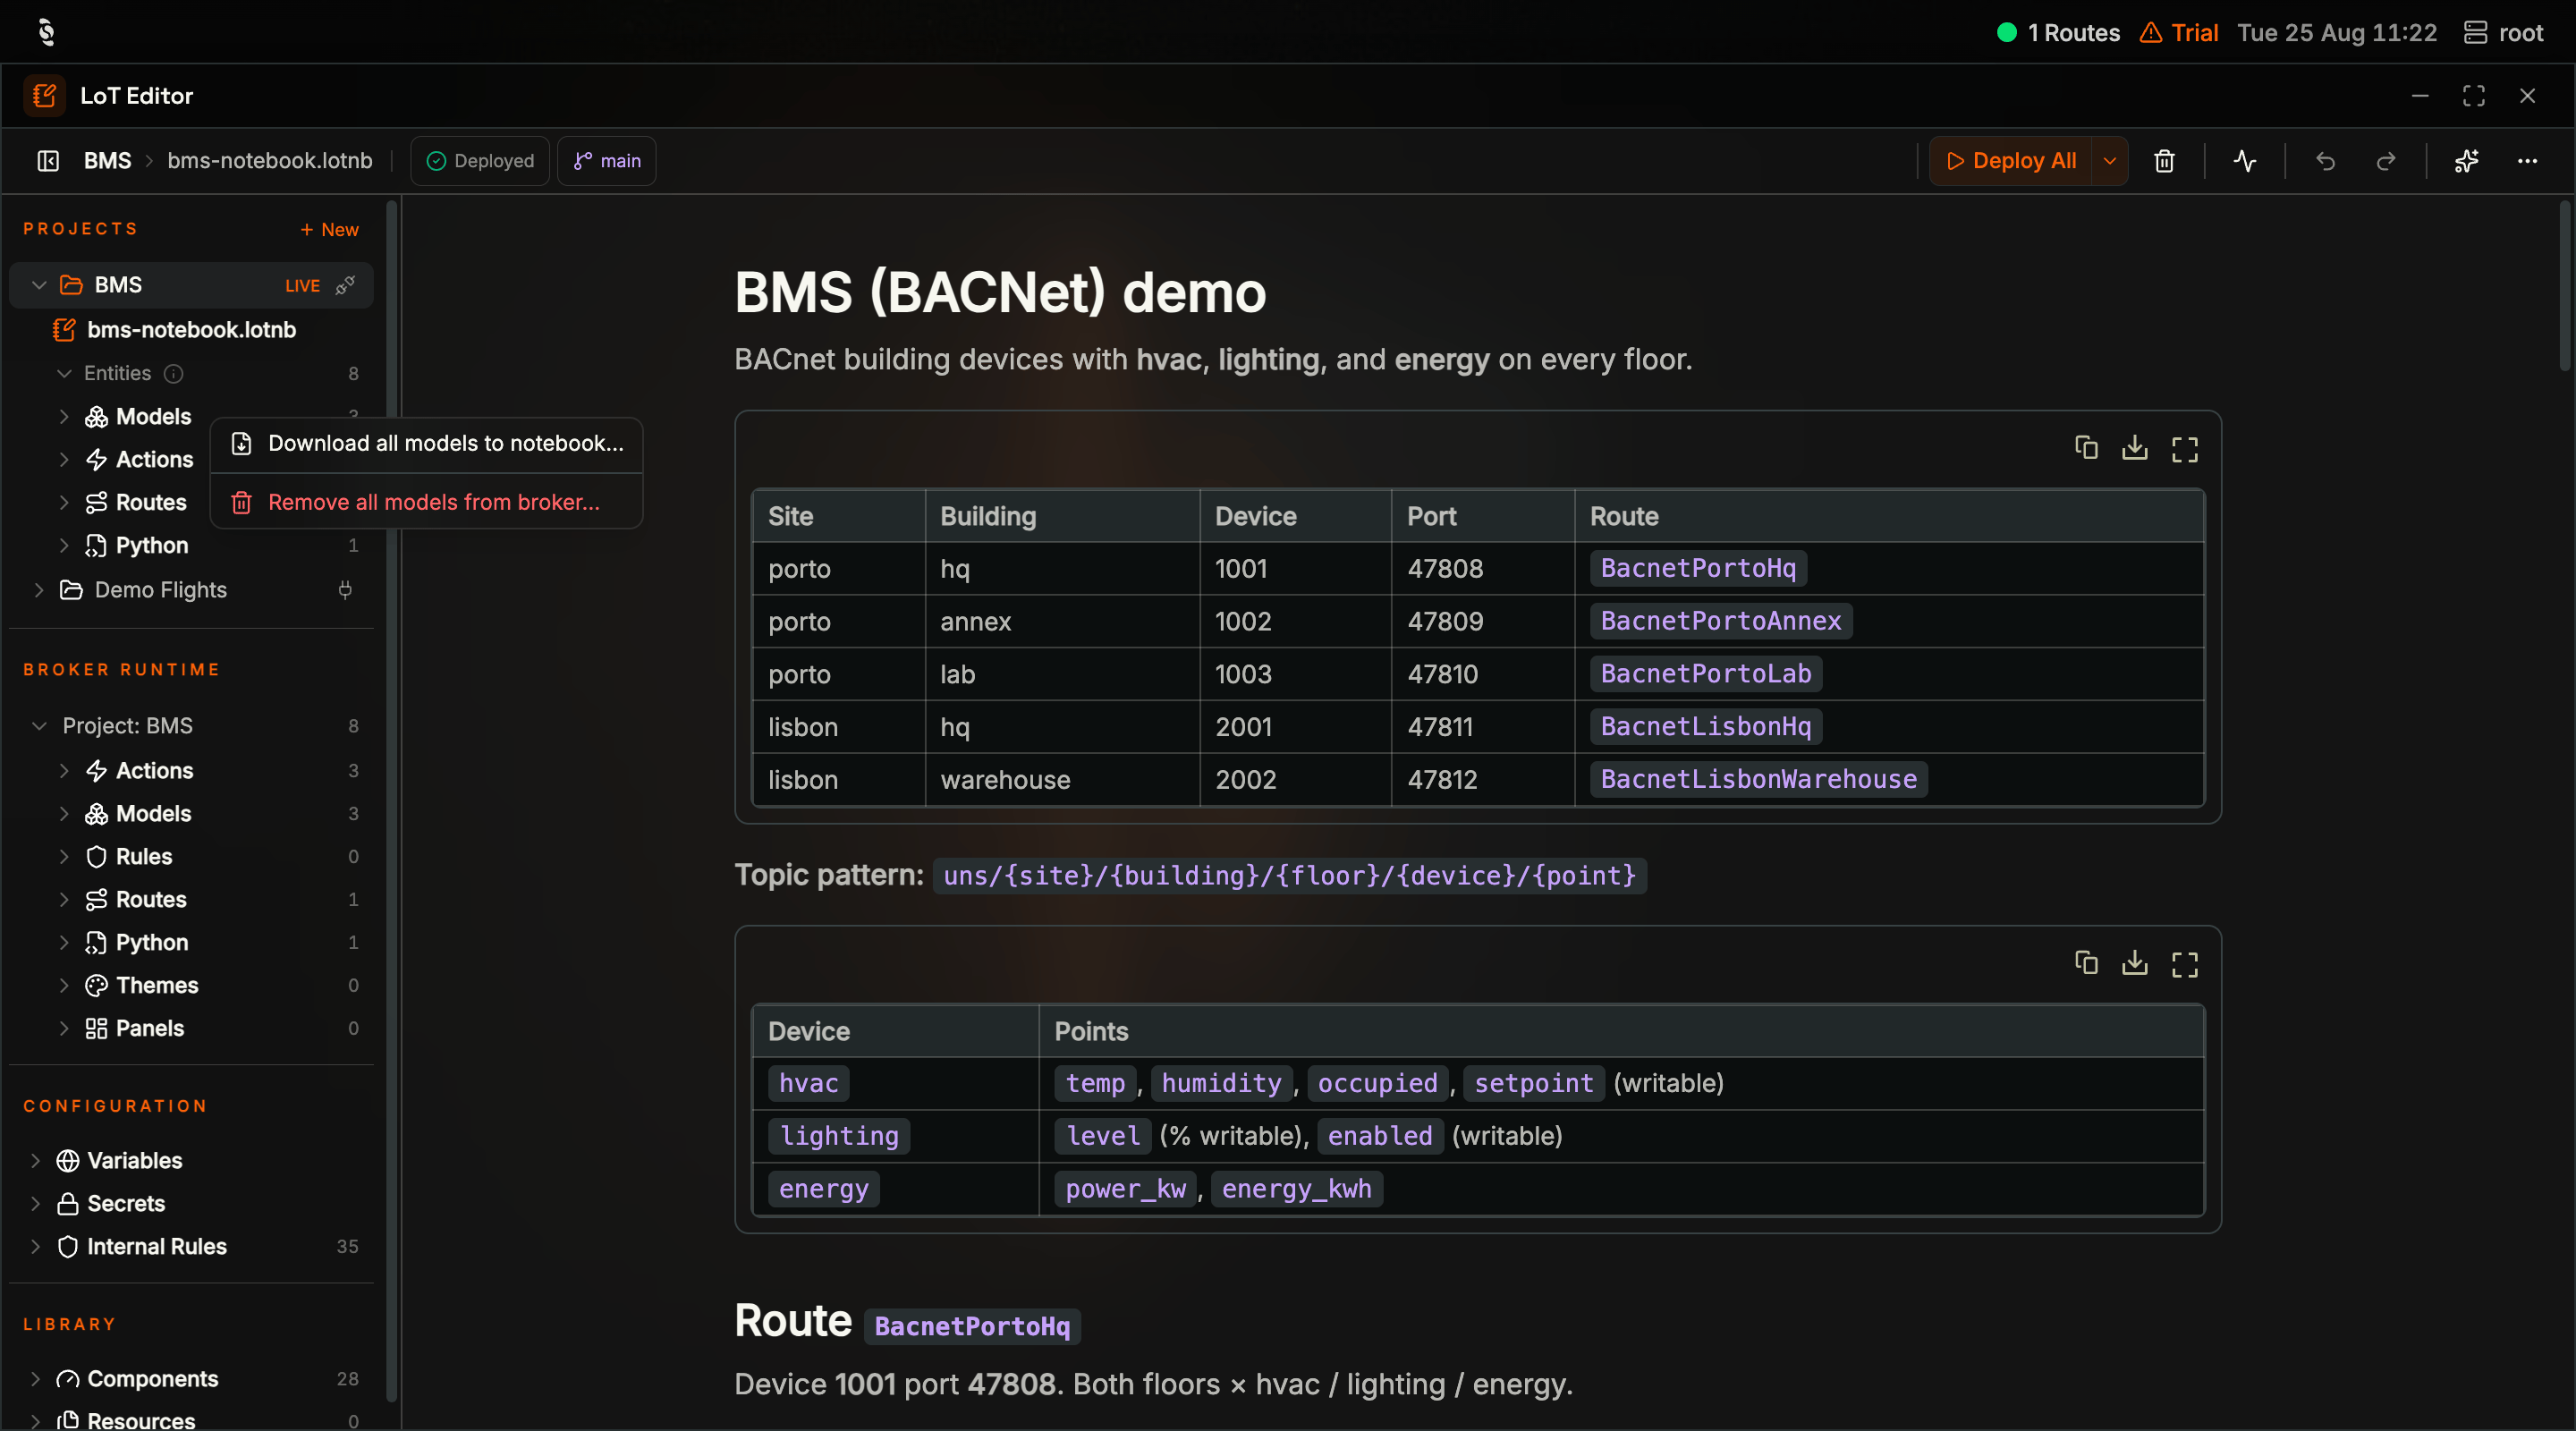
The context menu on the Models group offers Download all models to notebook… and a red Remove all models… — bulk operations exist per entity type, not only for everything at once
Entities group itself carries Download all to notebook… and Remove all from broker… for the whole set. Right-clicking a single entity offers Open in code editor, Download to notebook…, and Remove from broker….
Any download asks “Choose notebook” — pick an existing .lotnb file in the project, or create a new one — and the definitions arrive as cells you can then edit and redeploy.
Removal: Four Different Operations
Deleting locally and removing from the broker are different operations with different consequences, and the HUB guards them differently on purpose. Read the dialog: it tells you which one you are in.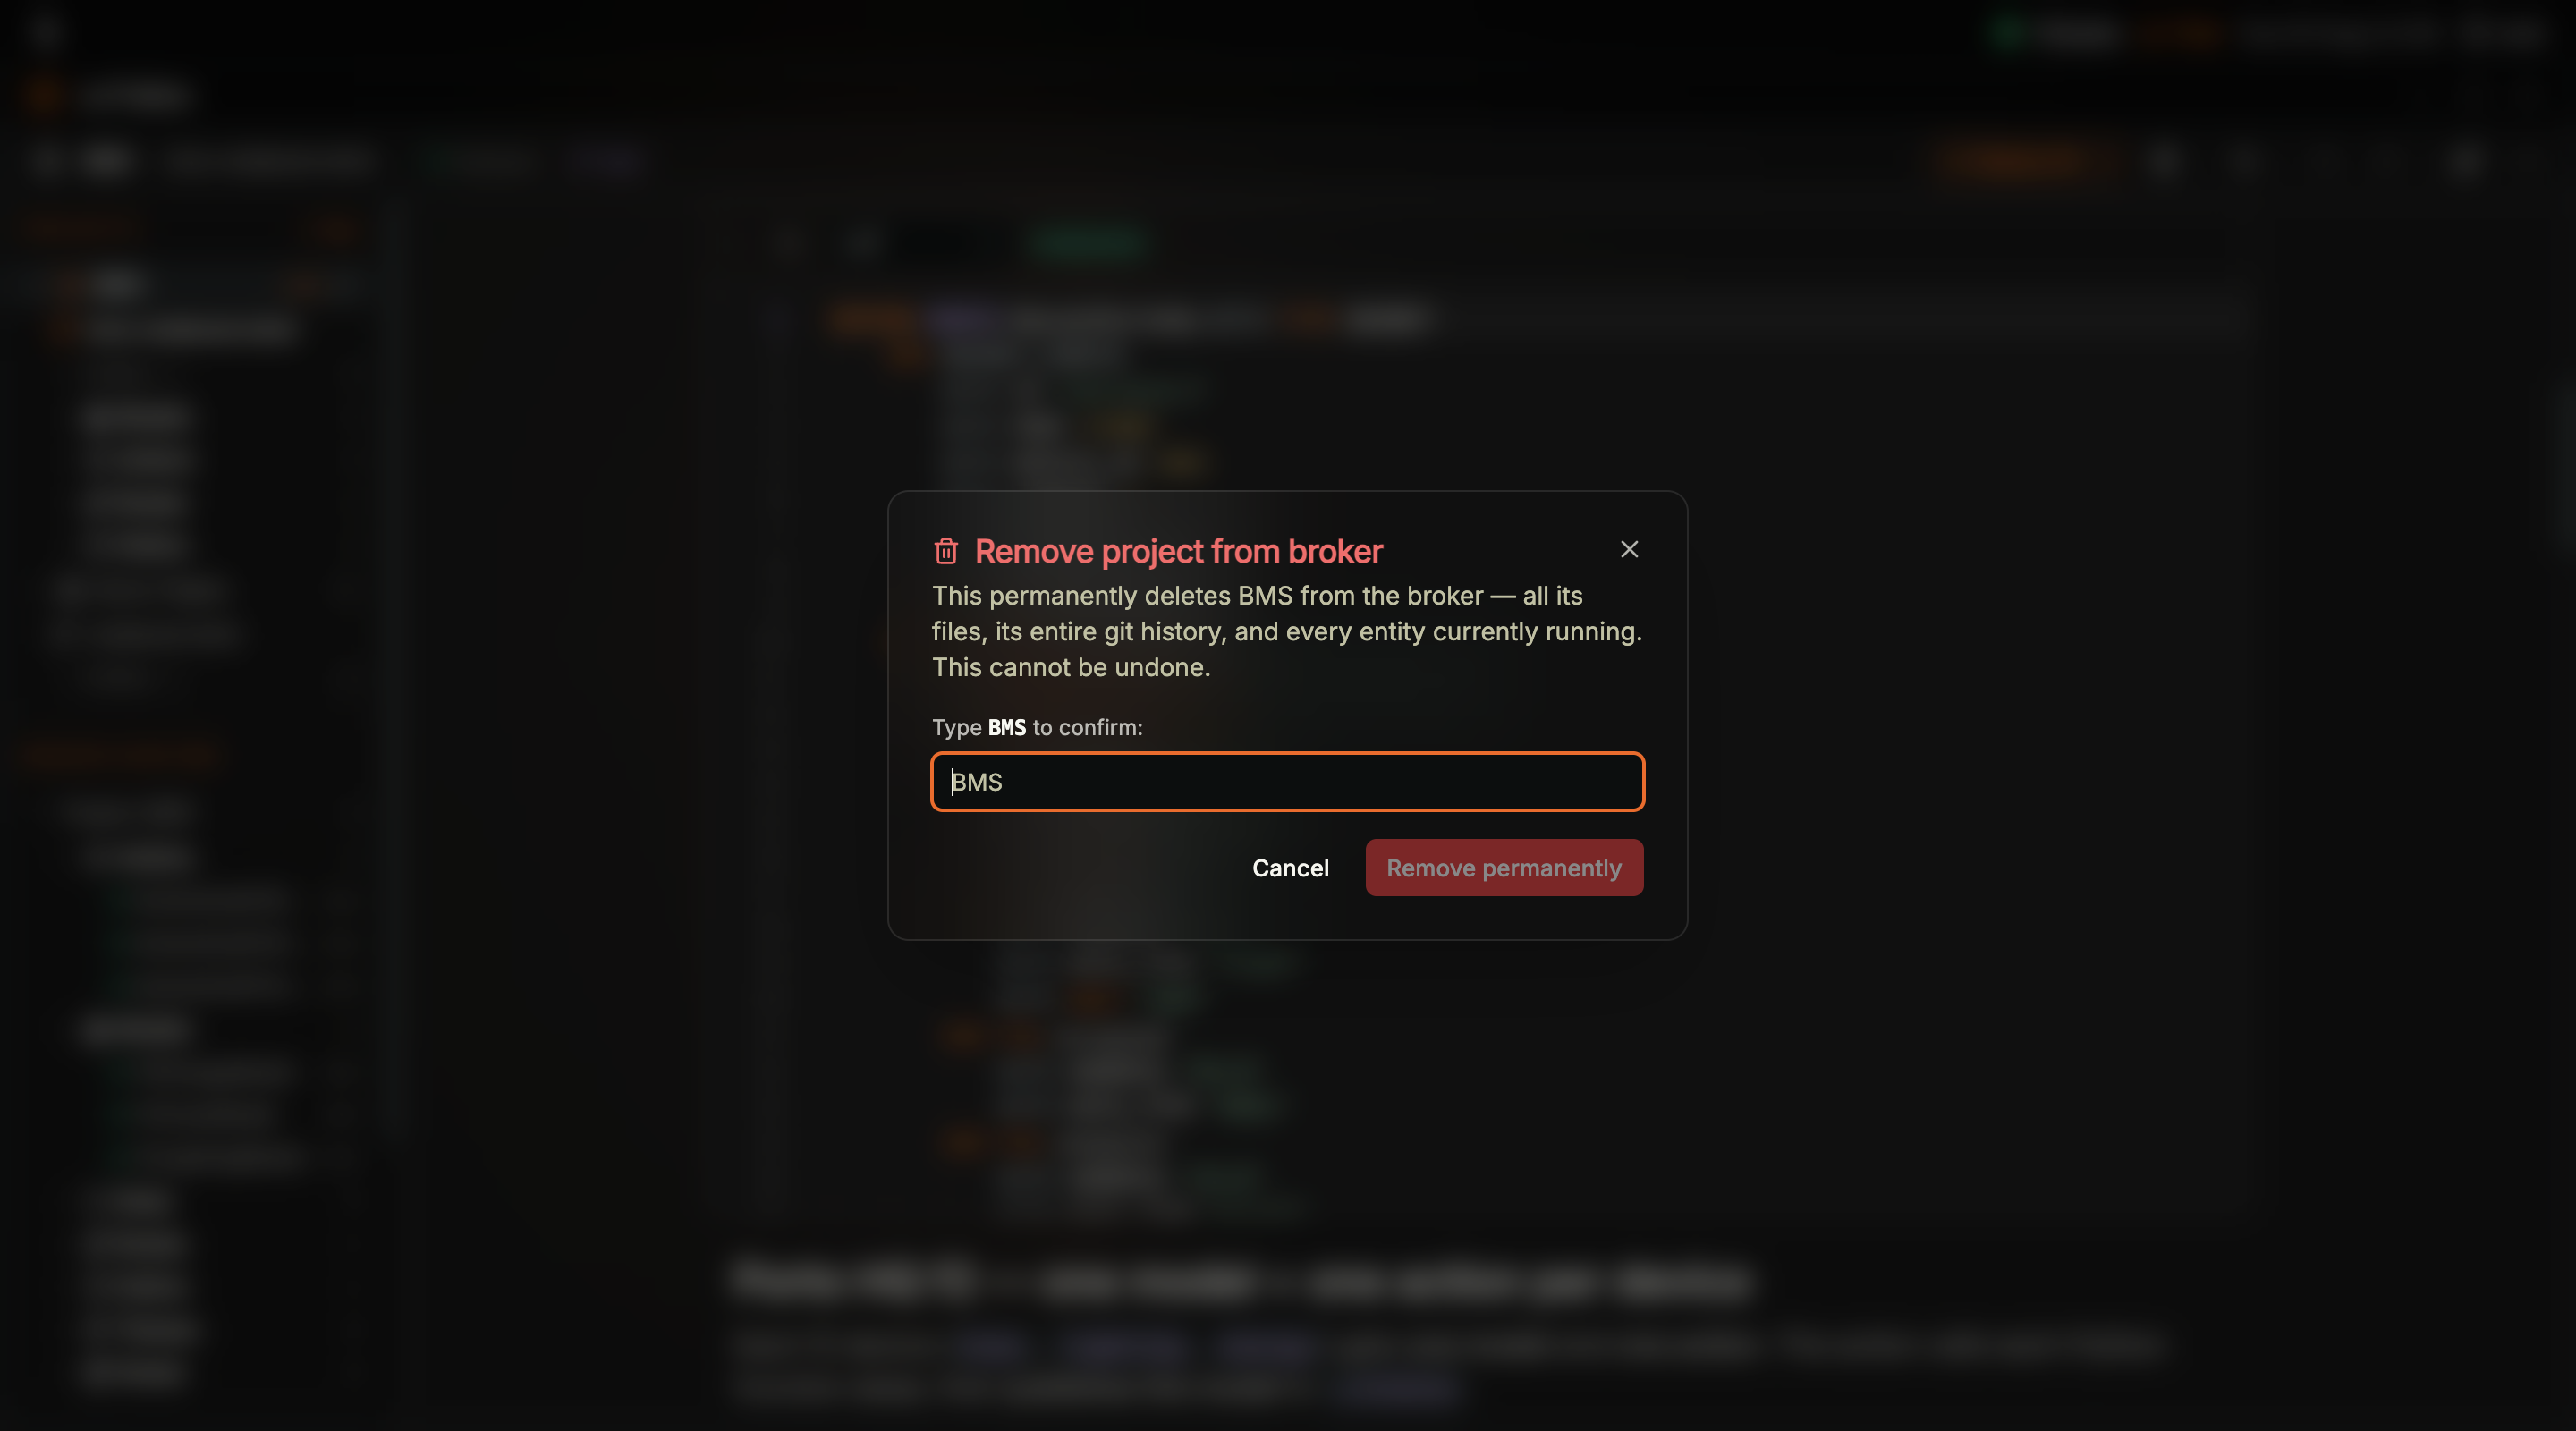
The broker project removal dialog: the description spells out that the git history goes too, and Remove permanently stays disabled until the project name is typed into the field
Rules count under Broker runtime can be small while Configuration → Internal Rules lists the broker’s locked built-ins separately.
.lotnb file is the safety net worth having before any removal. Download all to notebook… on the Entities group captures everything currently deployed, and Export open notebook as .lotnb in the header … menu writes it out as a file.Editing the Same Project From VS Code
The in-HUB editor and VS Code share the same broker-held project and git history: a project pushed from the HUB opens in the VS Code extension and vice versa, and.lotnb files move between them directly:
Import .lotnbon a project, orImport .lotnb filein the header…menu, brings a notebook from outside into that projectExport open notebook as .lotnbtakes the open notebook back outPush to brokerandPull from brokermove the whole project, which is how two people using two editors stay on one project