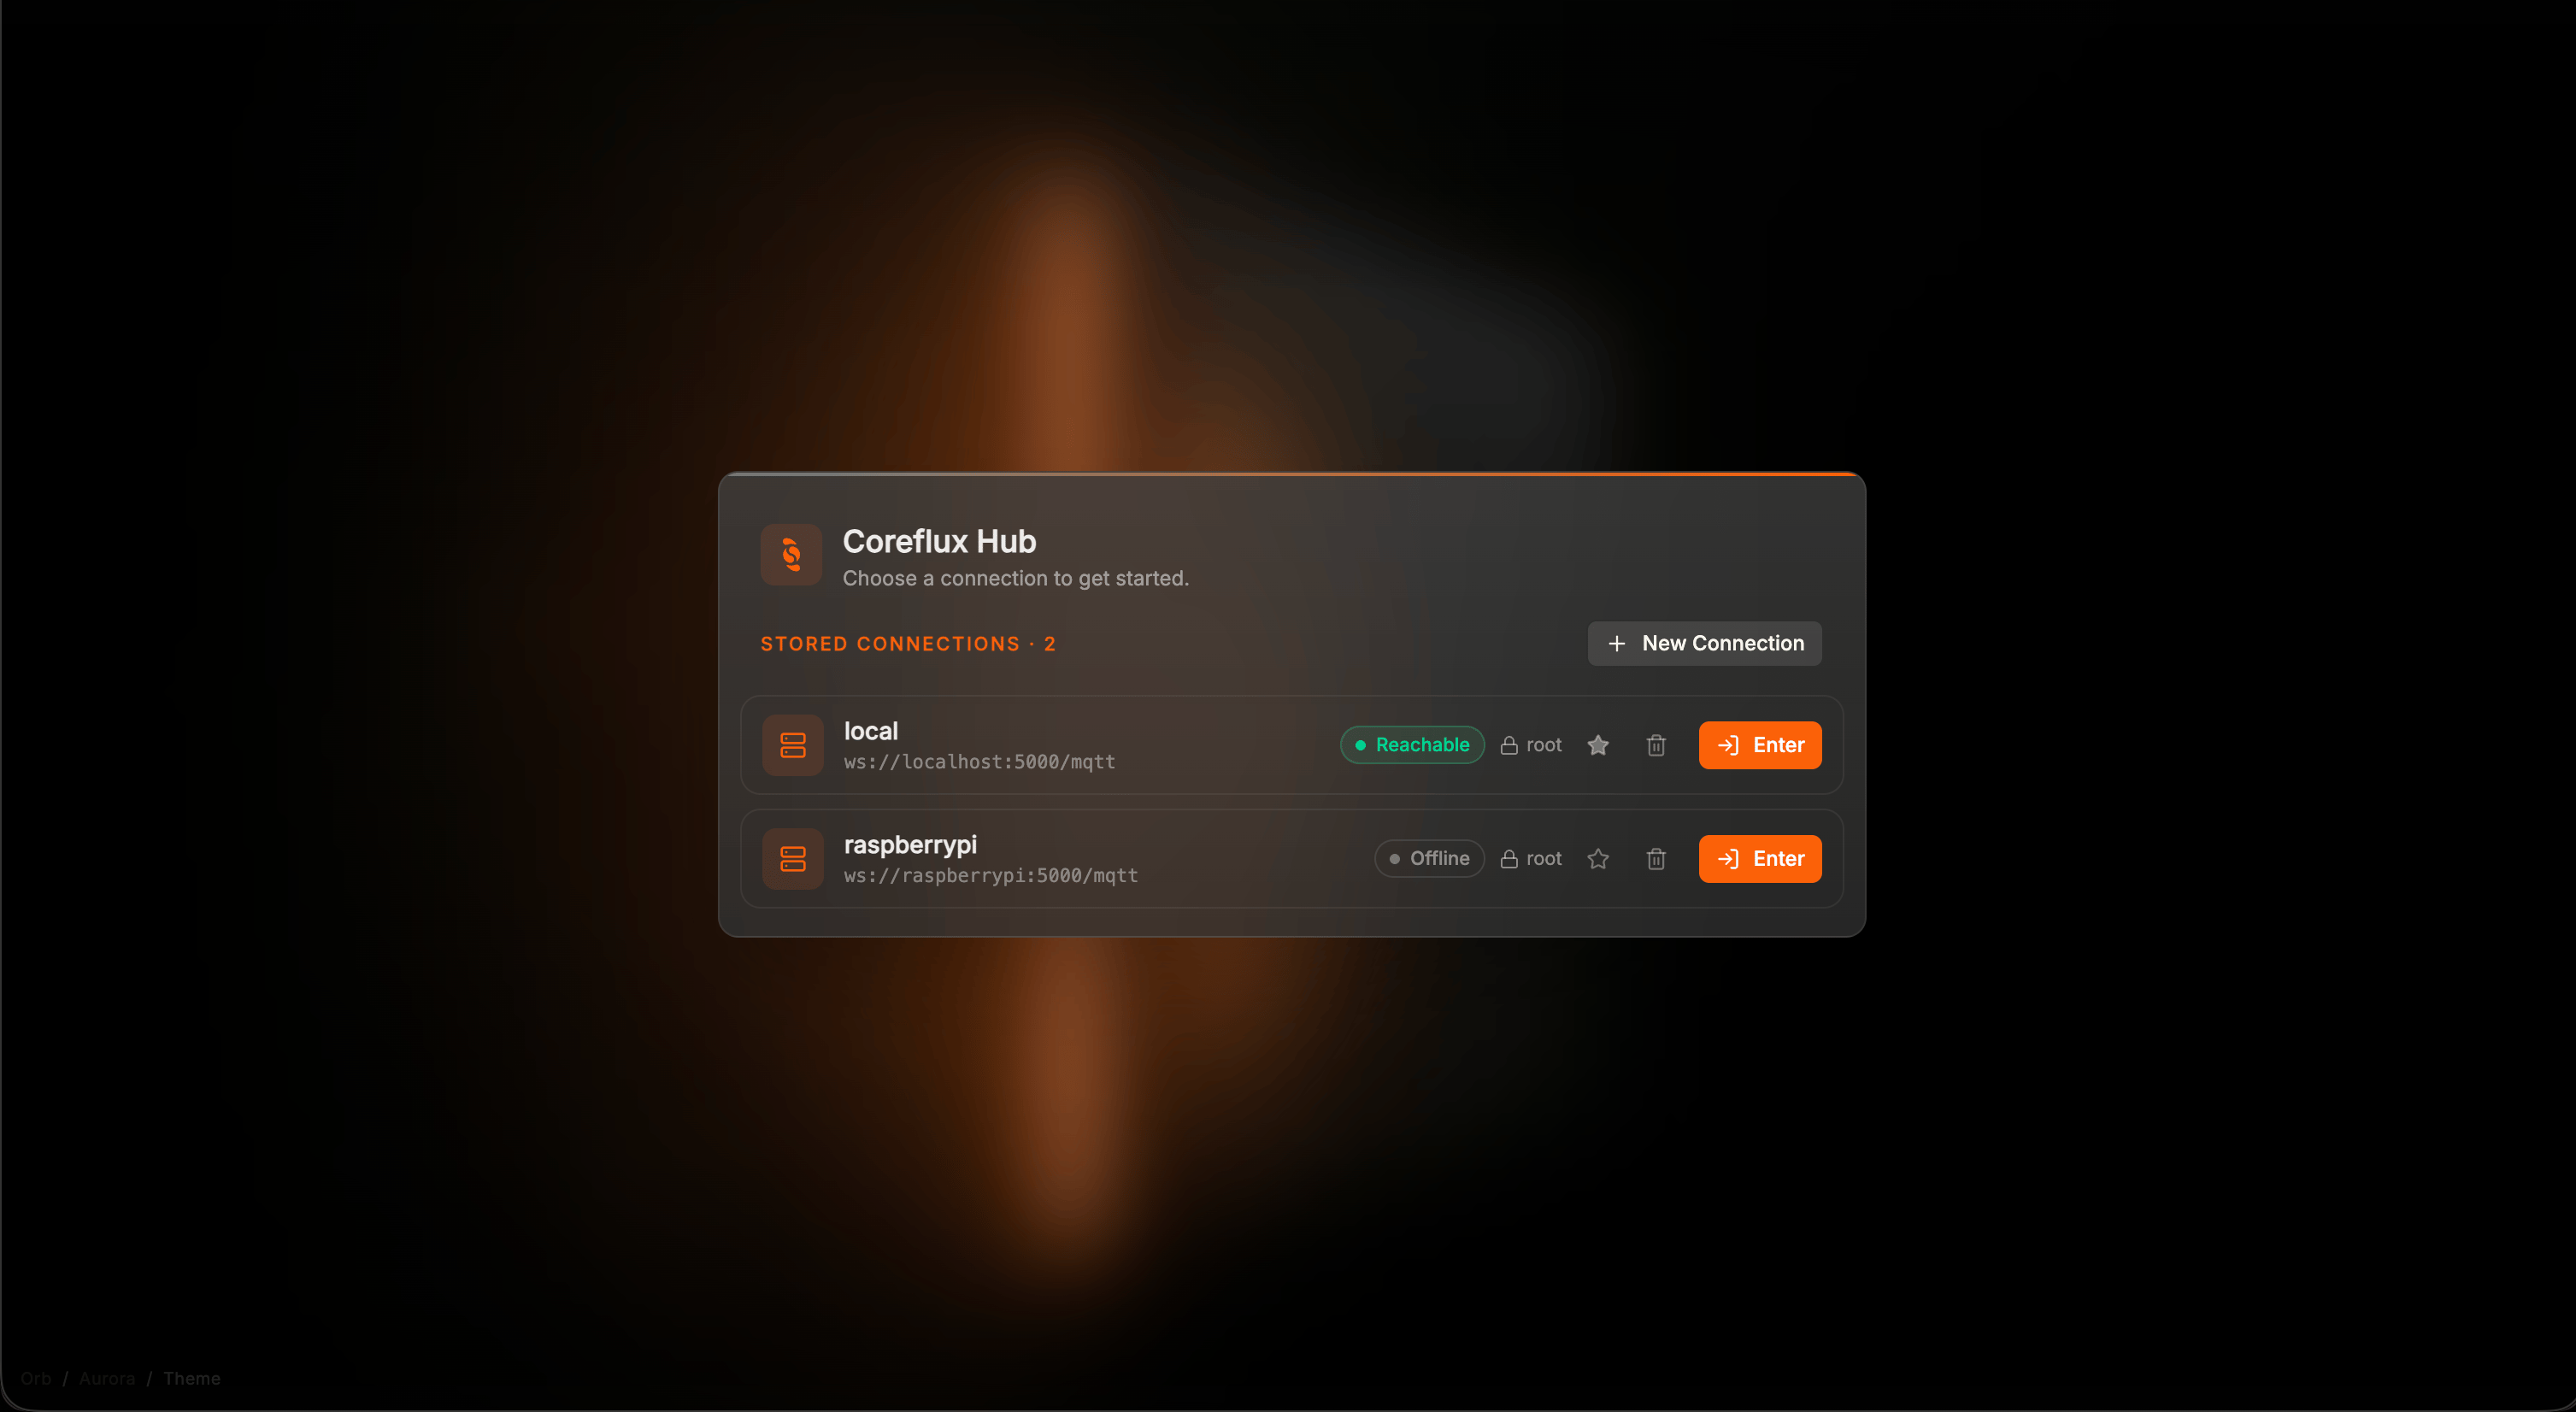
If you work with more than one broker — a local development instance, a staging cluster, a production site — the HUB remembers each one as a saved connection instead of a single remembered URL. Pick a broker from the list to sign in, probe every saved broker for reachability before you commit, and jump between brokers from the account menu without logging out and re-entering details.
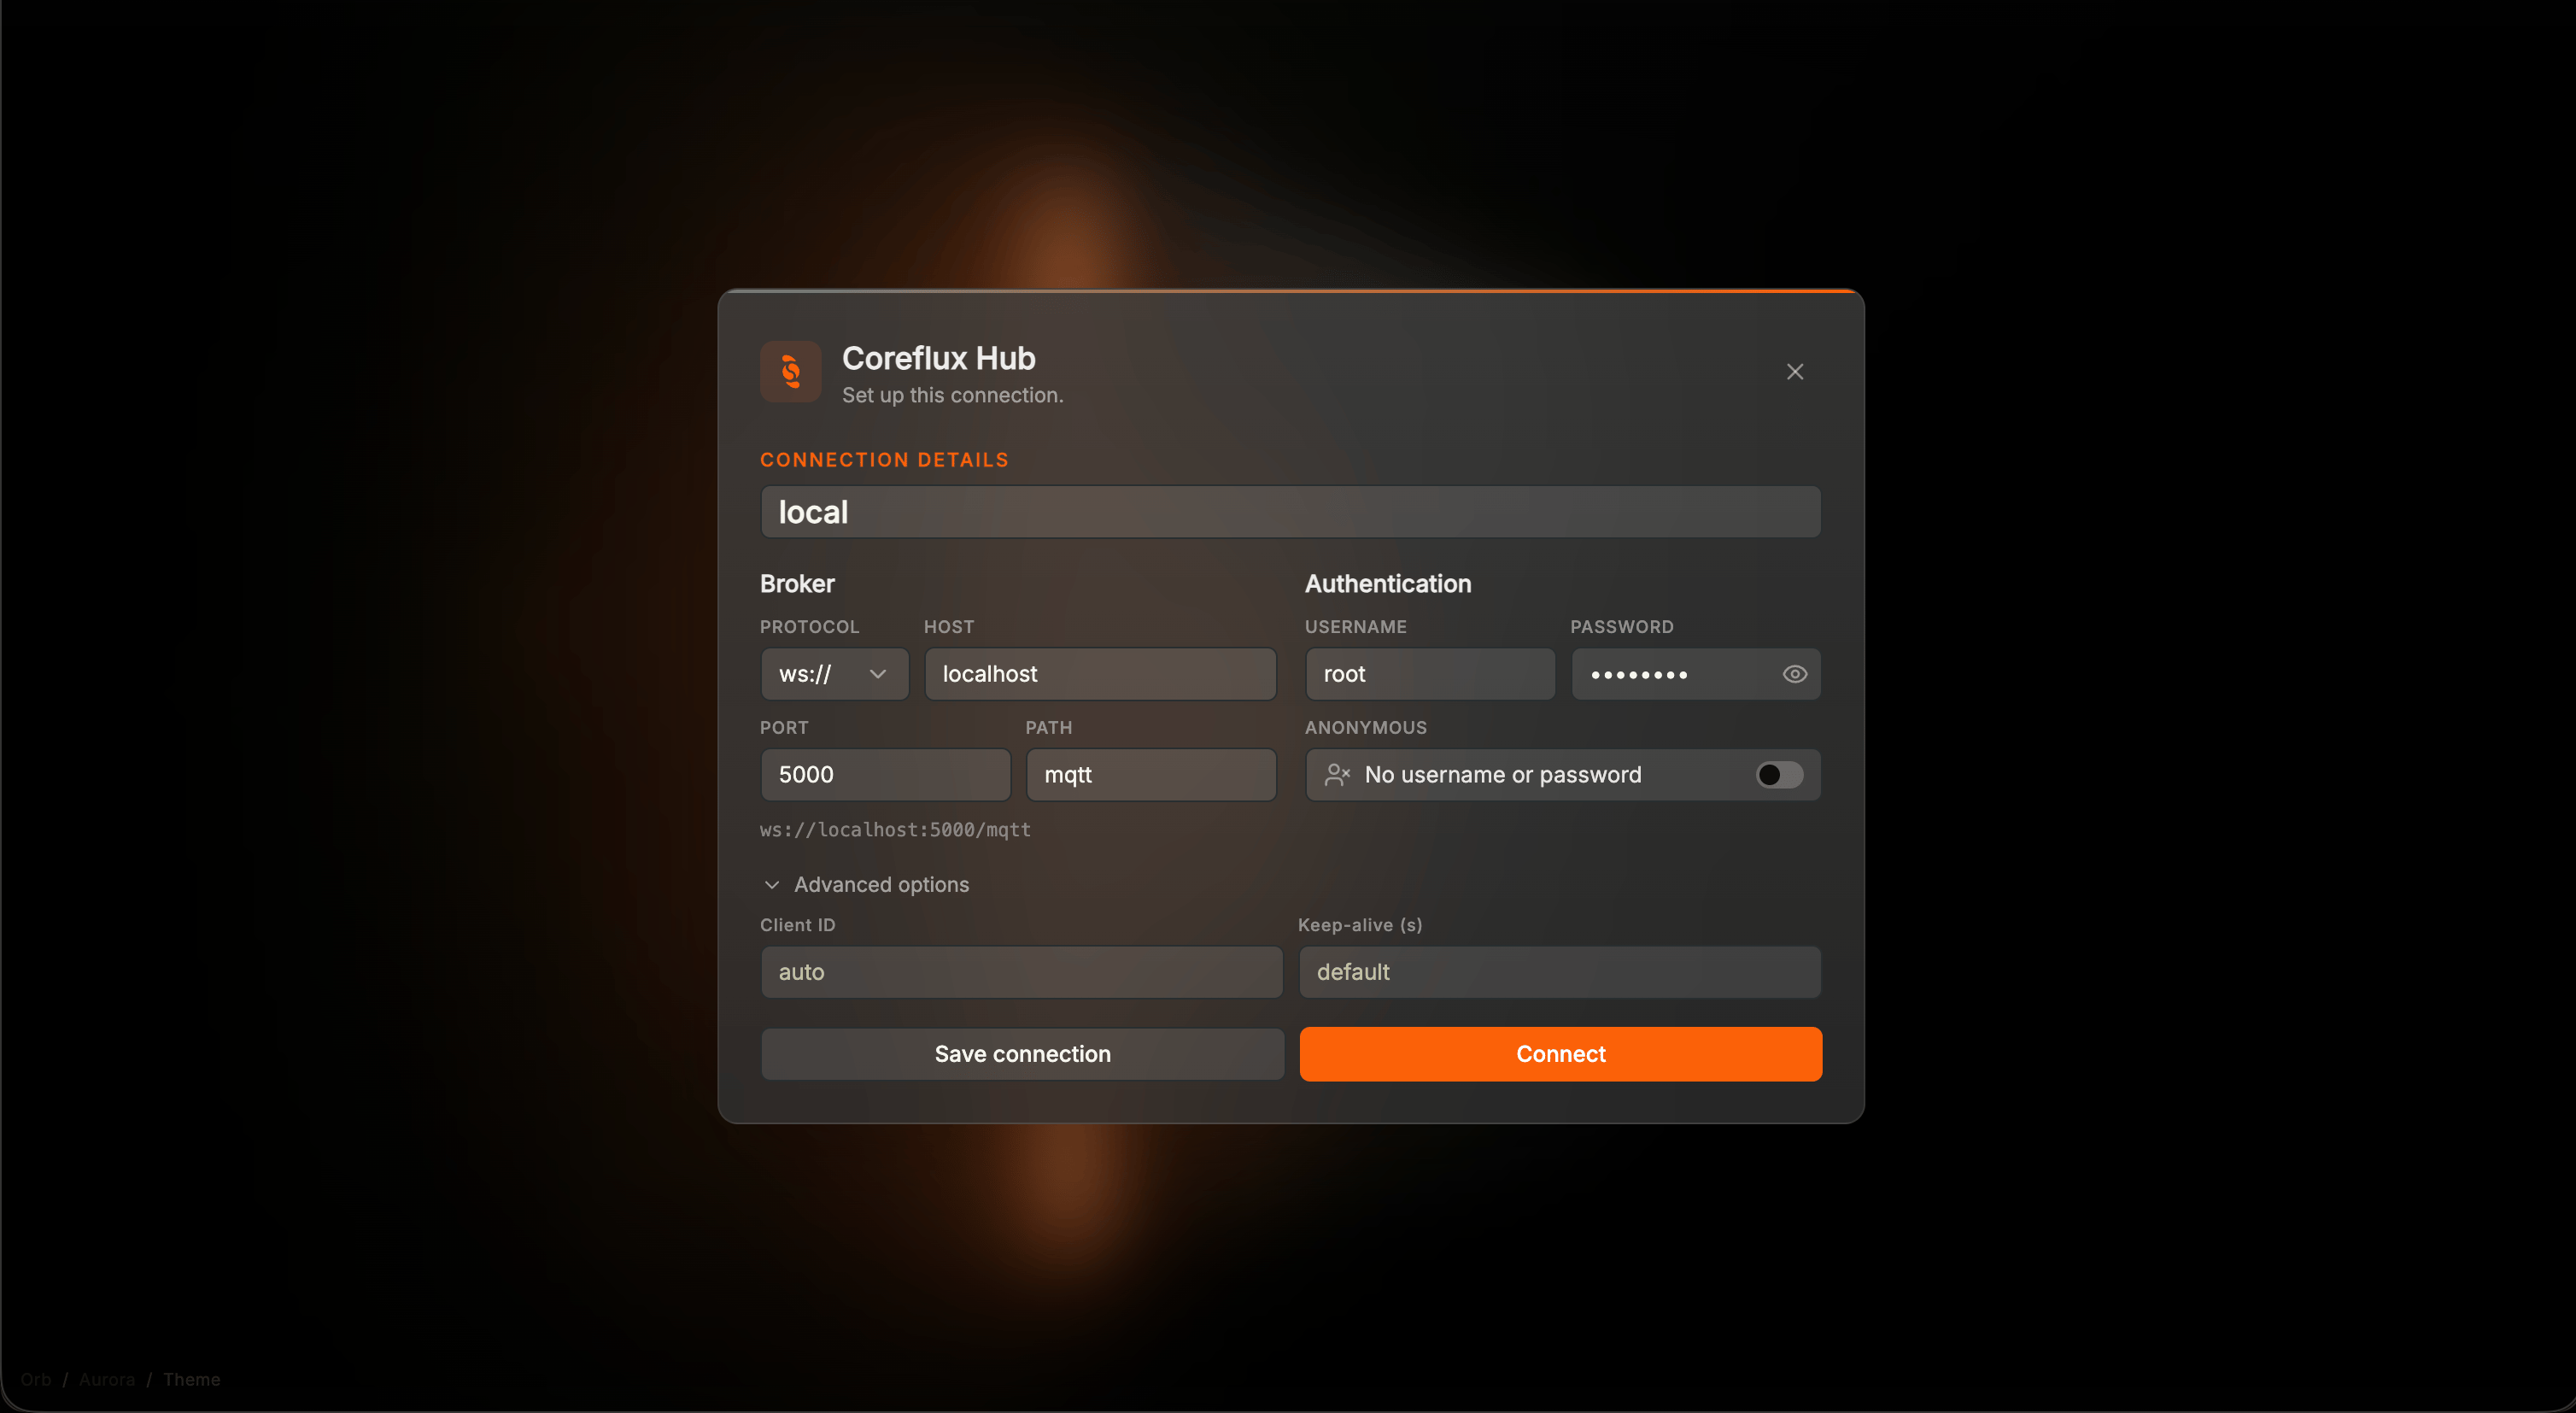
On the login screen, click New Connection in the header (or click a saved card’s edit action to modify an existing one). The connection form opens in the same card.
2
Fill in the broker details
Enter a name, the Protocol (mqtt://, mqtts://, ws://, or wss://), Host, and Port. For a HUB and broker started together with Docker Compose, use Hostbroker rather than localhost — the HUB proxies MQTT from inside Docker.
New Connection form with protocol, host, port, and an identity's username and password
3
Add an identity
Add at least one identity: a username and password, or an anonymous identity if the broker allows anonymous access. A connection can hold several identities — see Identities and Switch User below.
4
Test, then Save or Connect
Click Test to attempt a throwaway connection with the details you entered, without saving anything. Click Save to store the connection for later, or Connect to save and sign in immediately.
Each saved connection appears as a card on the login screen, showing its name, broker URL, and a Reachable status that the HUB probes automatically in the background — no need to open the connection to see whether that broker is up.
Favorites — star a connection to pin it; use the All / Starred filter above the list to narrow the view.
Reorder — drag a card to change its position in the list.
Enter — pick an identity from the card’s dropdown and click Enter, or press Enter with a card focused, to sign in.
Edit or delete — open a card to change its details, or remove it entirely.
A single saved connection can hold more than one identity — for example a day-to-day account and an admin account on the same broker. Mark one identity as the default for that connection, and switch between the others from the account menu without leaving the app: open the topbar account menu and choose Switch user to reconnect as a different identity on the current broker, or Change Broker to reconnect to a different saved connection (using that connection’s default identity). Both close the current session cleanly and reopen it against the new target.
For mqtts:// and wss:// connections, open the connection’s detail panel to attach TLS material:
A CA certificate, if the broker’s certificate isn’t already trusted by your system.
A client certificate and private key, for brokers that require mutual TLS.
Server certificate verification is on by default for secure connections; only turn it off for trusted development brokers.
This is separate from route certificate management (trust stores for OPC UA and similar routes running on the broker) — see the route’s own Certificate Management section when you configure a Route.
Desktop app — passwords and the TLS private key are encrypted at rest using your operating system’s secure storage. They are never written to the plain settings file the HUB otherwise syncs to disk.
Browser app — credentials are kept for the session and are not written to disk by the HUB; use your browser’s own security practices (a trusted device, a locked profile) when saving connections there.
The broker’s TLS certificate (the public part) can still be attached to a saved connection either way, since it isn’t sensitive.