


Opening User Management from the Coreflux HUB System menu
Why Use User Management?
You need to control who can connect to your broker—add users, set passwords, and manage access. The User Management in the Coreflux HUB lets you create, edit, and delete users without editing configuration files or using command-line tools.When to Use It
- Adding users — Create new users for devices, applications, or operators
- Updating credentials — Change passwords
- Managing permissions — Control which features each user can access
- Removing access — Delete users who no longer need broker access
Accessing User Management
In the HUB top navigation, select System, then User Management. The user accounts table shows all configured users with their permissions.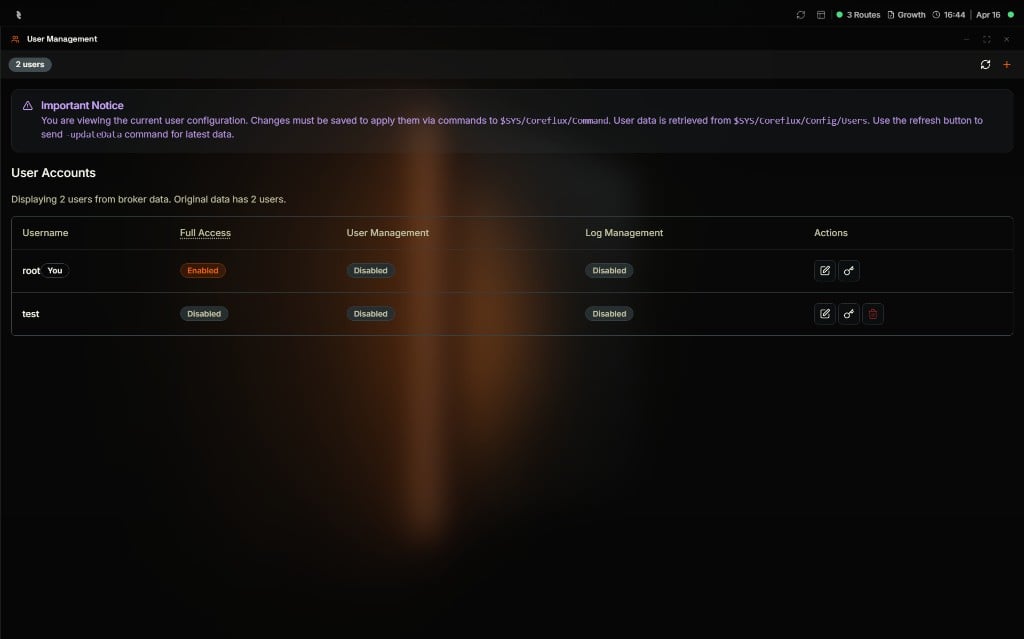
User Management showing the user accounts table with permission toggles and action buttons, and an Important Notice about saving changes
User Permissions
Each user has three permission categories, controlled by toggles:
Toggle permissions on or off for each user. The
root user has special permissions that cannot be fully modified.
Creating a User
- Click the + button in the top-right corner.
- The Add New User modal opens.
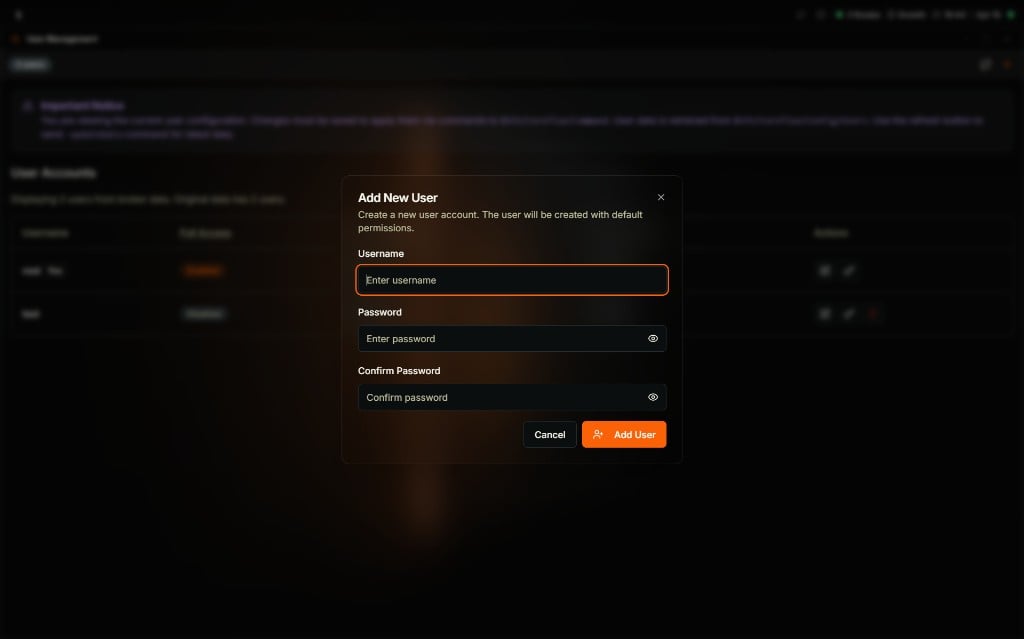
Add New User modal with Username, Password, and Confirm Password fields and a Create a new user account description
- Enter a username and password (with confirmation).
- Click Add User. The user is created with default permissions and can now connect to the broker.
Editing a User
Toggle permission switches directly in the user table to modify access. When you change a permission, the user row shows a Modified badge and action buttons appear: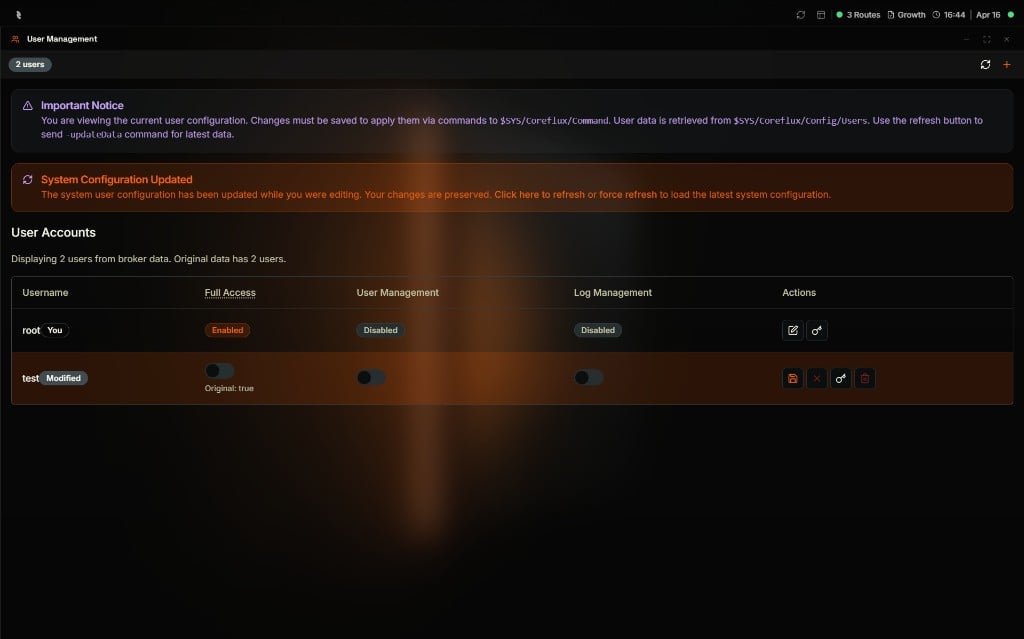
User Management with a modified user row and a System Configuration Updated banner, showing save, cancel, change password, and delete actions
The header bar shows badges for modified users and System Updated status when the broker configuration changes while you are editing.
Deleting a User
Click the delete (trash) icon next to a user and confirm the deletion. Theroot user cannot be deleted.
Next Steps
MQTT Broker Configuration
Learn about authentication and security options.