

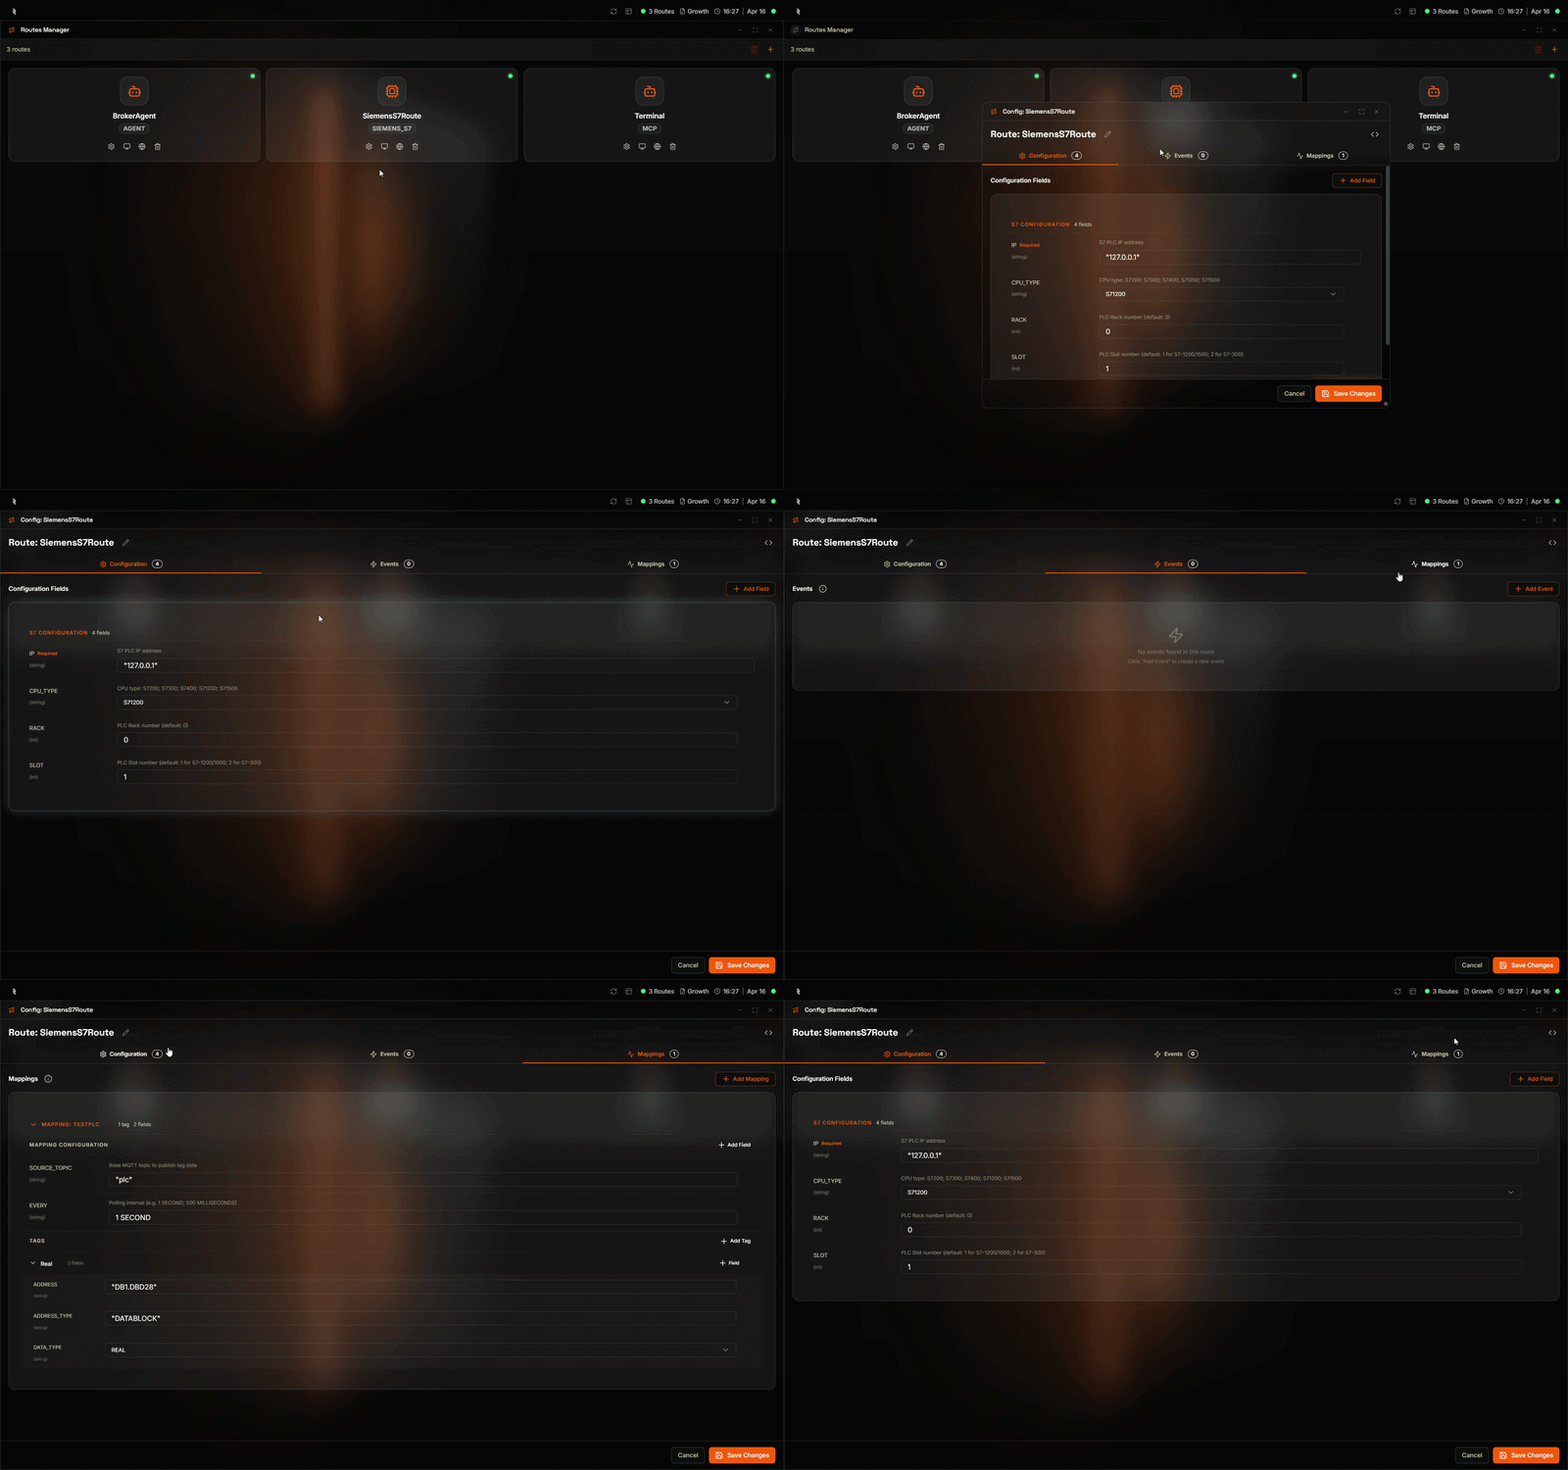
Route Configuration panel in the Coreflux HUB — edit settings, events, mappings, and tags in Visual or LoT mode
Why Configure Routes in the Coreflux HUB?
You need to adjust route settings—connection parameters, events, mappings, and tags—without editing files or publishing MQTT commands. The Route Configuration in the HUB lets you edit routes with a form-based Visual Mode or switch to LoT Mode to modify the raw LoT code by hand.When to Use It
- Updating connection settings — Change IP, port, credentials, or other config fields
- Adding events or mappings — Extend a route with new events, mappings, or tags
- Switching modes — Use Visual Mode for guided editing or LoT Mode for full control
Visual Mode vs LoT Mode
LoT Mode
Switch to LoT Mode to view and edit the full route definition as LoT code. This gives you direct control over the syntax and is useful for copying configurations or making bulk changes.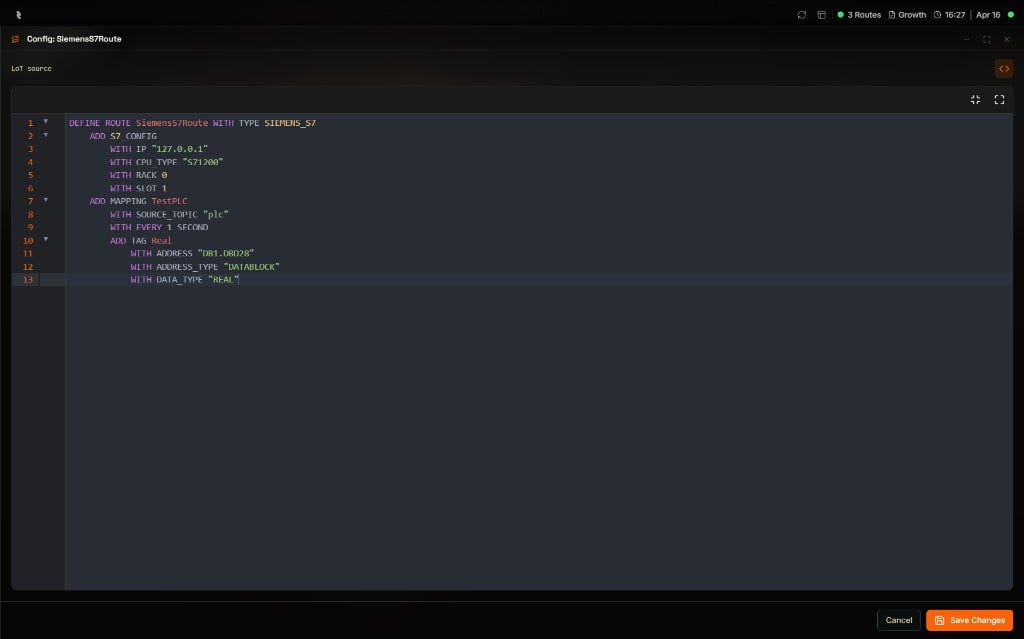
LoT source editor in Config: SiemensS7Route showing the full route definition as editable LoT code with Cancel and Save Changes controls
Renaming Elements
You can rename routes, events, mappings, and tags directly from the configuration panel. Click the pencil icon next to any element name to turn it into an editable text field, type the new name, and press Enter to confirm. A Renamed badge appears briefly to confirm the change. This works the same way for all element types:- Route name — Displayed at the top of the configuration panel
- Event name — Displayed in the Events tab header for each event
- Mapping name — Displayed in the Mappings tab header for each mapping
- Tag name — Displayed in the tag header within a mapping
Configuration Tab
The Configuration tab shows the route’s connection and protocol settings (e.g.,S7_CONFIG, SQL_CONFIG, MODBUS_CONFIG). Each field displays its name, whether it is required or optional, its data type, and a description.
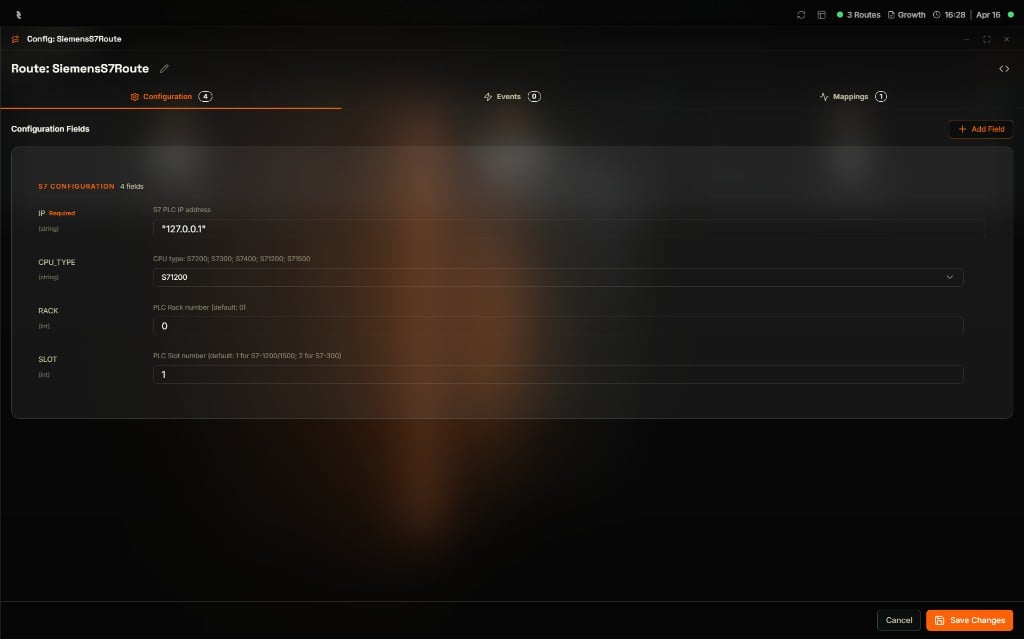
Configuration tab for Route: SiemensS7Route showing the S7 Configuration fields with types, descriptions, and current values
- View fields — See all configuration fields with their types and descriptions
- Edit field — Change values in the input fields
- Add field — Click + Add Field to add optional fields from a list of available parameters
- Delete field — Use the delete icon on a field to remove it
Adding a Configuration Field
Click + Add Field to open the Add Configuration Field modal. This shows all optional fields available for the route type, along with their data types and descriptions.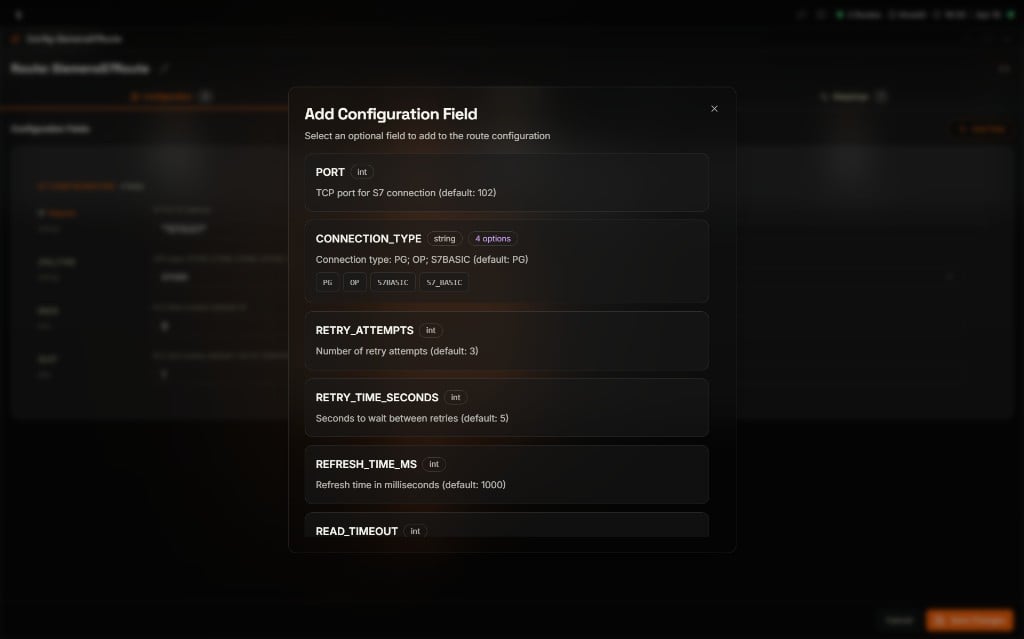
Add Configuration Field modal listing the optional parameters available for a Siemens S7 route
Events Tab
The Events tab manages event definitions for the route. Events define how the route reacts to MQTT messages—typically by reading from or writing to the connected device or service.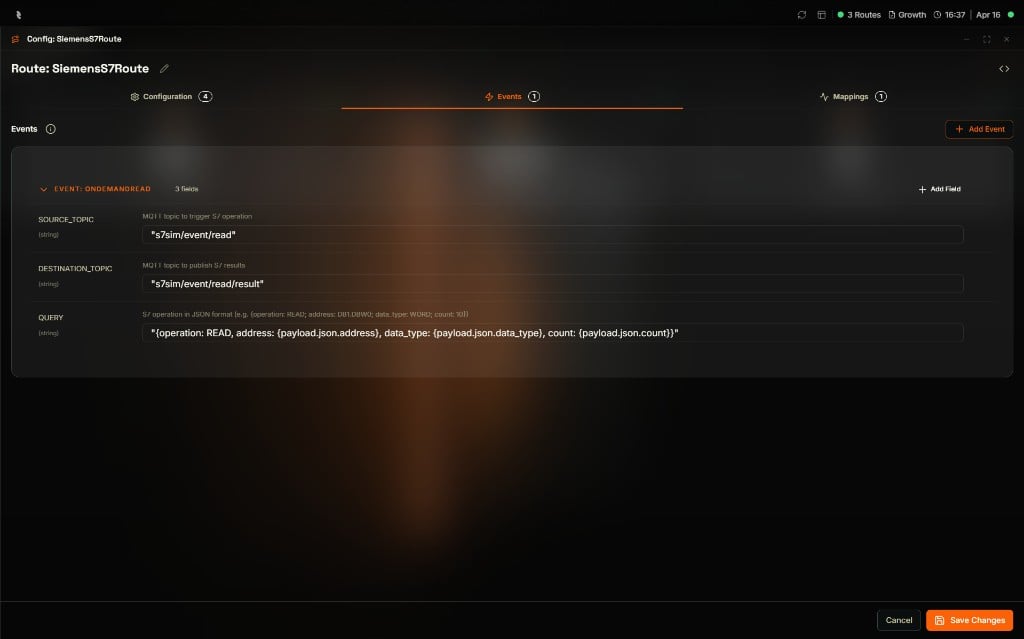
Events tab for Route: SiemensS7Route showing the OnDemandRead event with SOURCE_TOPIC, DESTINATION_TOPIC, and QUERY fields
- Add Event — Click + Add Event to create a new event with a name and fields
- Rename event — Click the pencil icon next to the event name to rename it
- Edit event — Expand an event to view and edit its fields (e.g.,
SOURCE_TOPIC,DESTINATION_TOPIC,QUERY) - Add field — Use + Add Field within an event to add optional fields
Adding an Event Field
Click + Add Field inside an event to open the Add Event Field modal. This shows the optional fields available for the event.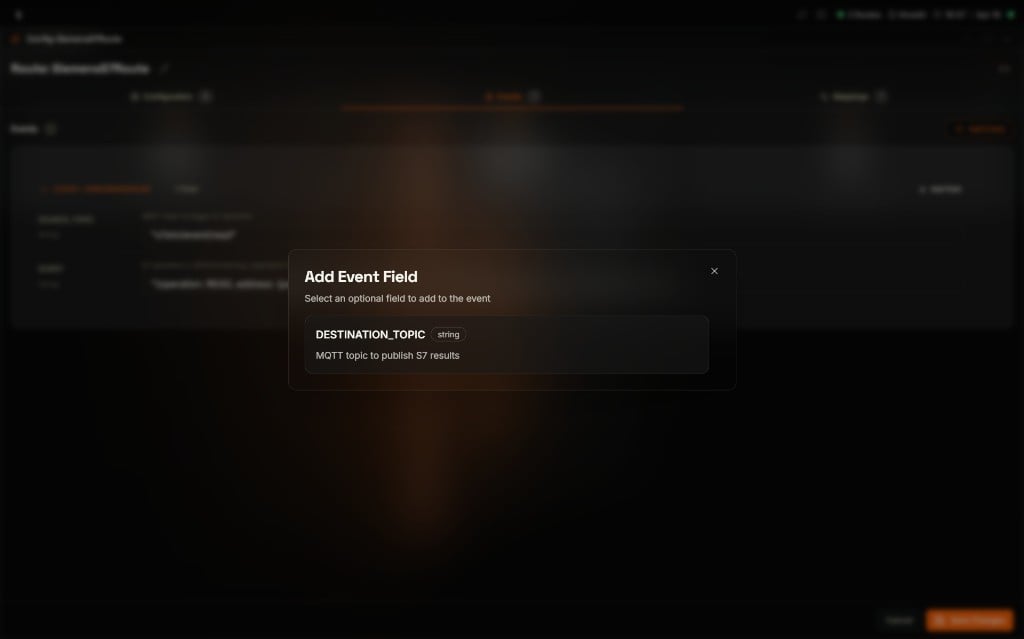
Add Event Field modal showing the optional DESTINATION_TOPIC field available for the event
Mappings Tab
The Mappings tab manages mapping definitions and tags. Mappings define periodic data polling from a connected device—reading tags at a set interval and publishing the data to MQTT topics.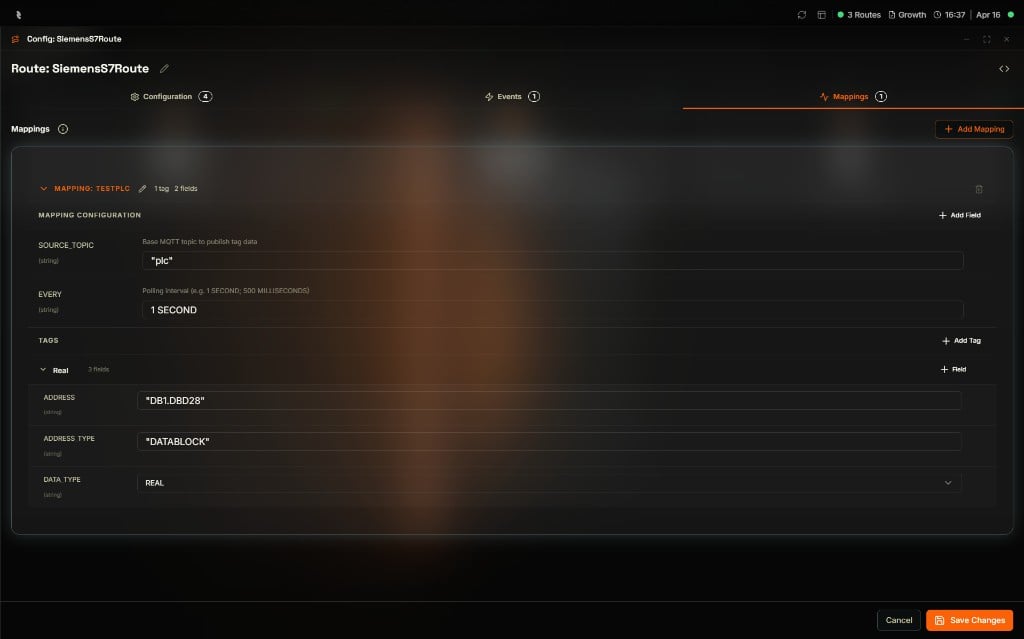
Mappings tab for Route: SiemensS7Route showing the TestPLC mapping with SOURCE_TOPIC and EVERY fields and a Real tag with address and data type properties
- Add Mapping — Click + Add Mapping to create a new mapping with a name, mapping fields, and tags
- Rename mapping — Click the pencil icon next to the mapping name to rename it
- Edit mapping — Expand a mapping to edit its configuration (e.g.,
EVERY,SOURCE_TOPIC) and tags - Add Tag — Use + Add Tag within a mapping to add tags with address, data type, and other properties
Adding a New Mapping
Click + Add Mapping to open the Add New Mapping modal. Enter a mapping name, then use + Add Field and + Add Tag to build the mapping.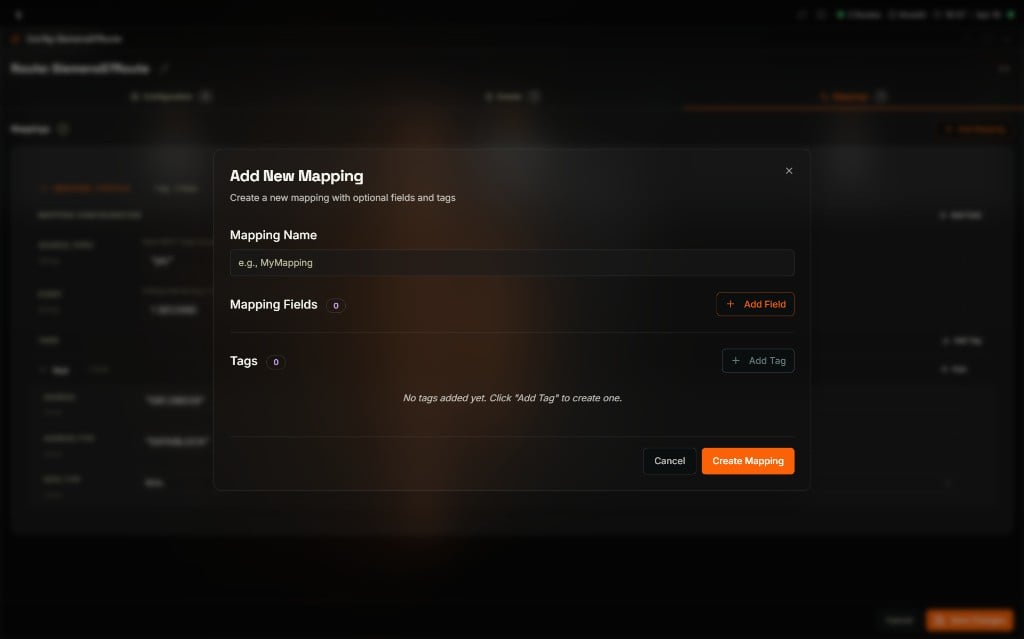
Add New Mapping modal with a name field, a mapping fields section, and a tags section, plus Cancel and Create Mapping actions
Adding a Mapping Field
Click + Add Field inside a mapping to open the Add Mapping Field modal. This shows the optional fields available for the mapping, such asDESTINATION_TOPIC and QUERY.
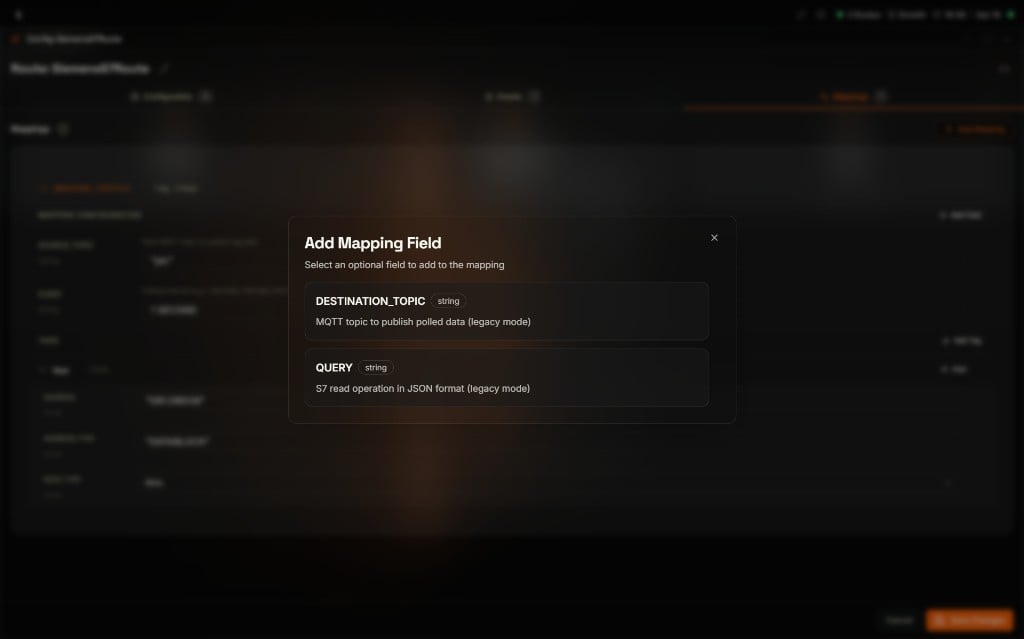
Add Mapping Field modal showing the optional DESTINATION_TOPIC and QUERY fields available for the mapping
Tags
Tags are defined inside mappings. Each tag represents a data point to read from the connected device. You can add, edit, rename, and remove tags and their properties (address, address type, data type, scaling, unit, etc.) from the Mappings tab. To rename a tag, click the pencil icon next to the tag name.Saving and Canceling
- Save Changes — Applies all edits to the broker
- Cancel — Discards unsaved changes and closes the configuration panel