Configuration
After successfully installing a broker and establishing a connection, you have the capability to configure and manage its settings and users. This section guides you through these processes.
Accessing Configuration Options:
Configuration settings can be accessed through either the Hub Access page or the Home page. The available options on these pages are identical, providing a consistent user experience.
Steps to Configure Your Broker:
- Navigate to the Configuration or Home page.
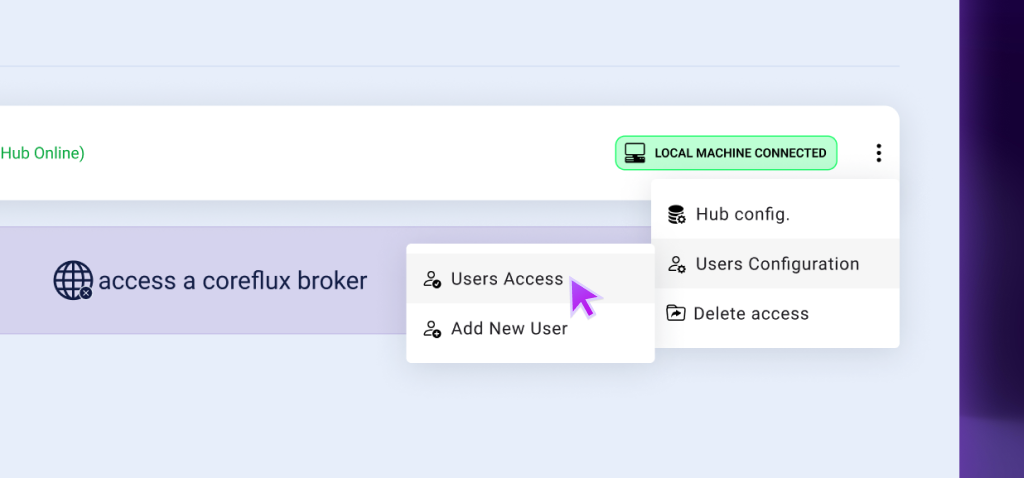
- Locate the broker's section. Hover your mouse over the three dots button to reveal additional options.
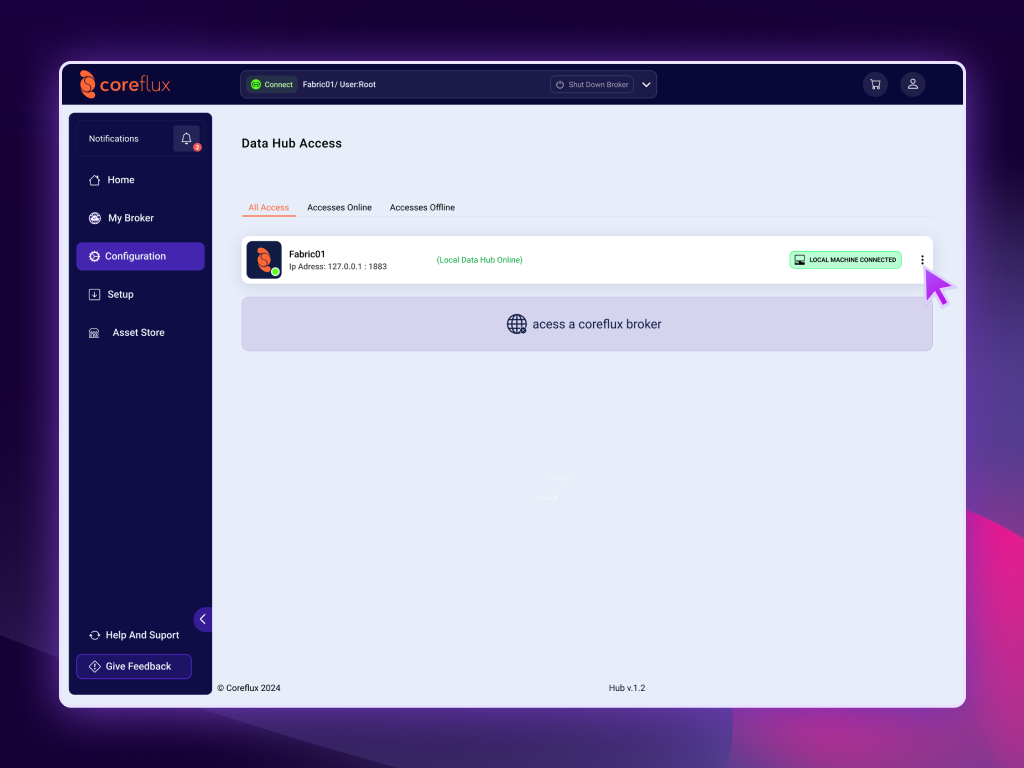
Configuration Options
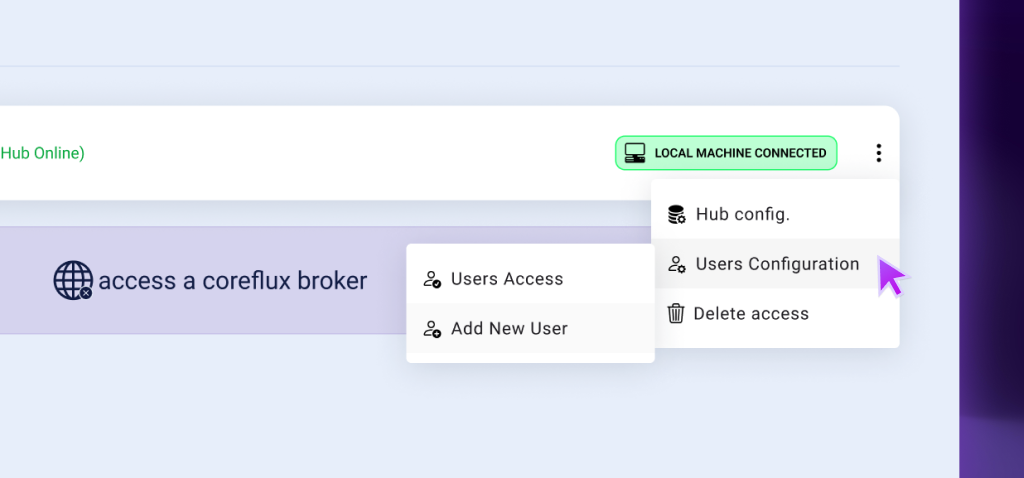
Upon accessing the configuration settings, you will find three main options to manage your broker:
- Hub Config: Initiate and manage the configuration settings of your broker here.
- Users Configuration: Manage all user-related settings under this option, which includes:
- Users Access: View a list of all users. A root user, or any user with root permissions, can modify the passwords and permissions of other users, excluding the root.
- Add New User: Use this feature to register a new user to the broker.
- Delete Access: Select this option to remove the current broker access configuration.
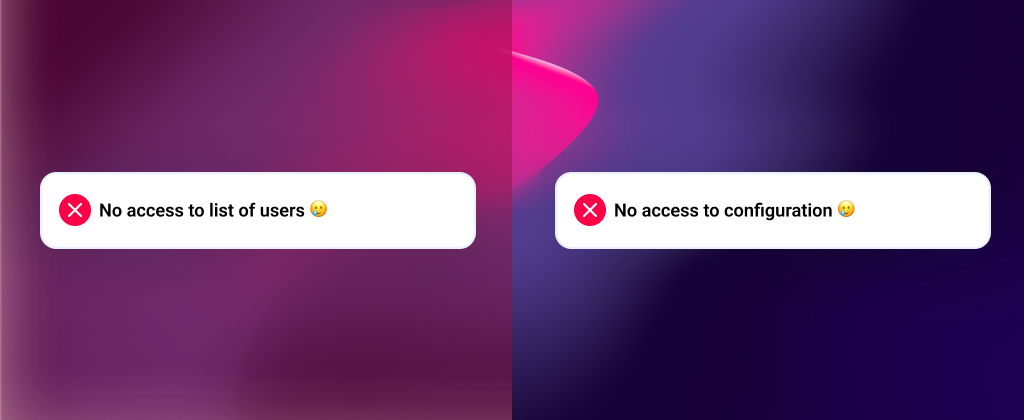
If your user doesn't have access to all the system configuration, an error pop up will be shown in user access option and Hub Config.
Hub Config
To begin configuring your Coreflux broker, click on Hub Config. This will open a menu with various options to customize and manage your broker settings.
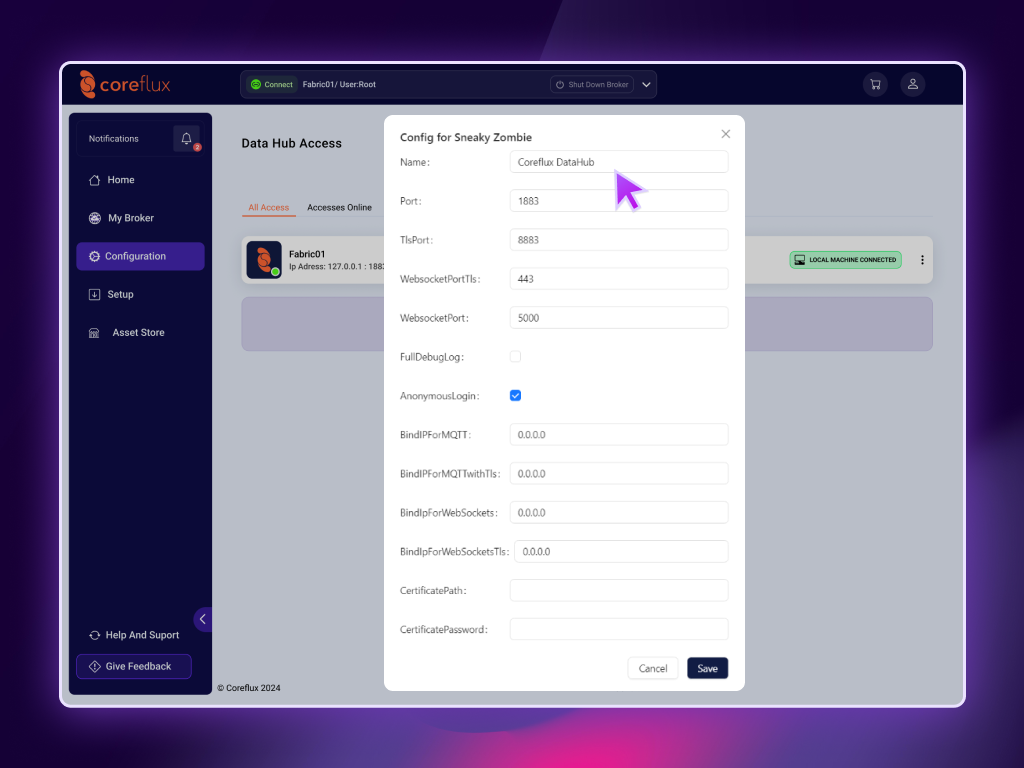
Managing Broker Configuration
This section displays all configurable fields for the broker. If you require detailed information about each field, please refer to our Configuration Overview in the documentation.
Once you have adjusted the settings to your preferences, click the Save Config button, a blue button located at the bottom of the page. Upon saving, a confirmation popup will appear to verify that your changes have been successfully stored.
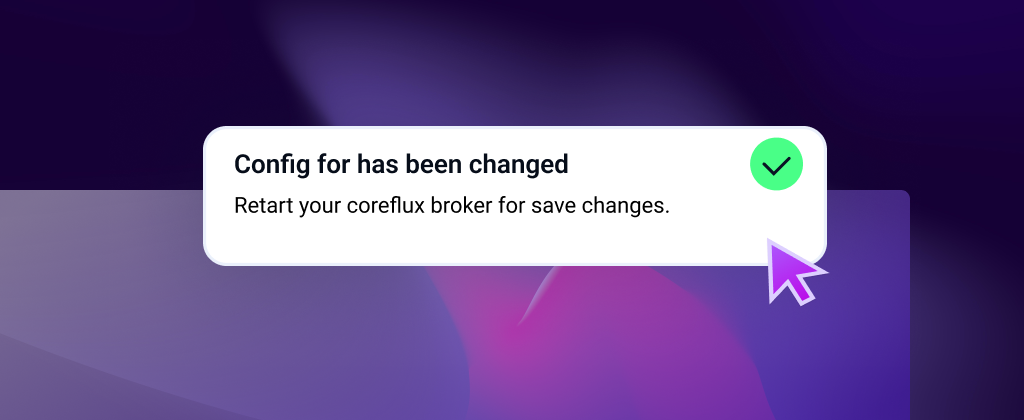
Important Note: The new configuration settings will not take effect until the Coreflux broker is restarted. For detailed guidance on this process, please visit the Configuration Hubless page in our documentation.
User Configuration
User Access
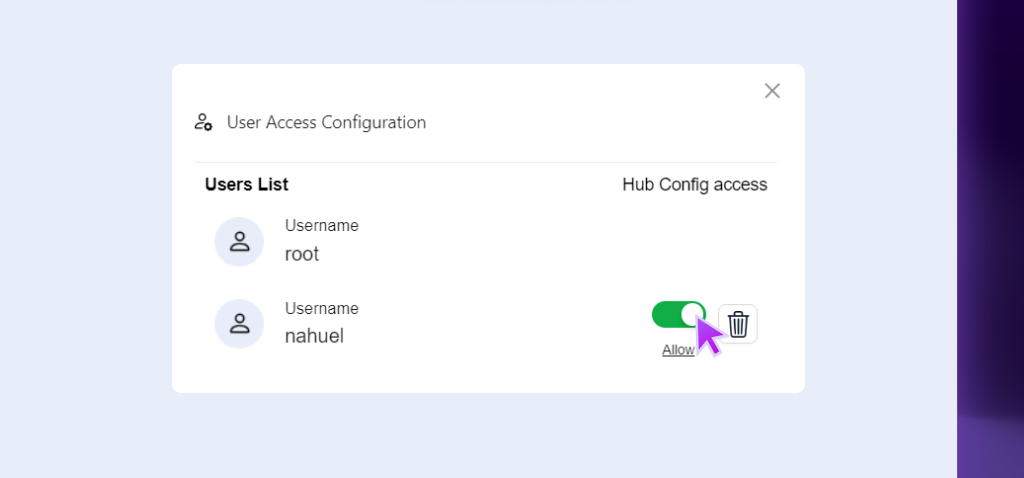
To view a list of all users associated with the broker, click the User Access button. This will display a list of all registered users, as shown in the image below.
Changing User Permissions
To modify a user's permissions:
- Click the switch button next to the user's name. This action toggles their ability to access system configuration settings, similar to permissions granted to a root user.
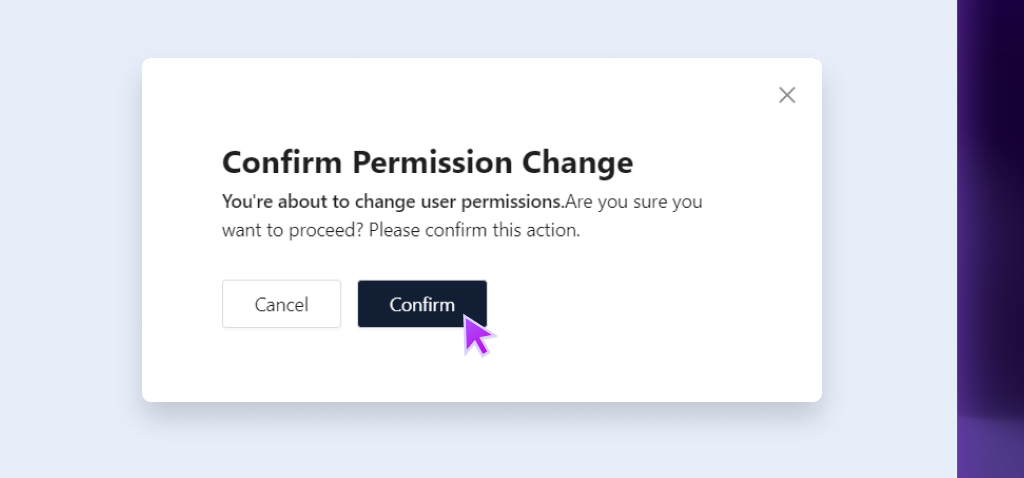
- A confirmation pop-up will appear to ensure the change is intentional. Confirm the modification to apply the new permissions.
Click Confirm button and after that the user will have permissions to change the system configuration.

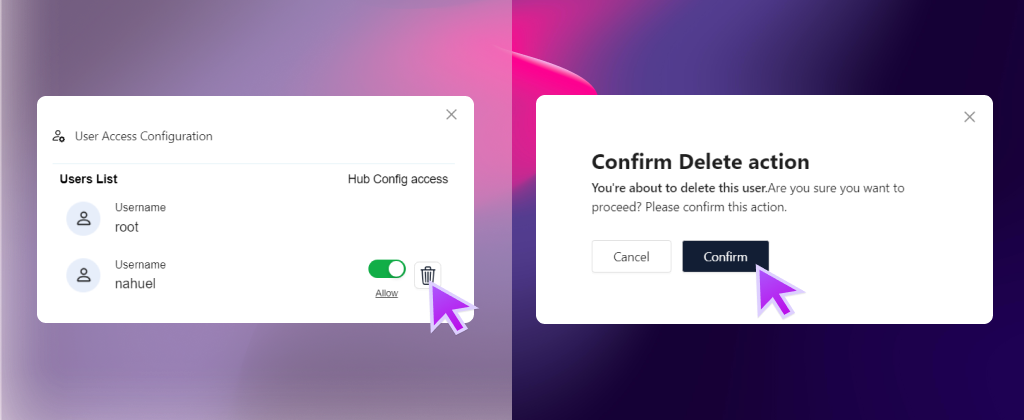
Delete a User
To remove a user from the broker:
- Locate the User: Find the user you wish to delete in the user list.
- Initiate Deletion: Click on the trash can icon located on the right side of the switch button for
- Confirm Deletion: A confirmation popup will appear to ensure that you want to proceed with
- Complete the Deletion: Click 'Confirm' on the popup to permanently delete the user.
Change Password
To update a user's password:
- Select the User: Click on the user whose password needs to be changed. This action will display the password change form.
To change the password, click on the user and the form for change the password will be shown.
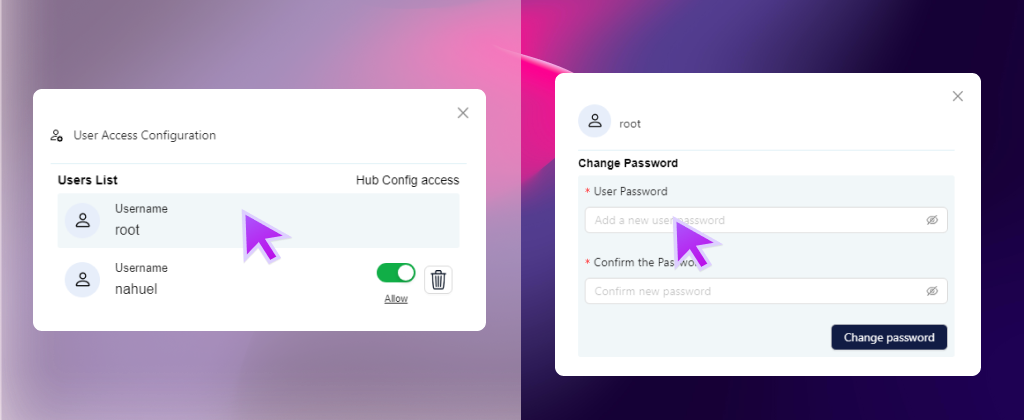
Fill the inputs with the new password, to complete click in Change Password button.
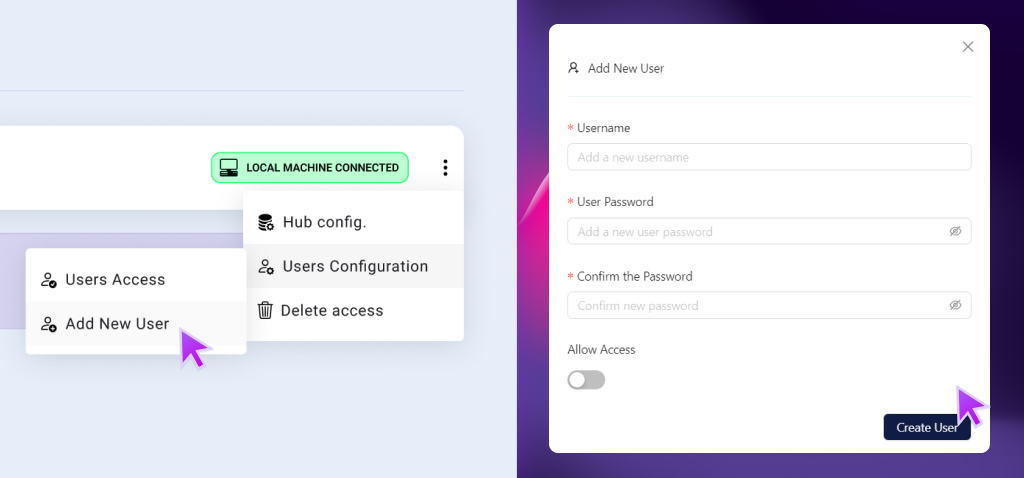
Add a New User
To register a new user to the system:
- Initiate User Addition: Click the Add New User button. This will open a form where you can enter the new user’s details.
- Enter User Details: Fill in the required fields with the new user’s information.
- Set Access Permissions: If you want to grant the new user system configuration access immediately, select the Allow Access option. This step ensures the user has the necessary permissions without requiring later adjustments.
- Create User: After entering all details and setting permissions, click the Create User button.
- Confirmation: A success confirmation pop-up will appear if the user is successfully added to the system.
Delete an Access
To remove access data to a broker:
- Initiate Deletion: Click the Delete Access button. This action will permanently remove all associated data from the historical files.
- Confirmation: You may be prompted to confirm your decision to ensure that you do not accidentally delete important data.
Video Tutorial: For a detailed walkthrough of this process, watch the video tutorial linked below: