Connector installation and configuration
In this section, we detail the process of purchasing, installing, and managing a connector. Follow these steps to efficiently set up your connectors within the Coreflux system.
Logging into Your Account
To begin, you must log in to your Coreflux account. Here's how to access your account:
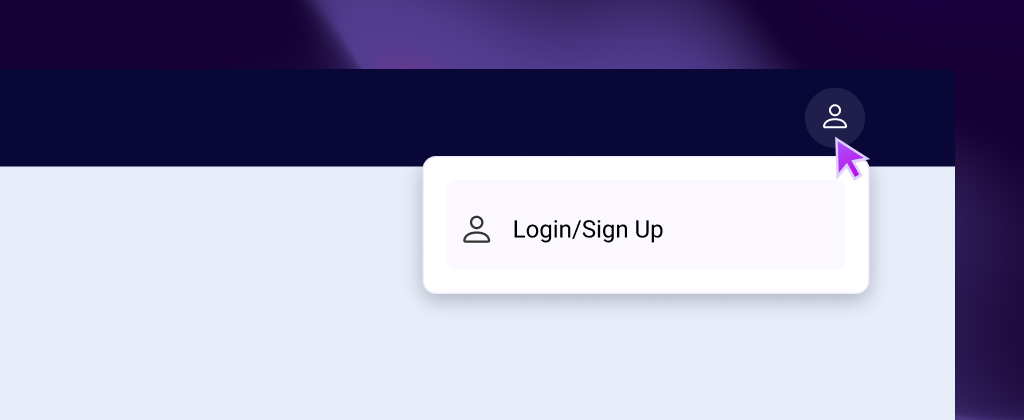
- Navigate to the Navbar: Locate and click on the avatar button in the top-right corner.
- Initiate Login/Signup: Click the 'Login / Signup' button. This action will redirect you to the Authentication Coreflux page.
-
Choose Your Login Method: You have three options to log in:
- Use your Google credentials.
- Use your GitHub credentials.
- Use an email address.
-
Creating a New Account: If you do not have an account, click on the Create One label. Follow the prompts to complete the registration process.
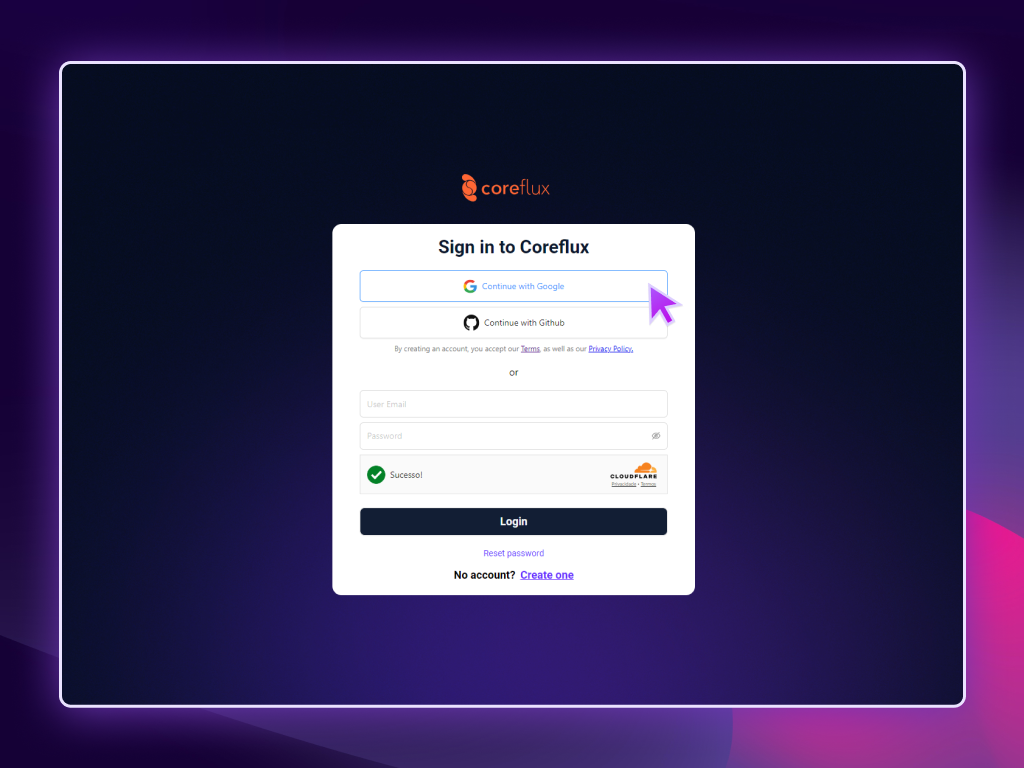
After successfully logging in, you will be automatically redirected back to the Hub
Connector List
Once you have successfully logged into your Coreflux Account, ensure you are connected to the appropriate Coreflux MQTT broker where you intend to install connectors. If you are not connected to the right broker, you will not be able to proceed with the installation.
-
Accessing the Connector List: Navigate to the "My Broker" page. Here, you can view the connector list by clicking the plus (+) button located beneath the log button.

-
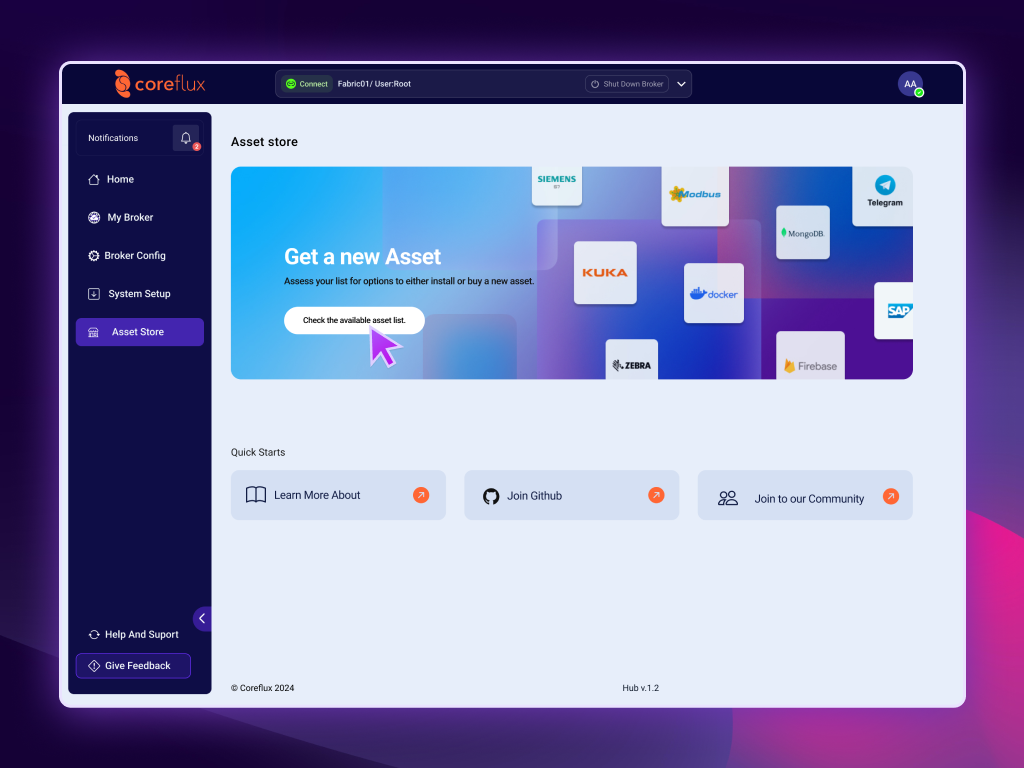
Alternatively, visit the 'Connector Store': Click on the Check the Available Connector List button to view and select from available connectors.
In both the "Broker's Connectors" page and the "Connector Store," you will find a list of available connectors for installation, along with information on upcoming connectors that will soon be available.
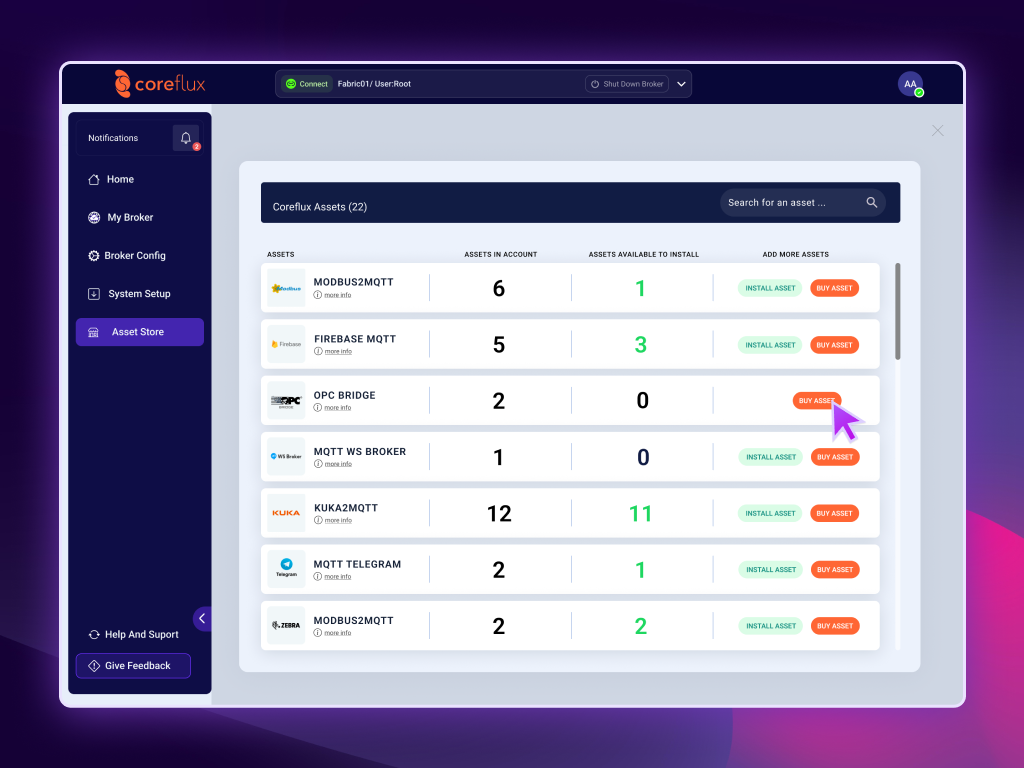
You will encounter four fields in the connector list:
- Connectors: Displays the name of each connector.
- Connectors in Account: Shows the connectors you currently own, indicating those you have purchased.
- Connectors Available to Install: Lists connectors that have not yet been installed in any broker and are ready for use when needed.
- Add More Connectors: This field allows you to install a connector you already own or purchase new ones. The install button will be disabled if no connectors are available for installation. Clicking the buy option will direct you to the Stripe payment page.
To install a connector, click on the Install Connector button. A popup will appear displaying the connector's name and a description of its features.
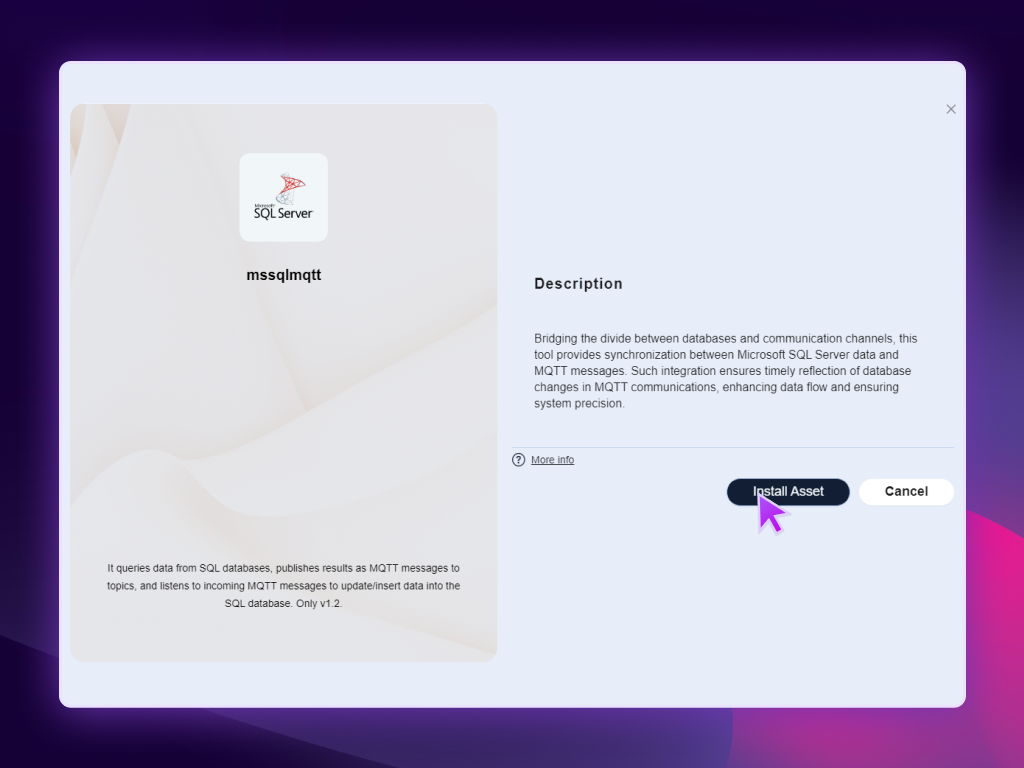
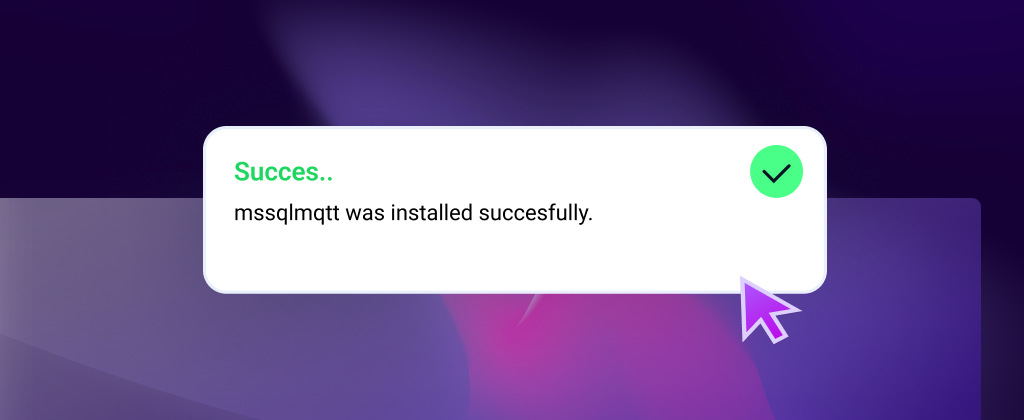
Click on the Install Connector button to begin the installation process. Once the installation is complete, a confirmation popup will appear to notify you of the successful setup.
When you are on the "Connector Store" page and initiate a connector installation, you will be automatically redirected to the "Broker's Connectors" page. If you open the list here, it will simply close itself. After installation, the new connector will be visible in this list.
Connector management
In connector management! You'll learn how to properly configure, run, stop, and uninstall connectors, as well as how to check their logs. Let's get started.
Configuration
To start, configuring your connector is recommended. Simply click on the three dots on the left side of the connector's box to open the configuration tab.

Initial Configuration
If you are accessing the configuration for the first time, a default configuration will automatically be created for the connector. This setup initializes the fields necessary to begin managing the connector effectively.
Dynamic Field Loading
The configuration fields are dynamically loaded based on the specific connector. If you require detailed information about these fields, it is recommended to consult the documentation for the connector you are configuring.
Navigating the Connector Management Interface
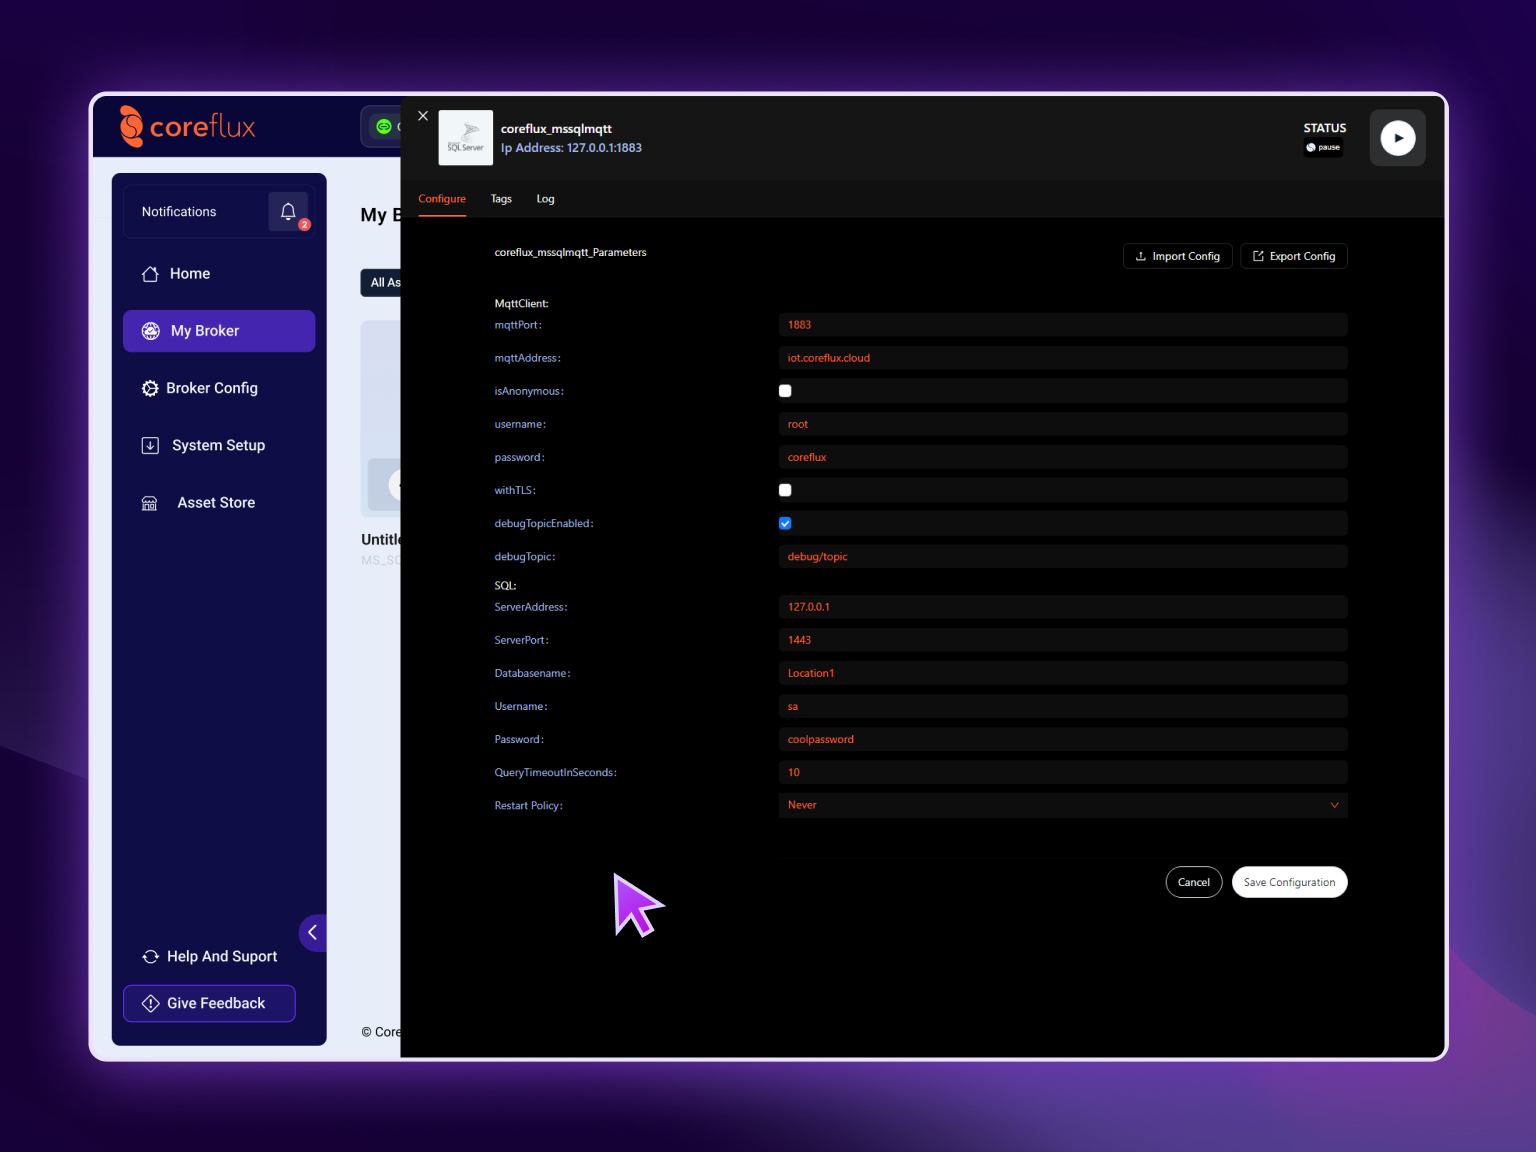
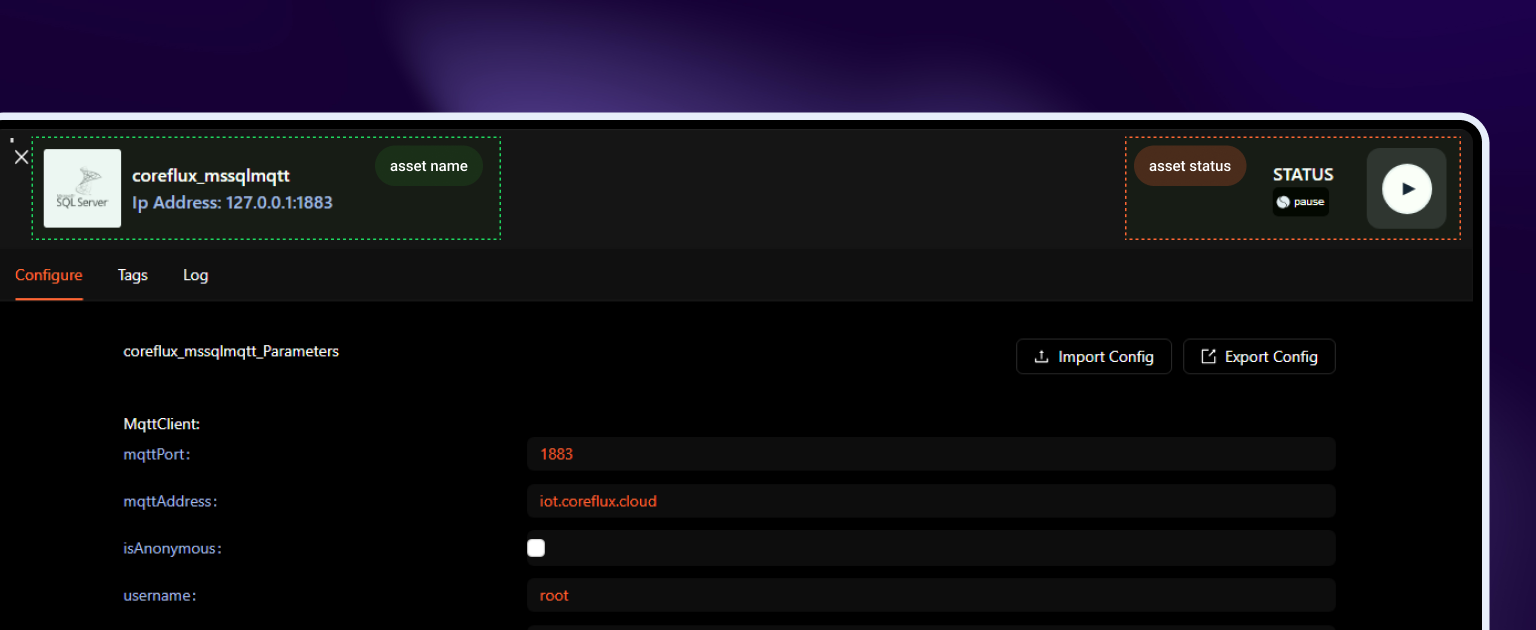
At the top of the page, you will see the name of the connector. If you have assigned a custom name, it will be displayed; otherwise, the default system name appears. Additionally, you will find the IP address of the Coreflux broker where the connector is installed. On the page, you'll find the current status of the connector (either Paused or Running) along with a button to start or resume the connector.
Below, you will find three tabs: Configure, Tags, and Logs:
- Configure: This is the default tab that opens when you access the configuration page. It provides all necessary information for setting up and managing the connector.
- Tags: Here, you can efficiently manage all the connector's tags. Options include adding new tags, deleting existing ones, duplicating tags, and modifying tag details.
- Logs: This tab displays all the logs related to the connector, allowing you to monitor its activity and troubleshoot issues based on log entries.
Import and Export Configuration
At the top of the section, you will find two essential buttons: Import Config and Export Config.
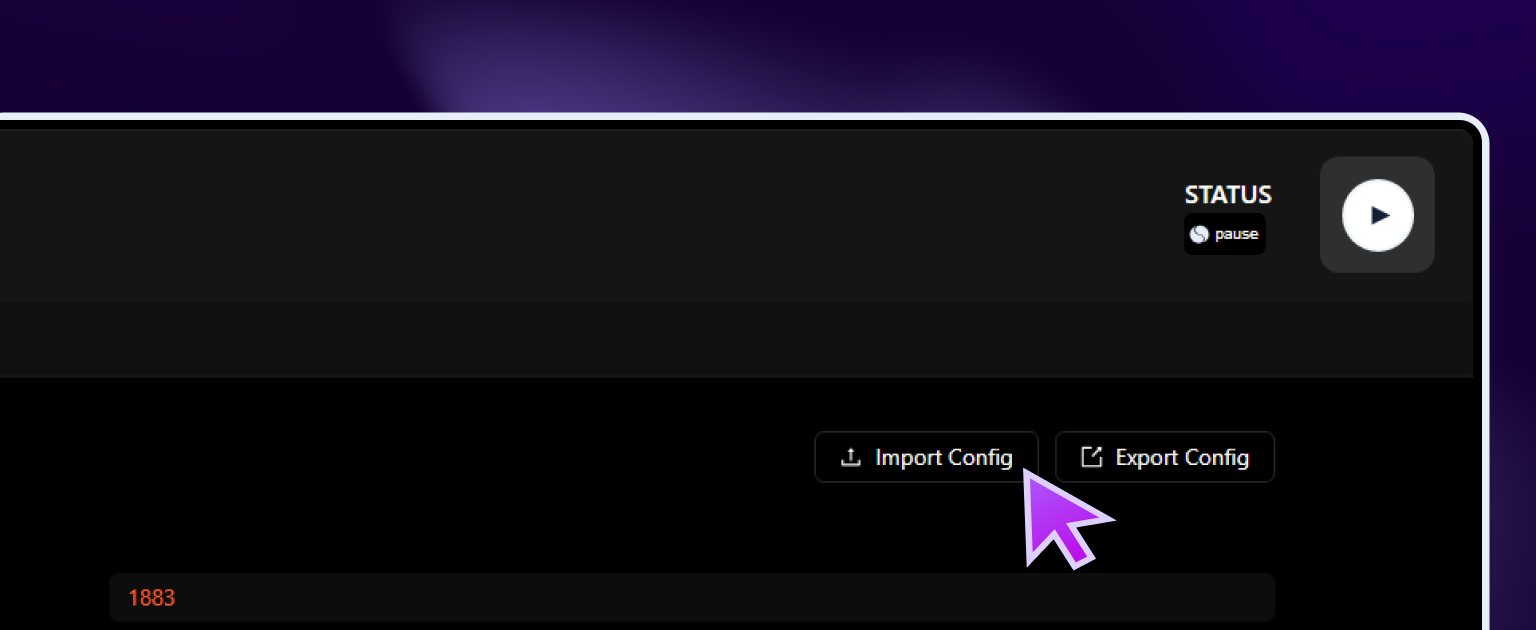
- Import Config: This option allows you to upload a custom configuration file in JSON format for the selected connector. To ensure the correct configuration is loaded, the filename should include the system name of the connector. For instance, to import a configuration for the MSSQLMQTT connector, the filename should be
coreflux_mssqlmqtt.json. Note that configurations uploaded this way are not automatically saved. - Export Config: This button enables you to download the current configuration of your connector in a JSON file format. It is important to remember that the export will reflect the last saved configuration in the broker. For example, if a field initially had the value A and you changed it to B but did not save this change, the exported file will still show the value A.
Tags management
To manage the connector's tags, navigate to the Tags tab.
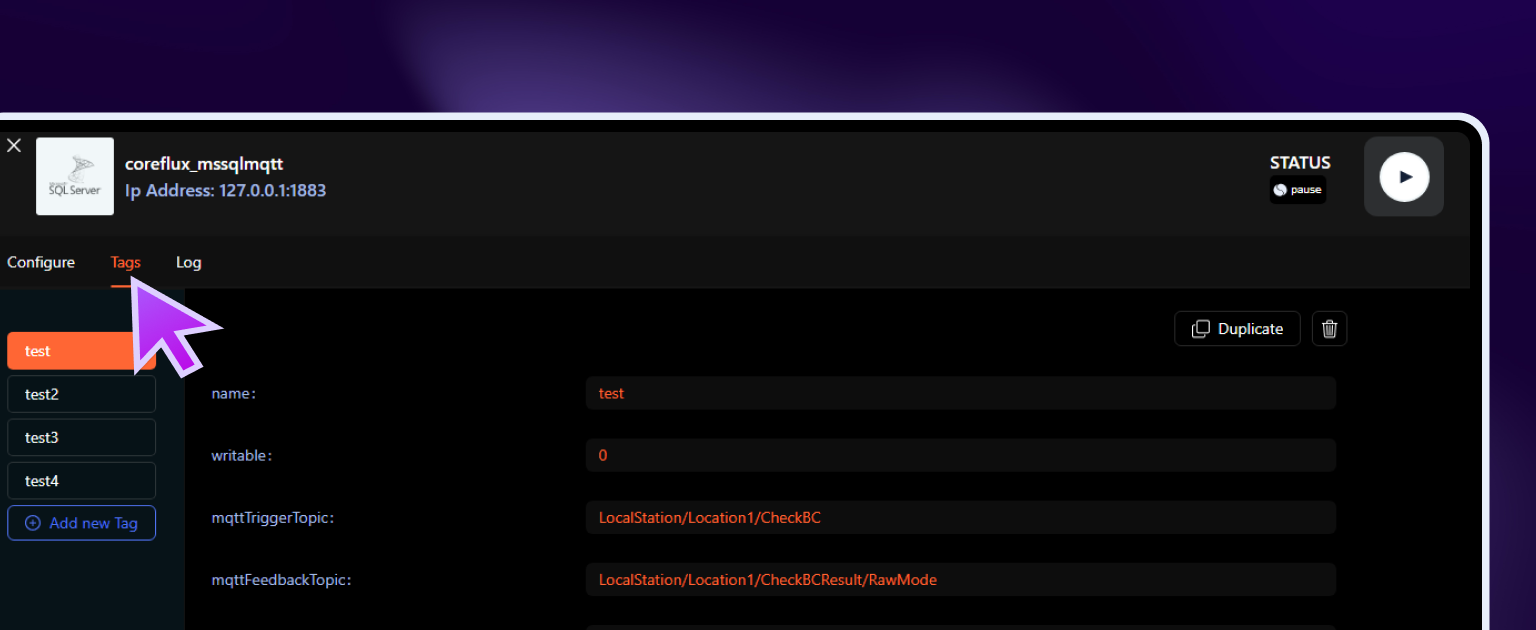
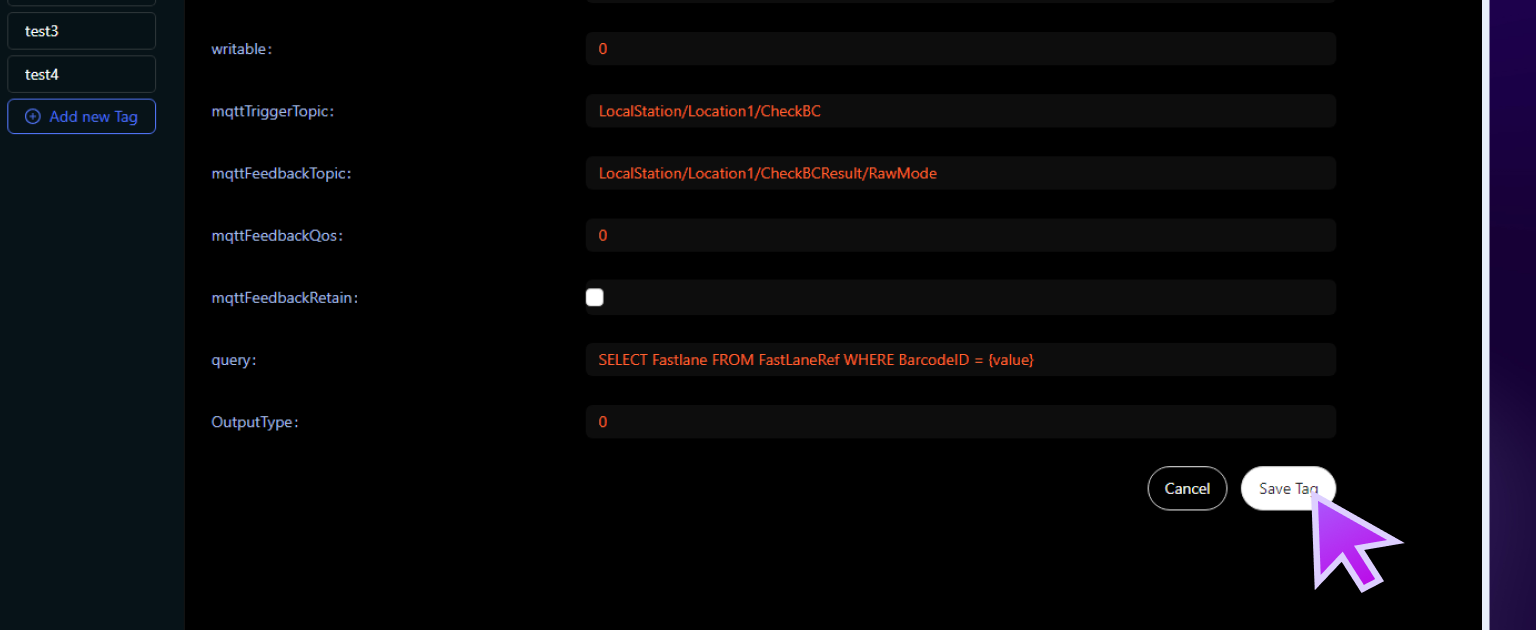
On this page, you'll find a list of all existing tags displayed on the left side. Each tag is accompanied by its respective fields and values. Below are the actions you can perform:
- Duplicate a Tag: To create a copy of a selected tag, click the Duplicate button. The duplicated tag will be named in the format
<namefield>-copy. - Delete a Tag: To remove a tag, click the trash can icon next to the tag you wish to delete.
- Add a New Tag: Click the Add New Tag button to create a new tag. The necessary fields will be populated based on the current configuration settings.
To confirm and save any changes made, click the Save Tag button.
Connector's Log Viewer
This section allows you to view all activity logs associated with the connector. You can also export these logs for analysis or record-keeping purposes in a JSON file format.
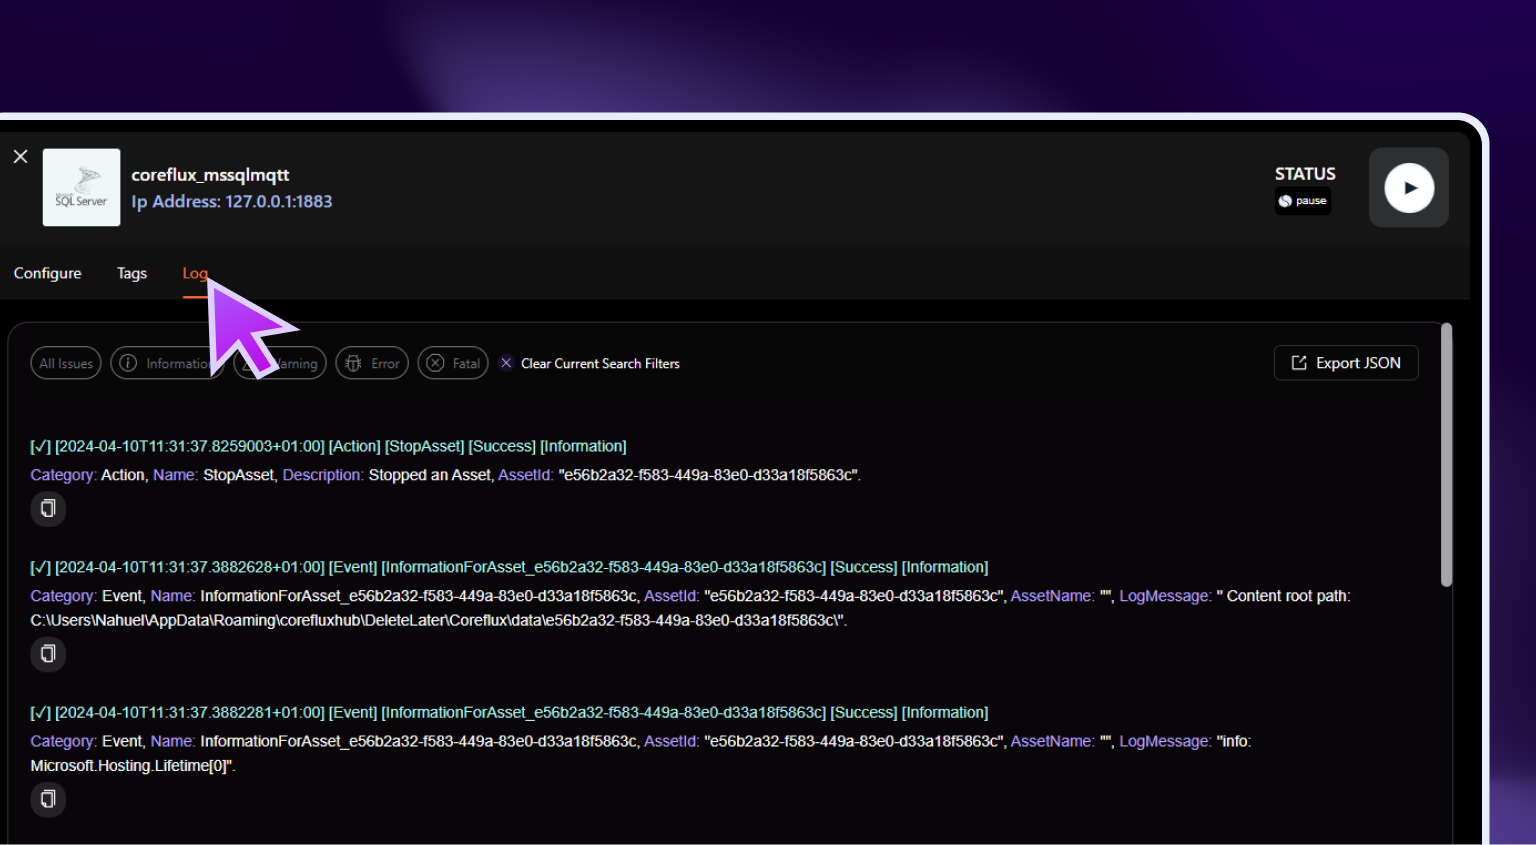
You can filter logs by type to quickly find specific issues or events:
- Information: Logs that provide general feedback or operational messages.
- Warning: Logs that indicate potential issues that may not immediately affect performance.
- Error: Logs that report significant issues which could affect functionality.
- Fatal: Logs that indicate severe problems causing the system to crash or function improperly.
Additionally, use the search bar to filter logs by entering a keyword or value. This will display only the logs containing that specific value in their messages.
To reset and view all logs, you can either click the All Issues button or the Clear Current Search Filters button.
Connector's General Usage
Once you have configured the connector, you are ready to begin using it.
Within the connector's interface, you will notice several elements:
- Status Indicator: Located in the right corner, showing whether the connector is active or inactive.
- Control Buttons: These include options to configure (
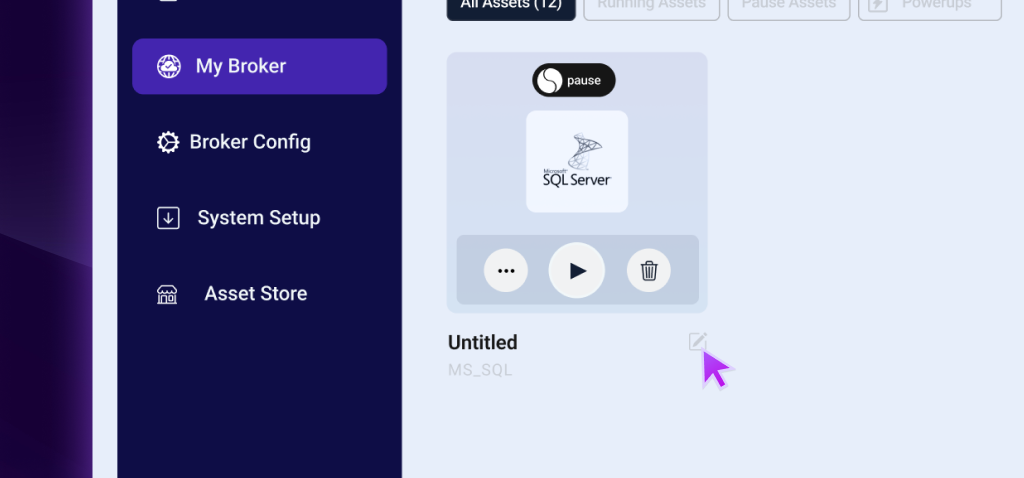
Config), activate (Play), and remove (Uninstall) the connector. - Naming Options: The connector's default system name is displayed along with a pencil icon. Click on this icon to assign a custom name to your connector.
To personalize the connector, simply click the pencil button and enter your preferred name.
Connector Status Overview
- Running: Indicates the connector is actively functioning.
- Paused: Shows that the connector's operations are temporarily halted.
- Warning: Suggests potential issues that may not immediately disrupt the connector's operations but should be monitored.
- Error: Signals a significant problem that has likely stopped the connector from functioning correctly.
In typical usage, you will most often see the connector in either the Paused or Running state.
Managing Connector Operations
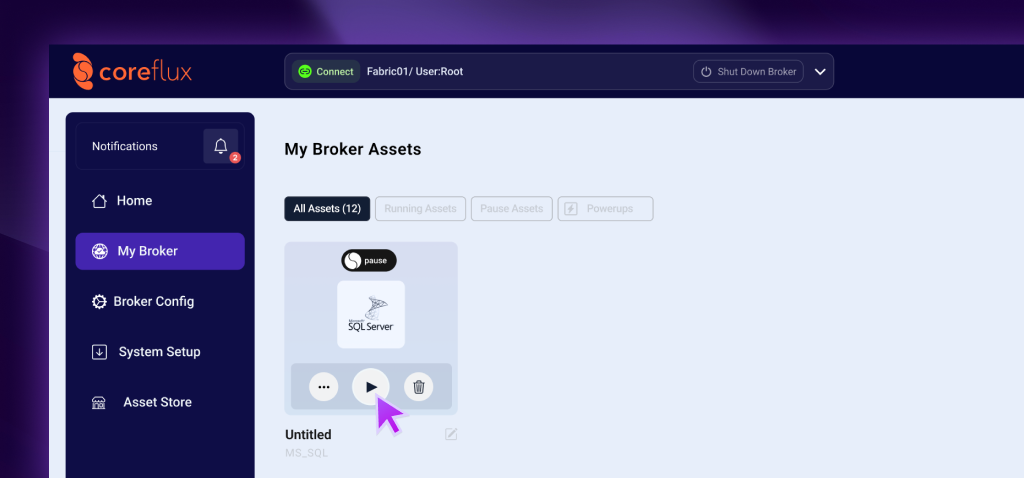
To Start the Connector:
- Click the Play button. If the connector starts successfully, the status will update to Running.
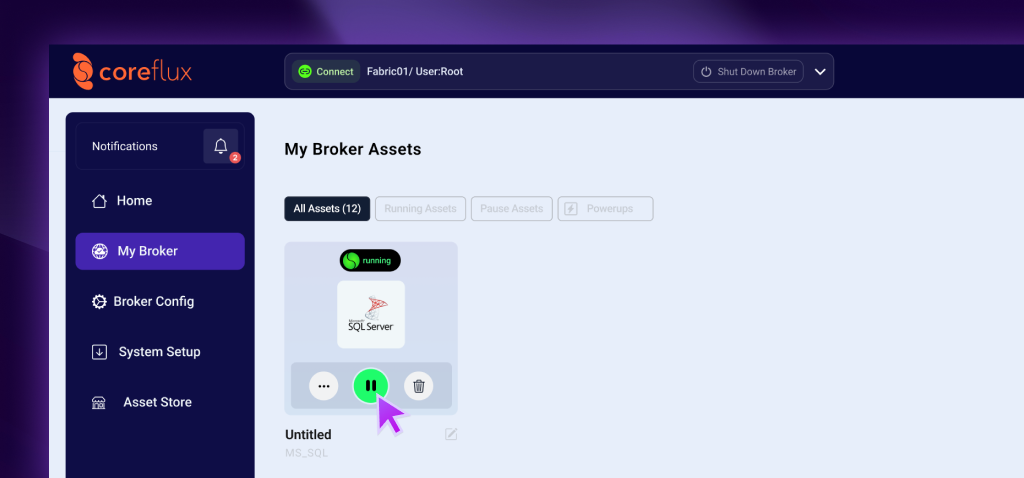
To Stop the Connector:
- Click on the green button to pause or stop the connector. This action will change its status to Paused
Uninstalling the Connector
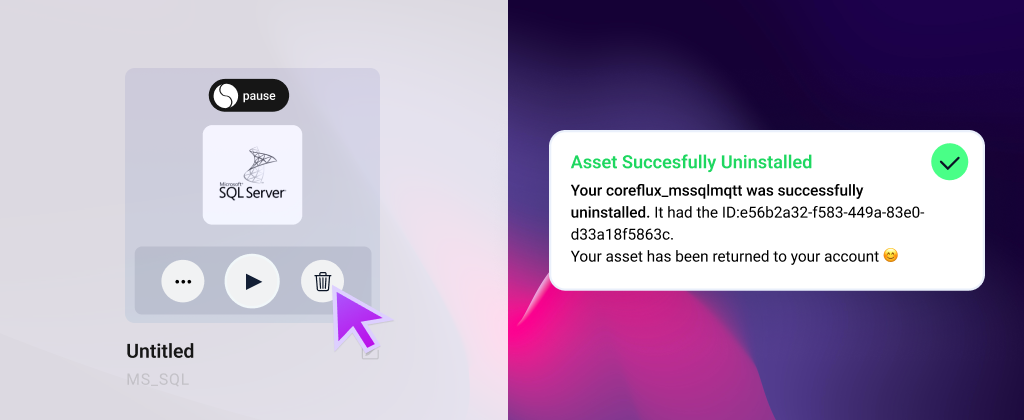
To uninstall the connector:
- Ensure you are logged into your Coreflux account. If you are not logged in, a pop-up error will appear.
- Click the Trash Can button to initiate the uninstallation process.
- Once the process completes, a confirmation pop-up will confirm that the connector has been successfully removed.
Coreflux MQTT Broker's log
Look for the Log Viewer icon located in the bottom right corner of the screen, just above the plus button. Click on this icon to view all logs associated with the Coreflux MQTT Broker.
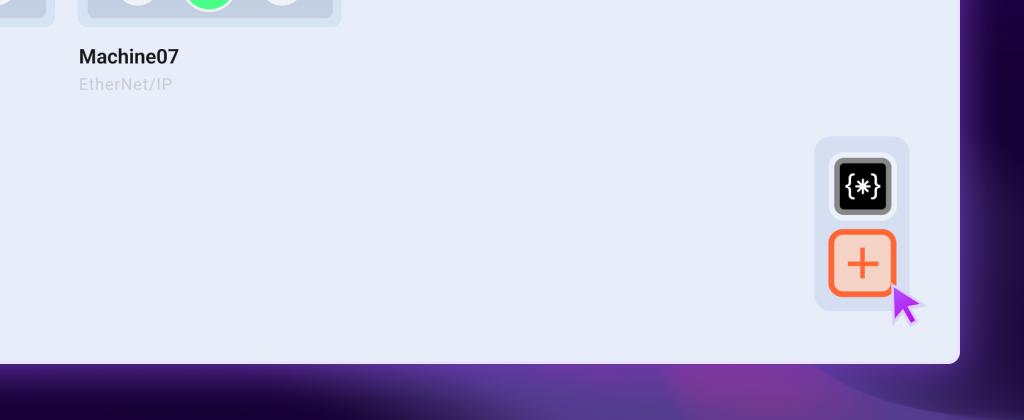
The Log Viewer for the Coreflux MQTT Broker offers the same functionalities as the connector's log viewer, such as exporting and filtering logs. The primary difference lies in the content of the logs, which specifically pertains to the operations and events of the Coreflux MQTT Broker.
You can see this video which explains this process: