

Documentation Index
Fetch the complete documentation index at: https://docs.coreflux.org/llms.txt
Use this file to discover all available pages before exploring further.
Why This Guide?
This is the fastest way to validate your Coreflux setup: in under 5 minutes you’ll have a live LoT (Language of Things) Action running inside your broker—proof that your installation works and logic executes at the edge. New to Coreflux? Start with the Overview.Prerequisites
Before you begin, ensure you have:- A running Coreflux Broker — See the Installation Guide if you haven’t set one up yet
- VS Code with the LoT Notebooks extension — See the VS Code Setup Guide for installation
- MQTT Explorer (Recommended) or any other MQTT client for verification
- Basic MQTT knowledge — Understanding of topics, publish/subscribe patterns
Ready? Here’s what you’ll build and deploy.
Your First LoT Action in 5 Minutes
Concept Refresher: You are about to write an action that lives and runs inside the broker, not on your laptop.Let’s create a simulated temperature sensor that publishes a temperature reading every 5 seconds. You’ll see data on a topic as soon as you deploy—no external input required. This keeps the whole guide in a single “temperature monitoring” flow.
Understanding the Action
LoT Actions have three parts:- Definition —
DEFINE ACTION <name> - Trigger — When to run (
ON EVERY <time>orON TOPIC "<topic>") - Logic — What to do (publish data, conditional logic, etc.)
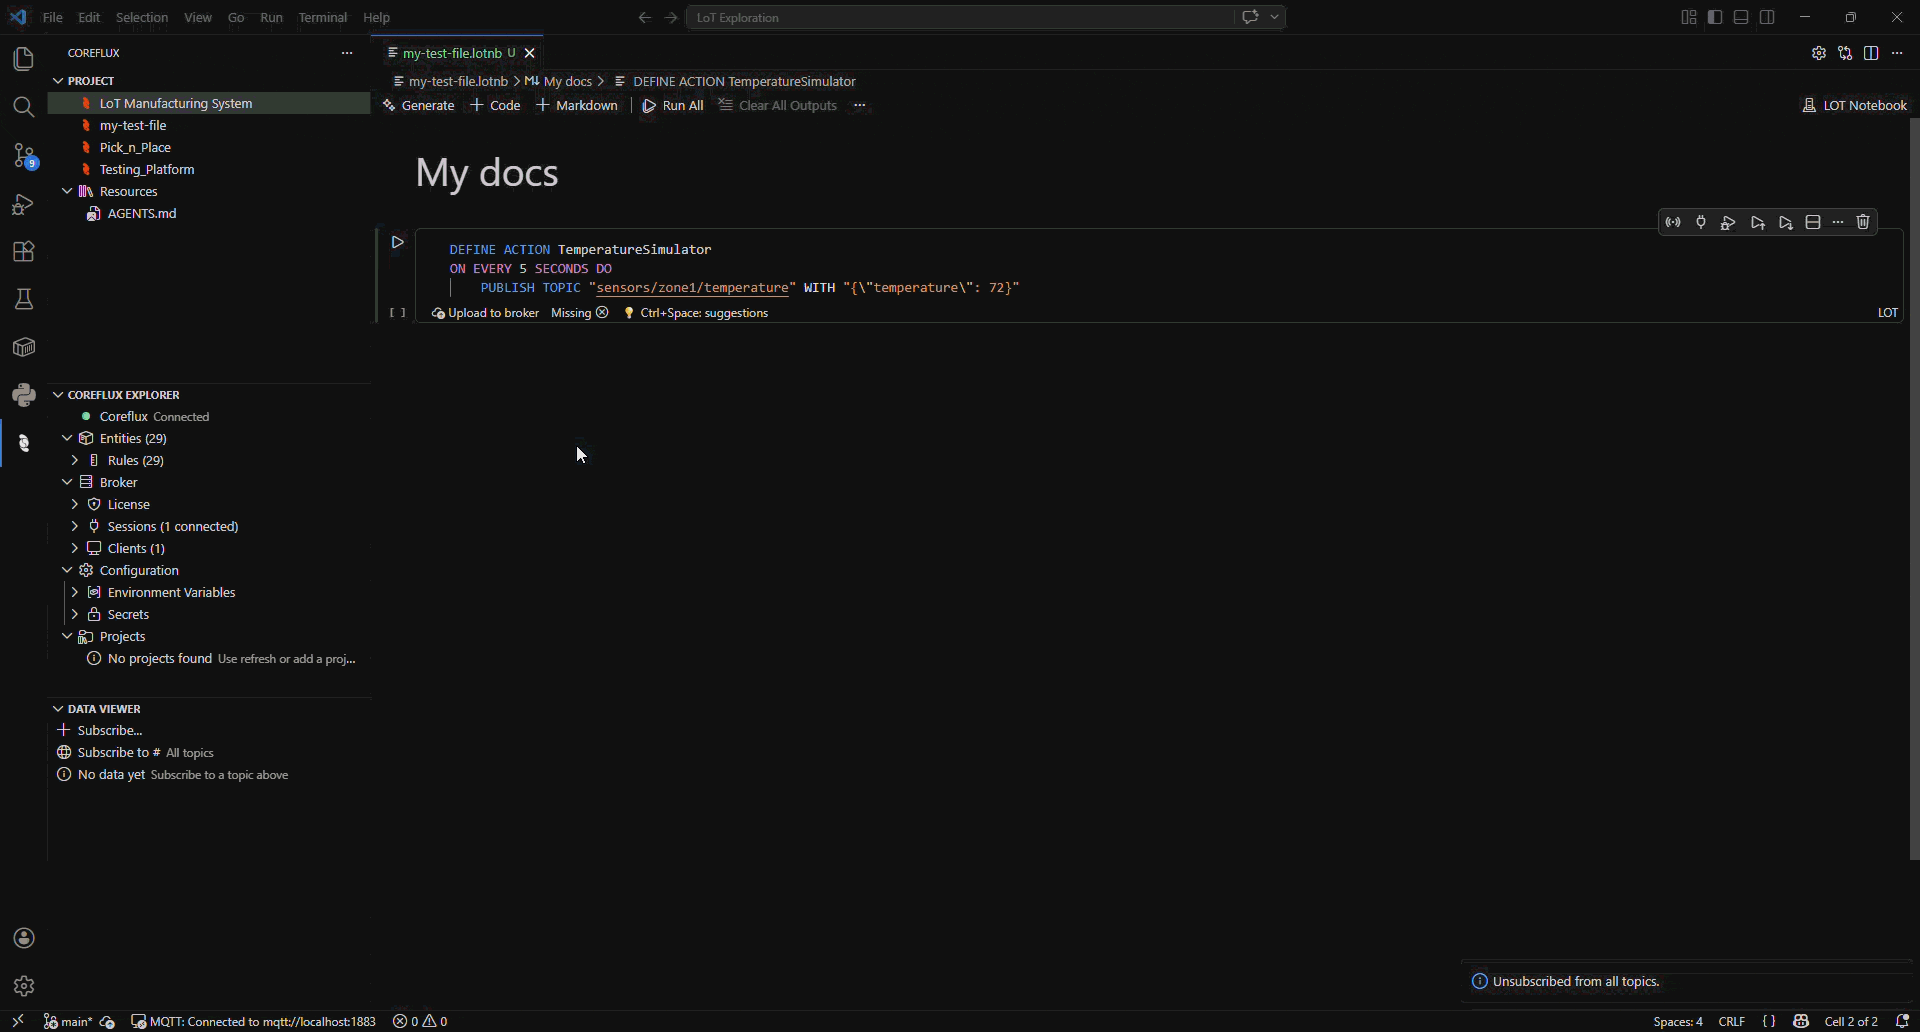
Temperature Simulator
| Line | What it does |
|---|---|
DEFINE ACTION TemperatureSimulator | Creates an action named “TemperatureSimulator” |
ON EVERY 5 SECONDS DO | Sets a time-based trigger (runs every 5 seconds) |
PUBLISH TOPIC ... WITH "{\"temperature\": 72}" | Publishes a JSON payload with temperature in Fahrenheit (72°F) |
Quotes inside strings must be escaped with backslashes (e.g.
"{\"temperature\": 72}").Deploy the Action
- VS Code Extension
- MQTT Client
- Coreflux HUB
Ensure you have the LoT Notebooks extension installed
Open the extension panel, search for ‘LoT Notebooks’, and install.
Create a new LoT Notebook file
Click on File > New File…, give it it to a descriptive name (e.g., temperature-monitor).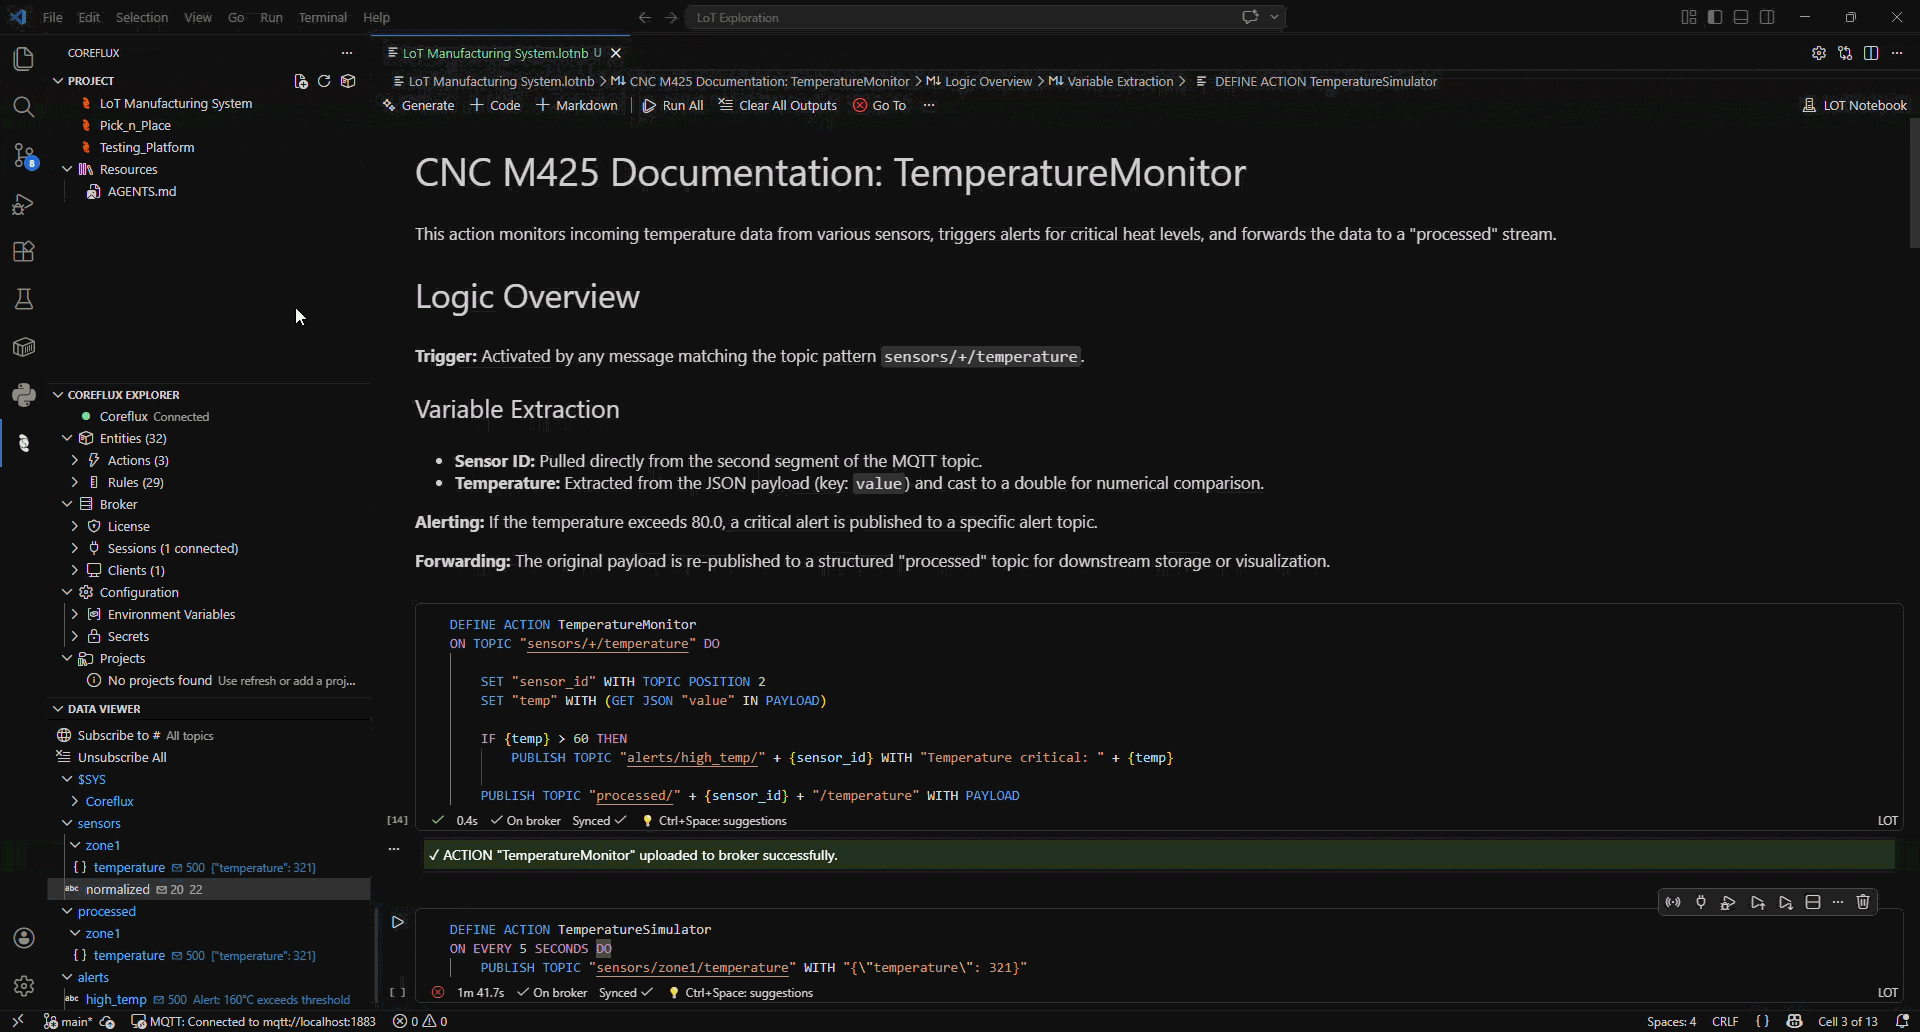
Connect to Your Broker
Enter your broker credentials (host, port, username, password) and click Connect.
Default Broker Credentials
Default Broker Credentials
If you haven’t changed your broker credentials, use these defaults:
| Setting | Value |
|---|---|
| Host | localhost or your server IP |
| Port | 1883 (unencrypted) / 8883 (TLS) |
| Username | root |
| Password | coreflux (change immediately!) |
Verify It’s Running
- VS Code Extension
- MQTT Client
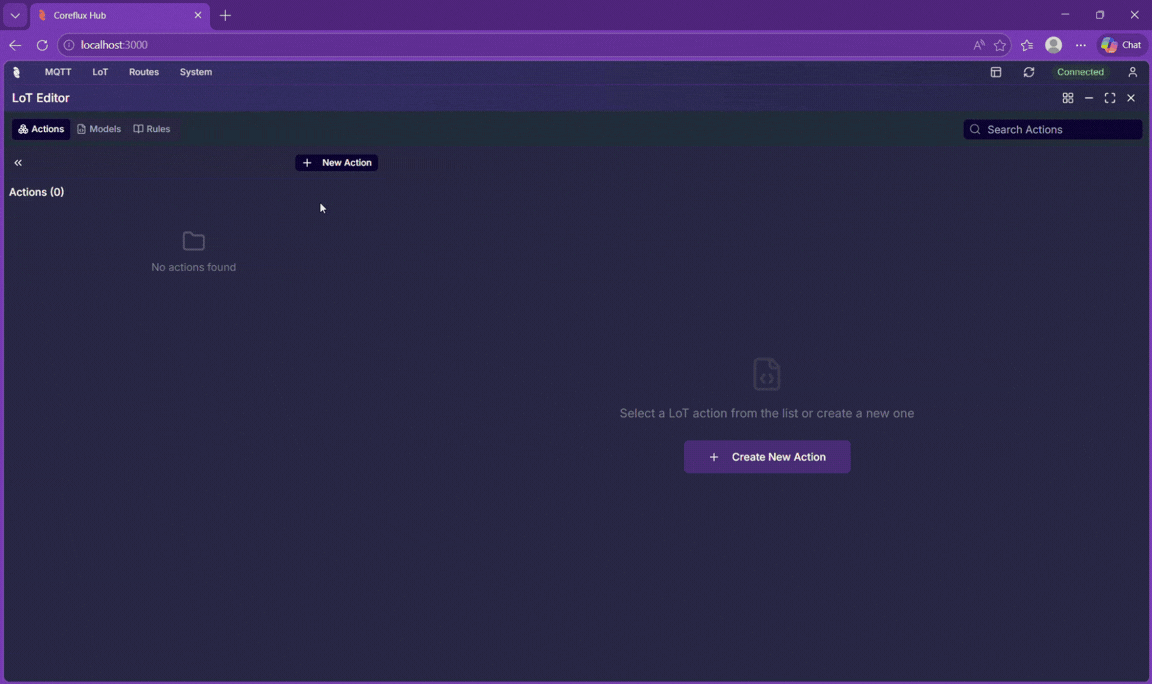
- Coreflux HUB
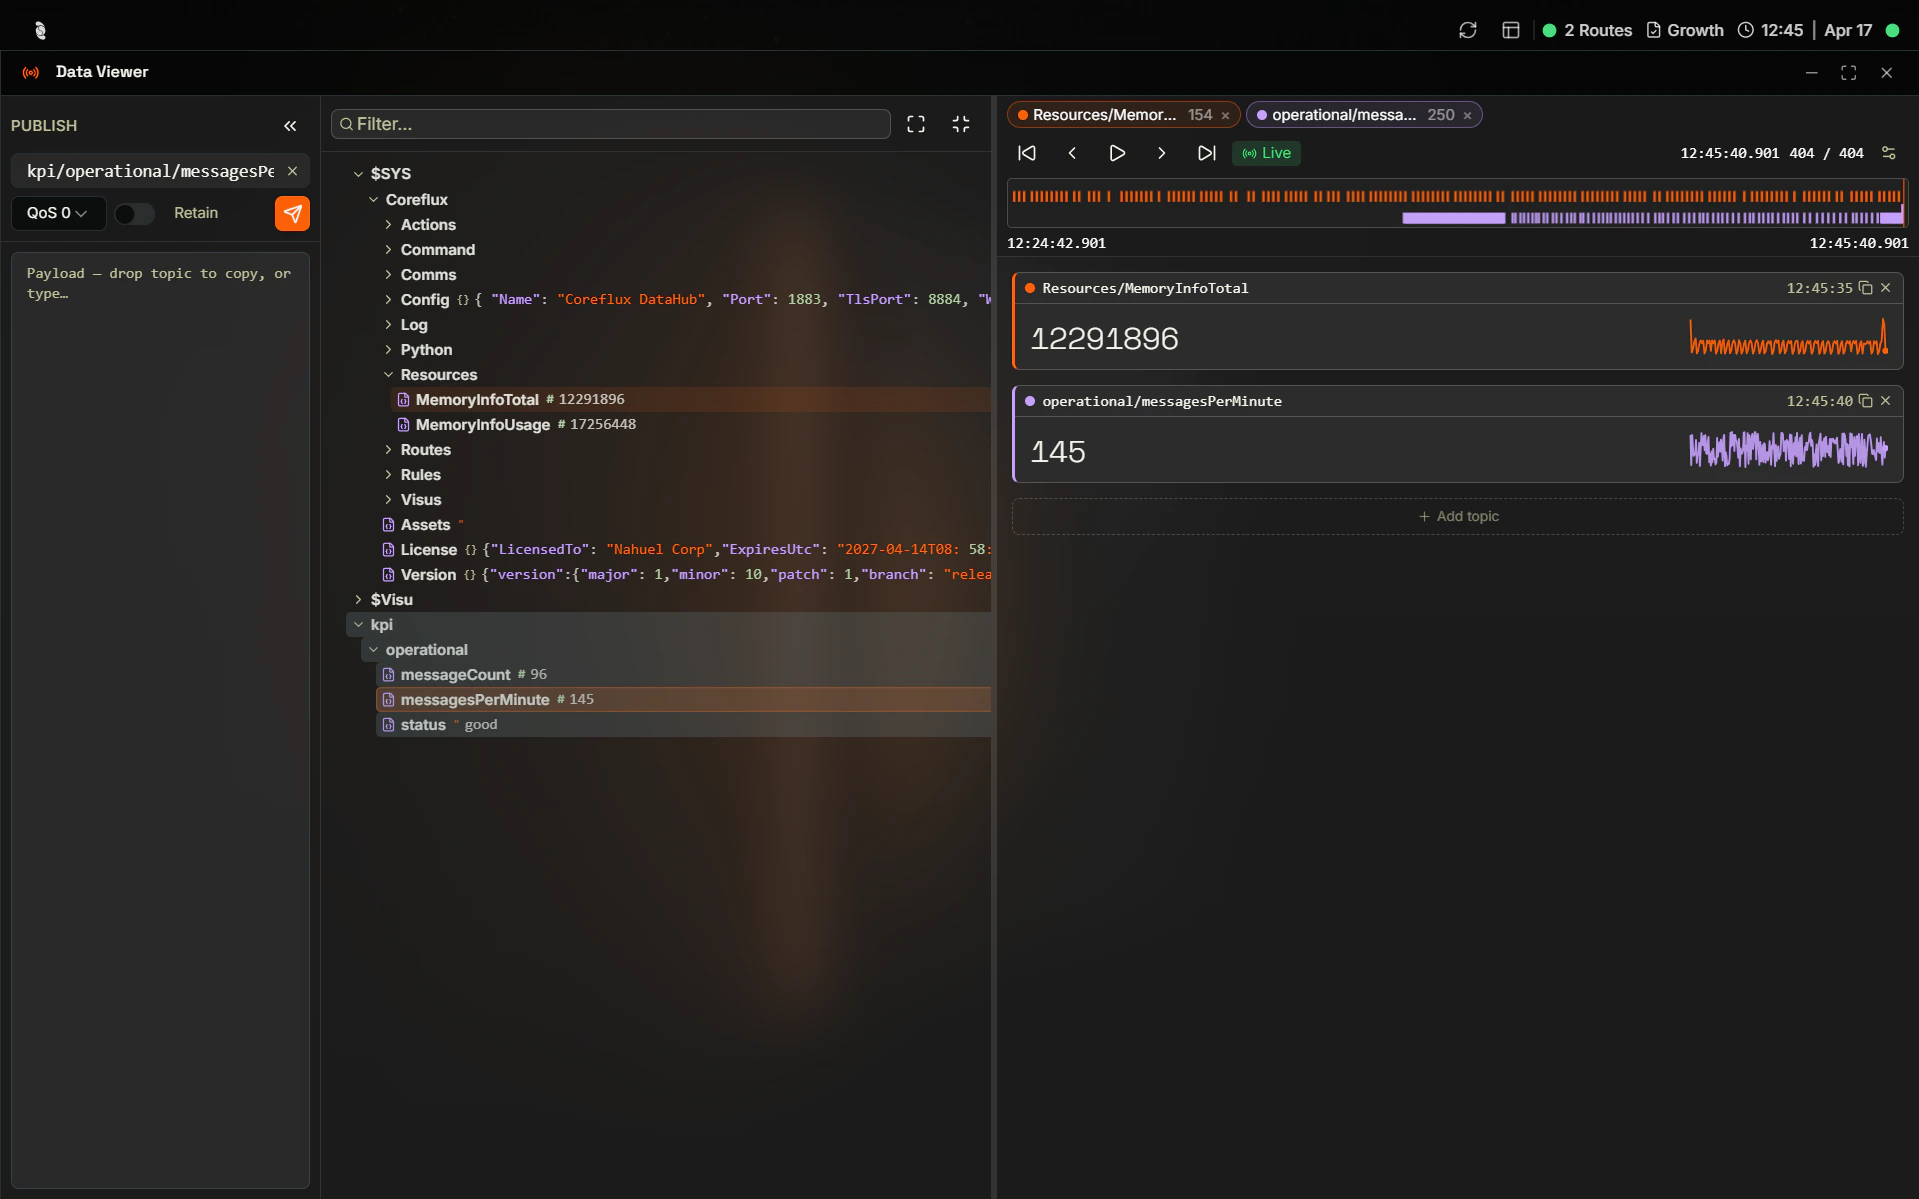
The LoT extension automatically shows debug values for MQTT topics, so you can verify in two ways: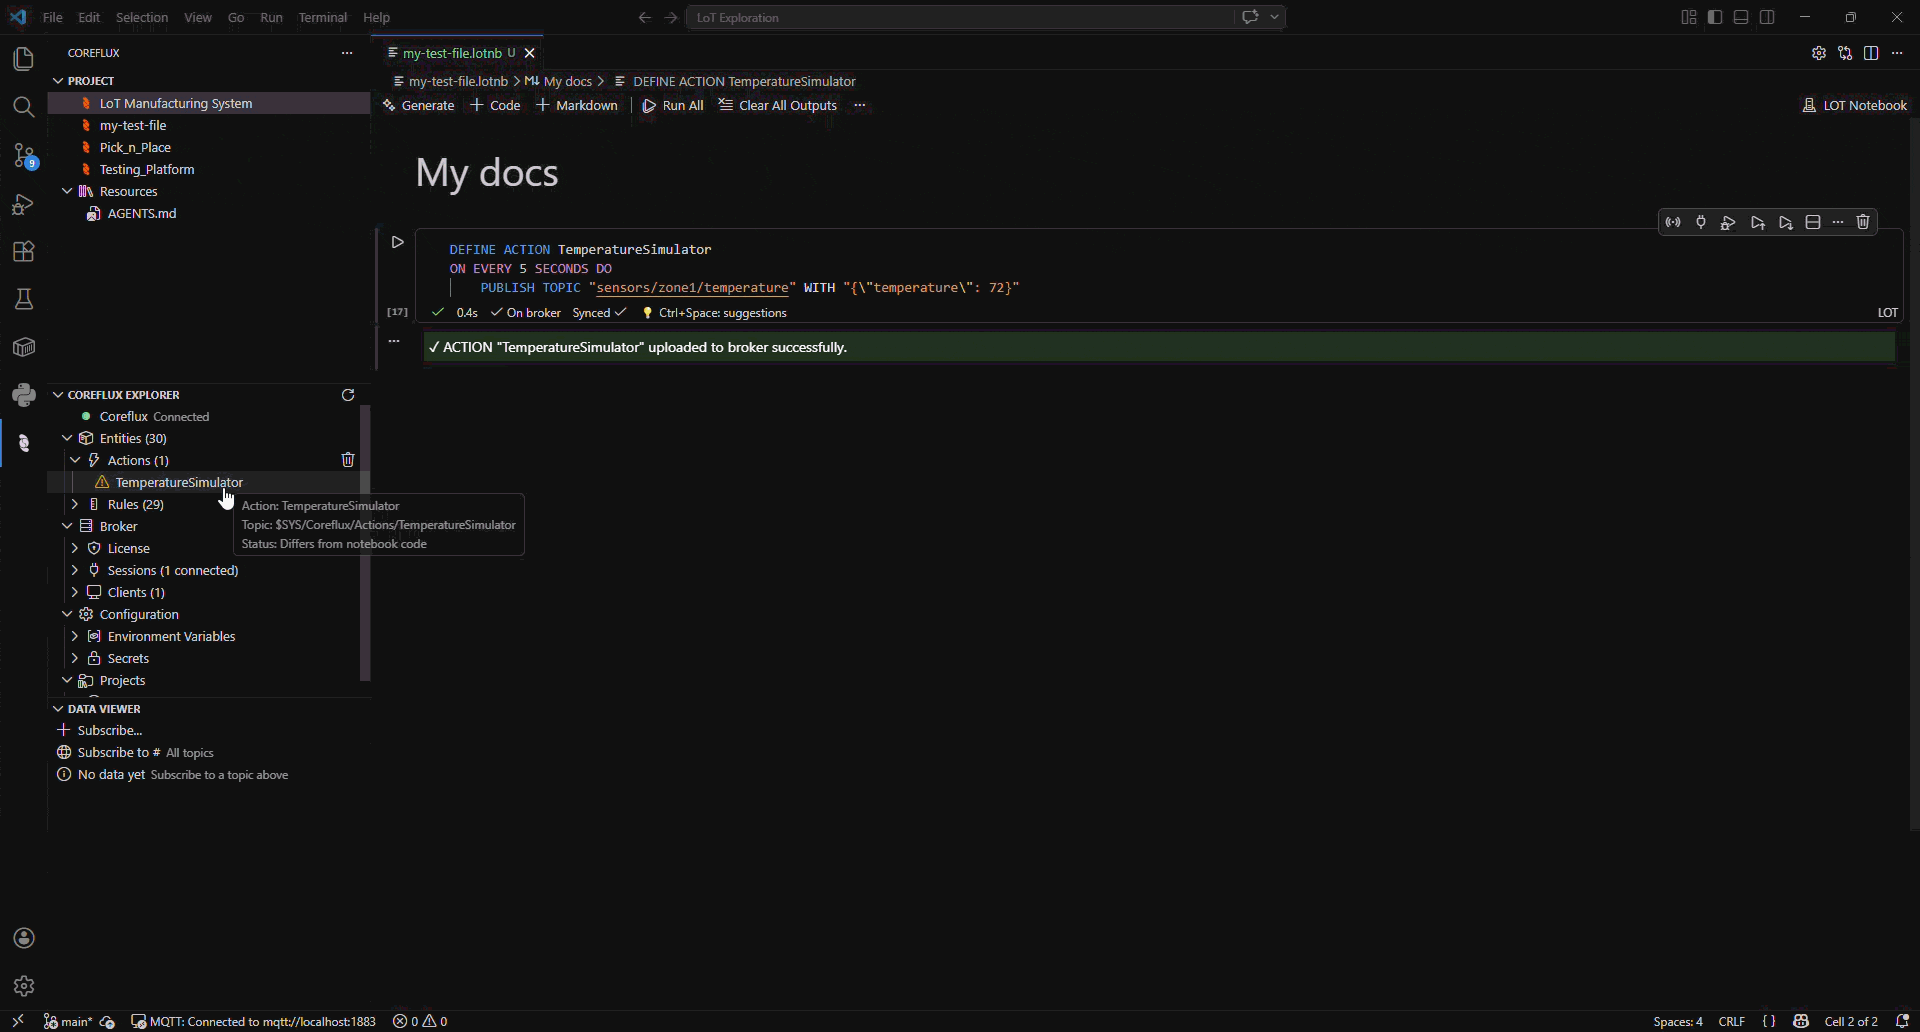
Check the Actions list
If the action appears in your Actions list under the Coreflux Entities tab, it should be running.
Troubleshooting
Action not executing?
Action not executing?
- Verify the broker is running and you’re connected
- Check
$SYS/Coreflux/Command/Outputfor error messages - Ensure proper indentation in your LoT action (use consistent tabs or spaces)
- Confirm the action appears in
$SYS/Coreflux/Actions
Can't connect to the broker?
Can't connect to the broker?
- Verify the broker hostname/IP and port are correct
- Check that port 1883 (or 8883 for TLS) is open
- Confirm your username and password are correct
- If using TLS, ensure certificates are properly configured
Messages not appearing on subscribed topics?
Messages not appearing on subscribed topics?
- Verify you’re subscribed to the exact topic (including case sensitivity)
- Check if any Rules are blocking access to the topic
- Use wildcards (
+or#) to debug topic hierarchies
Example Real Scenario: Temperature Alarm
Now let’s create a reactive action that transforms sensor data and checks thresholds. This demonstrates data transformation and conditional logic—common patterns in industrial monitoring.This action runs only when a message arrives on
sensors/+/temperature. After you deploy it, you will see no output until something publishes to that topic—for example, the Temperature Simulator from the previous section (if both are running), or a manual publish from MQTT Explorer or any MQTT client.- Trigger — The action fires whenever a message is published to any topic matching
sensors/+/temperature(e.g.sensors/zone1/temperature). - Extract — It reads the
temperaturevalue (in Fahrenheit) from the incoming JSON payload. - Convert — It transforms Fahrenheit to Celsius using the standard formula:
(F − 32) × 5 / 9. - Decide — If the Celsius value exceeds 35 °C, it publishes an alert to
alerts/high_temp. Otherwise, it publishes the normalized Celsius reading tosensors/normalized.
The
{} denotes variable substitution, and expressions must be wrapped in parentheses. The + in the topic pattern is a single-level MQTT wildcard — it matches any value in that position (e.g. sensors/zone1/temperature, sensors/zone2/temperature).Deploy and Test
Deploy this action using the same method as above (VS Code extension or MQTT client). Once deployed, use the steps below to verify reactive logic.How to Test the Logic
The action subscribes to any topic matchingsensors/+/temperature (e.g. sensors/zone1/temperature). It expects a JSON payload with a temperature key (Fahrenheit). It then converts to Celsius and either publishes an alert (if > 35°C) or the normalized value.
| Role | Topic | Description |
|---|---|---|
| Input | sensors/zone1/temperature | Publish test payloads here (must match sensors/+/temperature) |
| Output (normal) | sensors/normalized | Receives the Celsius value when temperature is at or below 35°C |
| Output (alert) | alerts/high_temp | Receives the alert message when temperature exceeds 35°C (e.g. 95°F) |
-
Below threshold — publish to
sensors/zone1/temperature:Expect: a message onsensors/normalizedwith the Celsius value (about 25). -
Above threshold — publish to
sensors/zone1/temperature:Expect: a message onalerts/high_tempwith text like “Alert: 35°C exceeds threshold”.
- VS Code Extension
- MQTT Client
Deploy the Temperature Alarm action
Paste the action code in a LoT cell and run it. Confirm success in the Actions list.
Observe output topics
After deploying, the extension automatically subscribes to the action’s output topics and displays their values. Look for messages on
sensors/normalized and alerts/high_temp once test data is published.Send test data
Open MQTT Explorer (or any MQTT client) and publish one of the sample JSON payloads above to
sensors/zone1/temperature. If the Temperature Simulator from the previous section is still running, it already publishes every 5 seconds and you will see results on sensors/normalized (72°F is below 35°C). Check the topic tree displayed below the code cell to see incoming values update in real time.Clean Up (Optional)
To remove the test action:- VS Code Extension
- MQTT Client
On the Coreflux Entities tab, right-click the desired action in your Actions list and select “Remove”.
Quick Examples
Looking for inspiration? Check out the Language of Things Training Repository for common patterns like:- Topic-Based Triggers: Echo messages between topics
- State Machines: Toggle switches and conditional logic
- Event Counters: Track and aggregate system events
Language of Things Training
Explore a collection of ready-to-use LoT Action examples and templates.
Next Steps
Now that you have a working setup, explore the core LoT components:Actions
React to events and publish data. Create time-based automations or respond to topic changes.
Introduction to LoT
Understand the core concepts and architecture of the Language of Things.