Getting Started with LOT Notebooks
LOT Notebooks provide an interactive development environment for creating and testing LOT (Language of Things) definitions while documenting your work in a single file. This guide will help you get started with creating your first LOT Notebook.
Prerequisites
Before starting, ensure you have:
- Visual Studio Code installed (download here)
- The LOT Notebooks extension installed from the VS Code Marketplace
- Access to a Coreflux MQTT Broker
Creating Your First Notebook
1. Install the Extension
If you haven't already installed the required extension:
- Open VS Code
- Open the Extensions view (Ctrl+Shift+X or Cmd+Shift+X)
- Search for and install:
- "LOT Notebooks" by Coreflux
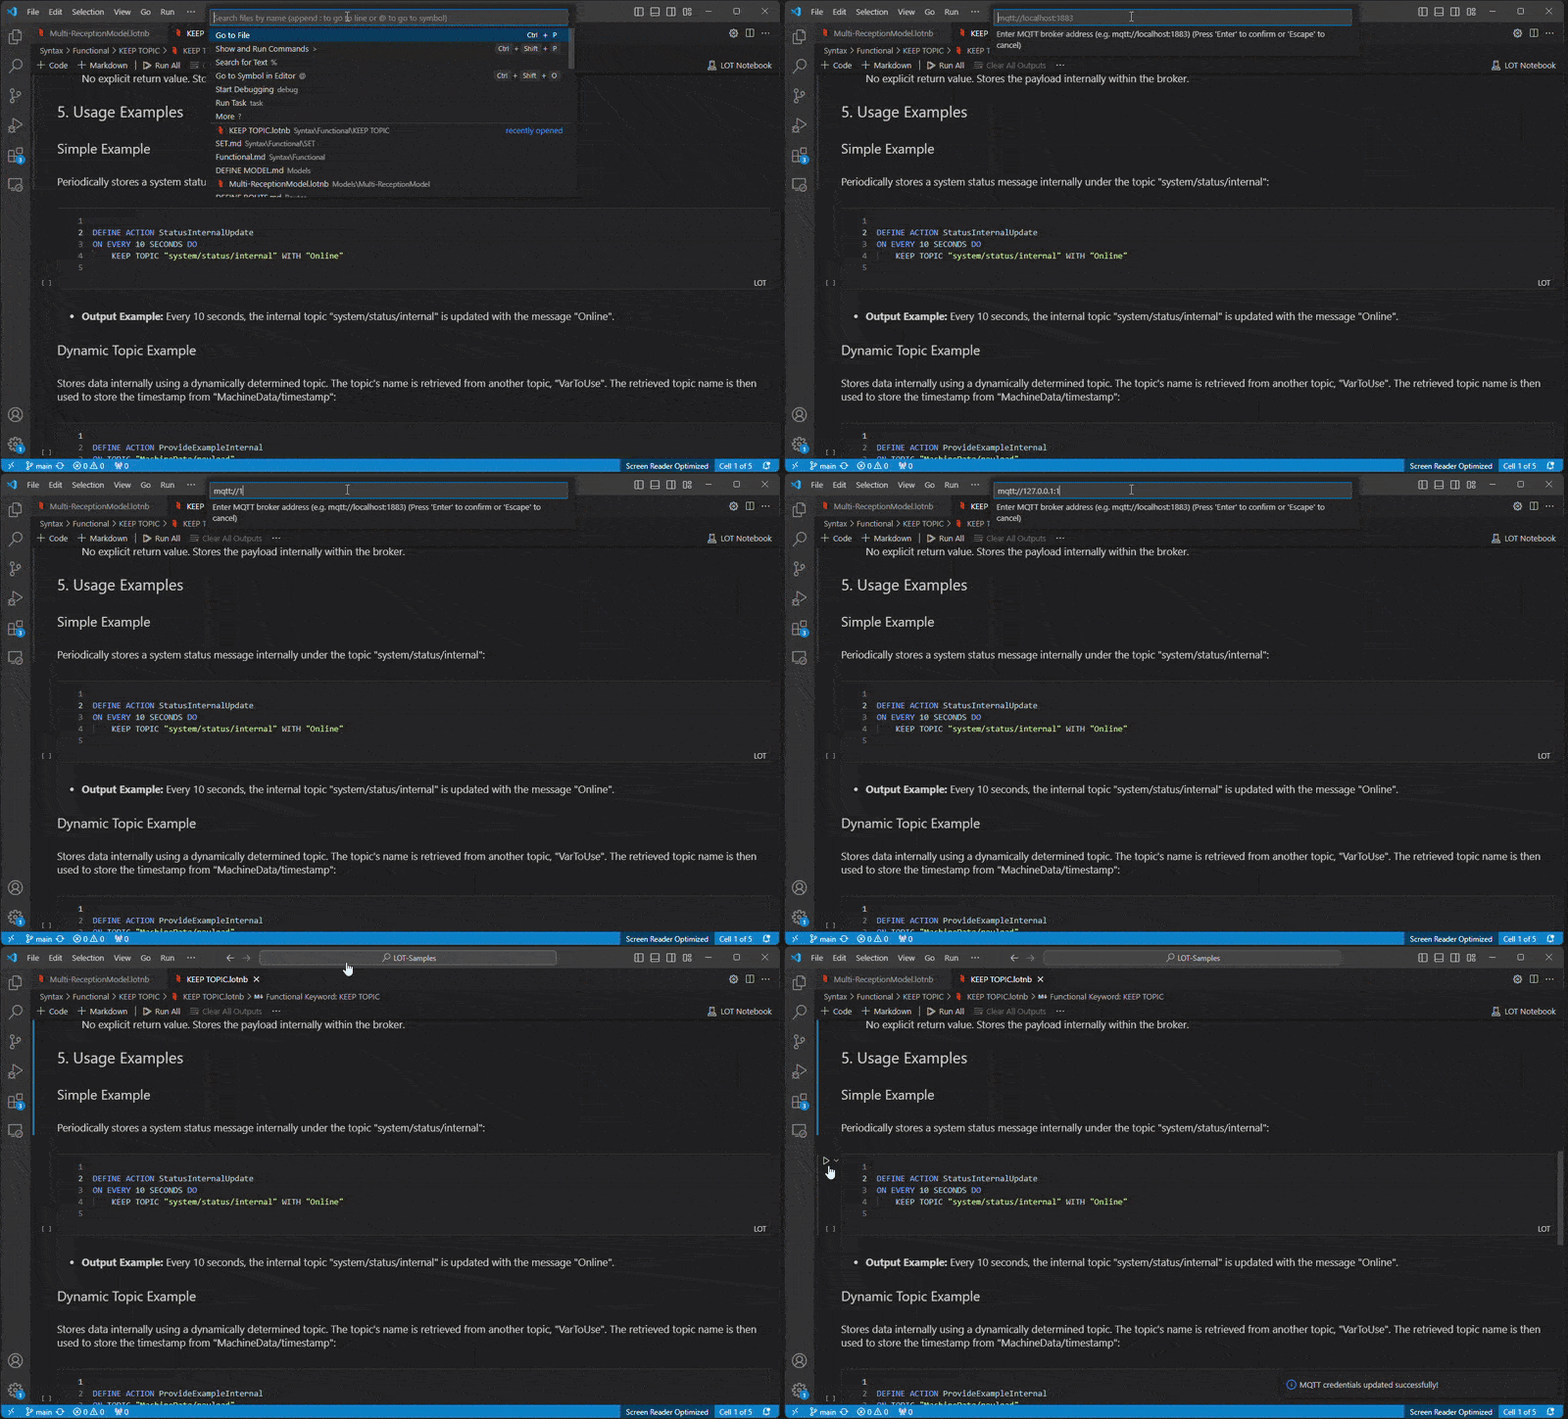
2. Set Up MQTT Credentials
Before creating your first notebook, configure your connection to the Coreflux MQTT broker:
- Open the Command Palette (Ctrl+Shift+P or Cmd+Shift+P)
- Type "LOT Notebook: Change Credentials" and select it
- Enter your broker details:
- URL (e.g., mqtt://localhost:1883)
- Username (default is "root")
- Password

The extension will test the connection and notify you if it's successful. Once connected, you'll be able to deploy LOT code directly from your notebook to this broker.
3. Create a New Notebook
- Open the Command Palette (Ctrl+Shift+P or Cmd+Shift+P)
- Type "LOT Notebook: Create New Notebook" and select it
- A new untitled
.lotnbfile will open - Save the file with a descriptive name (e.g.,
temperature-monitor.lotnb)
Working with Notebook Cells
LOT Notebooks consist of two types of cells:
Markdown Cells
Markdown cells allow you to document your system with text, lists, tables, and even diagrams.
- Add a Markdown cell by clicking the "+ Markdown" button in the notebook toolbar
- Write documentation in the cell using Markdown syntax
- Execute the cell to render the Markdown
Example:
# Temperature Monitoring System

This notebook implements a temperature monitoring system that:
- Receives raw temperature readings from sensors
- Converts between temperature units
- Calculates moving averages
- Triggers alerts when temperatures exceed thresholds
Code Cells
Code cells contain executable LOT code that can be sent to your MQTT broker.
- Add a code cell by clicking the "+ Code" button in the notebook toolbar
- Write LOT code in the cell
- Execute the cell to send the code to your MQTT broker
Example:
DEFINE MODEL SimpleTemperature WITH TOPIC "device/temperature/processed"
  ADD "celsius" WITH TOPIC "device/temperature/raw" AS TRIGGER
  ADD "fahrenheit" WITH (celsius * 9/5 + 32)
Creating a Complete Example
Let's build a simple temperature monitoring system step by step:
Step 1: Document Your System
Add a markdown cell explaining the purpose of your system:
# Temperature Monitoring System

This notebook implements a temperature monitoring system that:
- Receives raw temperature readings from sensors
- Converts between temperature units
- Calculates moving averages
- Triggers alerts when temperatures exceed thresholds
Step 2: Define a Temperature Model
Add a code cell that defines a model for processing temperature data:
DEFINE MODEL TemperatureProcessor WITH TOPIC "temperature/processed"
  ADD "celsius" WITH TOPIC "sensors/temperature/raw" AS TRIGGER
  ADD "fahrenheit" WITH (celsius * (9/5) ) + 32
  ADD "kelvin" WITH (celsius + 273.15)
Execute this cell to deploy the model to your broker.
Step 3: Add an Action for High Temperature Alerts
Add a code cell that defines an action to handle high temperatures:
DEFINE ACTION LowTemperatureAlert
ON TOPIC "temperature/processed/celsius"
  IF (PAYLOAD < 10)
    PUBLISH TOPIC "alerts/temperature/low" WITH "Temperature is too low!"
Execute this cell to deploy the action to your broker.
Step 4: Document Testing Procedures
Add another markdown cell explaining how to test the system:
## Testing the System

To test this system:

1. Publish a temperature reading to the trigger topic:
   ```
   Topic: sensors/temperature/raw
   Payload: 32
   ```

2. Observe the processed output:
   - temperature/processed/celsius → 32
   - temperature/processed/fahrenheit → 89.6
   - temperature/processed/kelvin → 305.15

3. Check if the alert was triggered:
   - alerts/temperature/high should have a message
Testing Your Notebook
Once you've created your notebook:
- Open an MQTT client like MQTT Explorer
- Publish test messages to the trigger topics
- Observe the results on output topics
Final Result

You can download the complete Temperature Monitoring Notebook to use as a starting point for your own projects.
LOT Notebooks (.lotnb files) can be:
- Saved to your local file system
- Committed to version control systems like Git
- Shared with colleagues
- Reused as templates for similar projects
Next Steps
Now that you've created your first LOT Notebook, explore more advanced features:
- Sample Notebooks - Explore example notebooks for common use cases
- LOT Syntax Reference - Learn the complete syntax for the Language of Things
- Defining LOT Constructs - Understand how to define models, actions, rules, and routes
- Functional Keywords - Explore the functional programming aspects of LOT
- Operators & Expressions - Master the expressions and operations in LOT